

Settings
Profile
The profile page handles username, password, MFA and API key management.
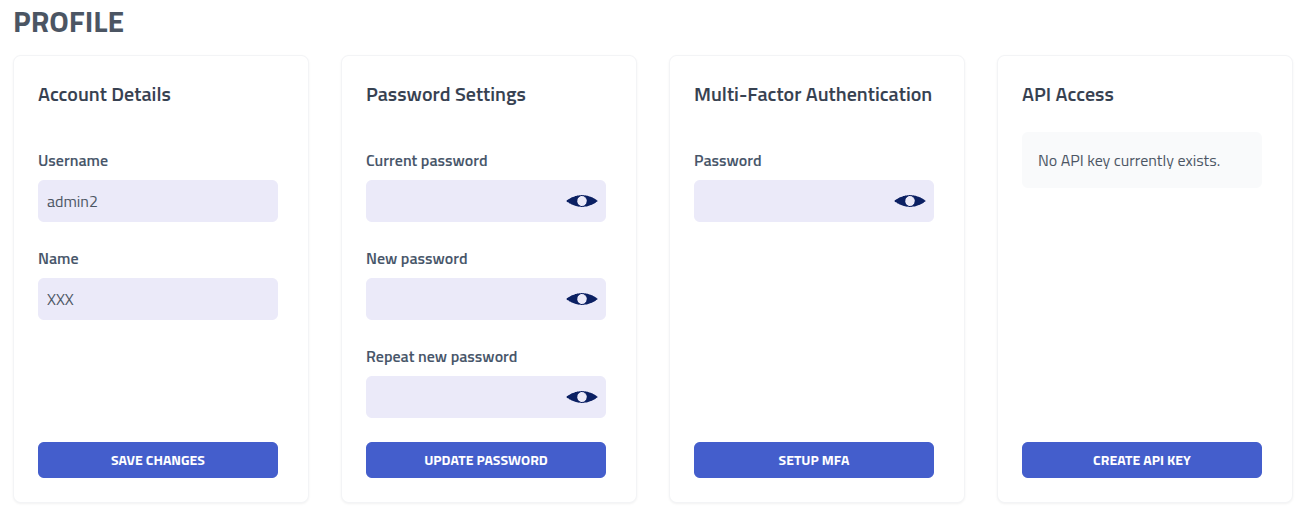
| Section | Description |
|---|---|
| Account Details | Modify username and display name |
| Password Security | Update account password - this invalidates active sessions |
| Multi-Factor Authentication | Enable TOTP authenticators. Recommended for all accounts |
| API Access Management | Configure API tokens for programmatic access |
Multi-Factor Authentication
Setup multi-factor for the account by clicking Setup MFA
Multi factor authentication applies to password login. An account that signs in only through SSO has no password, and any multi factor requirement is enforced by the identity provider.
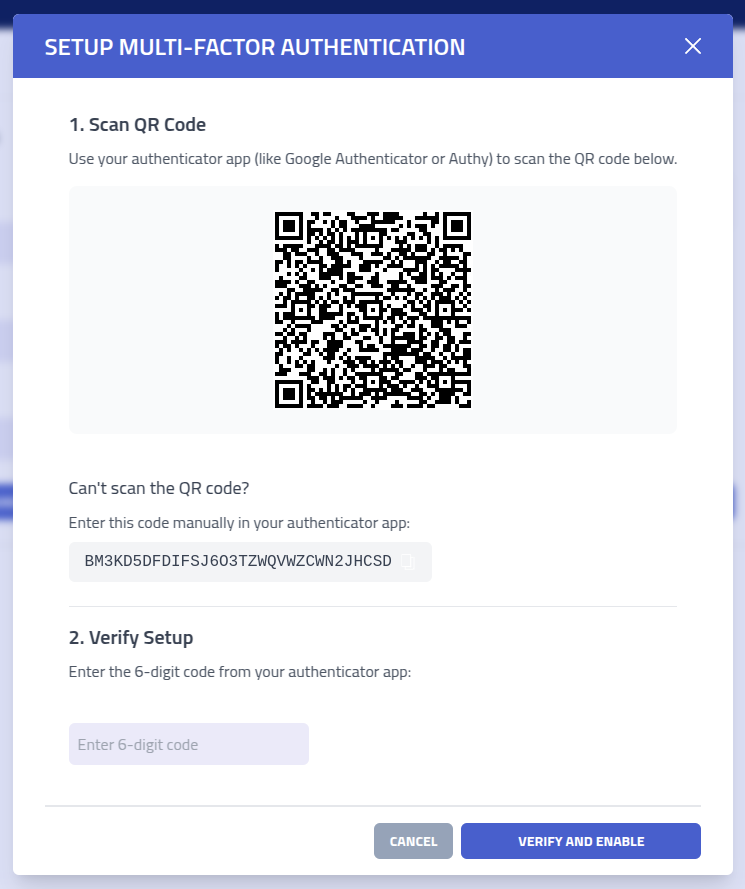
Complete the setup by scanning the QR code with your authenticator app (such as Google Authenticator, Authy, or Microsoft Authenticator) and then enter the generated verification code.
Important: After setup, you will receive backup recovery codes. Store these codes securely as they provide account access if your authenticator device becomes unavailable.
Should administrative access be lost, it can be recovered in the CLI by running -recover
API Key
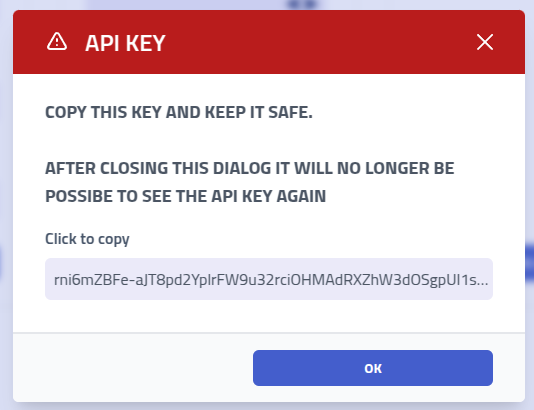
Accessing the API using the key can be done by adding a X-API header with the API
key as the value.
Note: The API is undocumented at the moment.
Sessions
Session management shows all active login sessions for your account. Each login creates a unique session that maintains your authentication state.
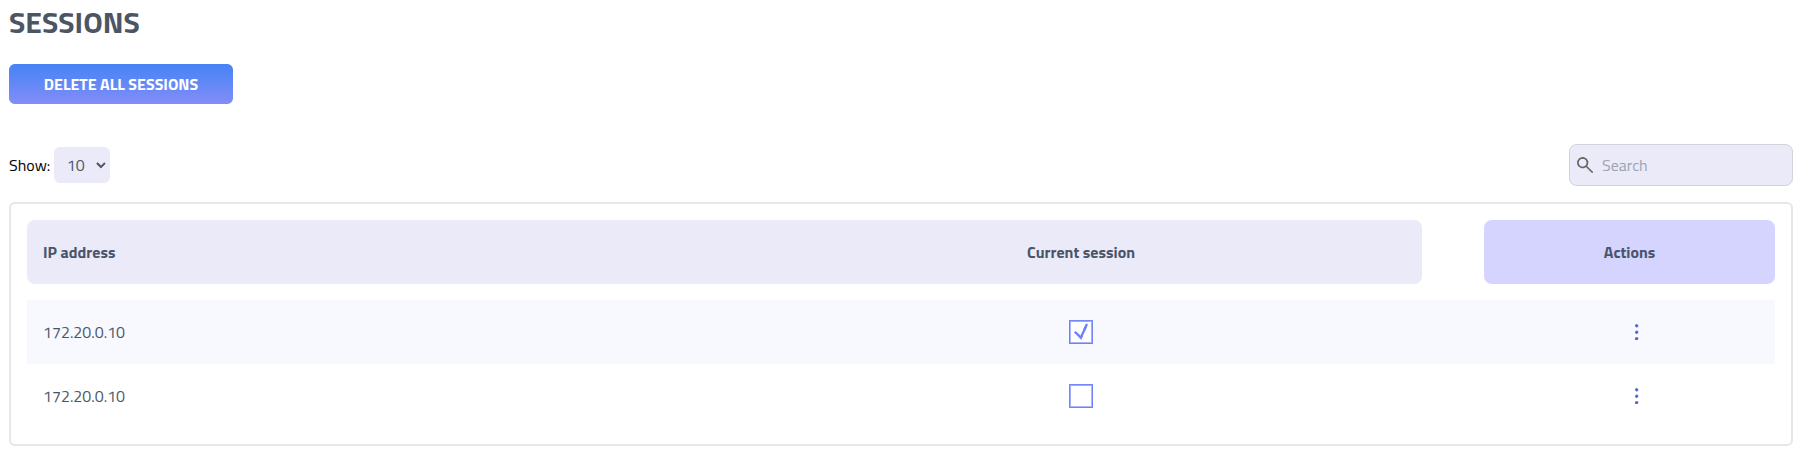
| Field | Description |
|---|---|
| IP Address | Source IP address associated with the session |
| Current Session Indicator | Indicator showing which session corresponds to your current browser session |
Users
Create, modify and delete administrative users. Use different accounts to help with audit logging and handling multiple API keys.
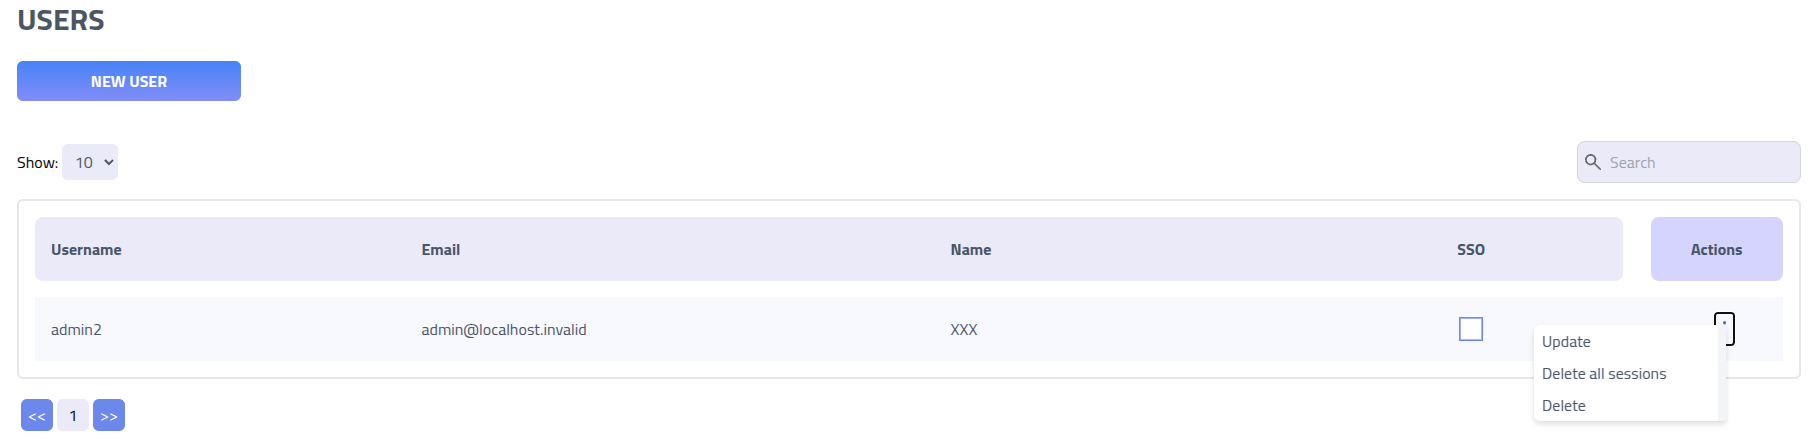
Force immediate logout for specific users by utilizing the Delete all sessions function,
which invalidates all active sessions.
Create user
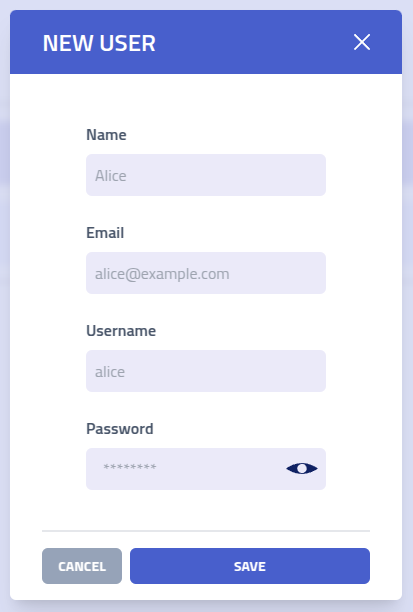
| Field | Description and Requirements |
|---|---|
| Display Name | Name for user identification in interfaces, reports, and audit logs |
| Email Address | Email address for user identification, notifications, and password recovery |
| Username | Login identifier for authentication. Should follow organizational naming conventions |
| Initial Password | Randomly generated password for initial account access. Users should change this upon first login |
Companies
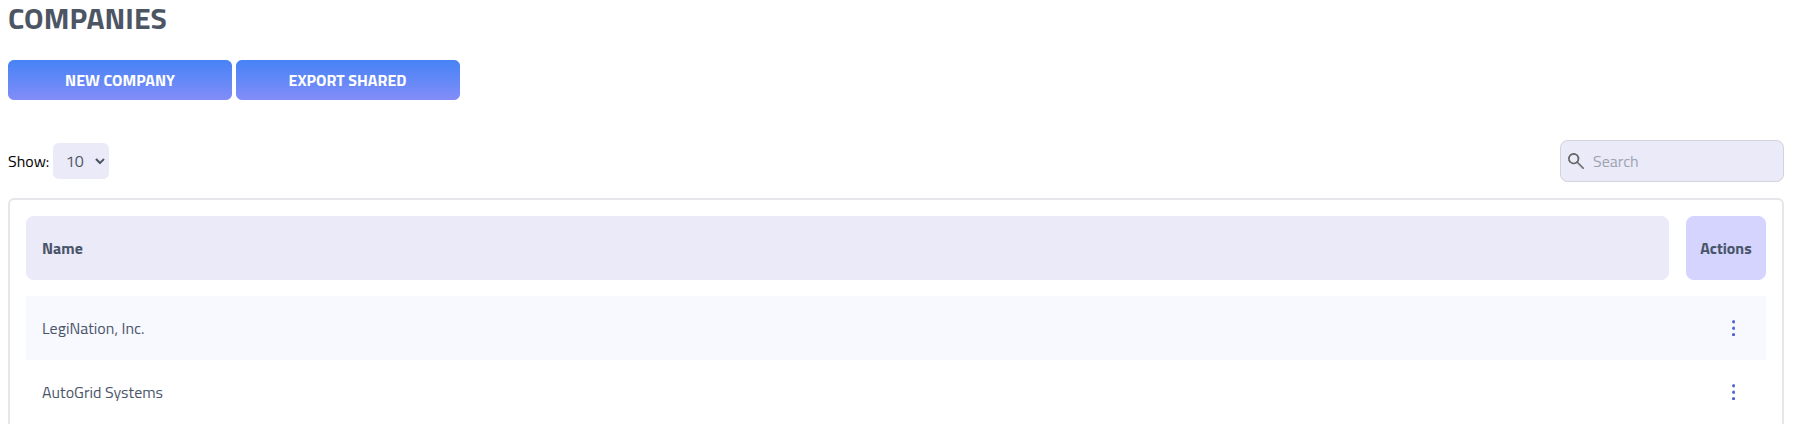
Phishing Club supports handling multiple different companies within the same instance. This
means that all views such as the dashboard, emails and etc. are affected by if you are viewing
it in the Shared View or in a Company View.
Using this feature helps with analytics that match the company, and segregates company data so
it is less likely to that you send company 1 campaign to company 2. All resources that are
created in the Shared View
is available inside all Company Views. This makes it an ideal space to generic
campaign templates and etc. that can be reused for all companies or create a test recipient
group.
Data Export
Export organizational data for backup, compliance, or migration purposes. Use
Export Shared to download all global and shared resources that are available across
multiple organizations within your instance.
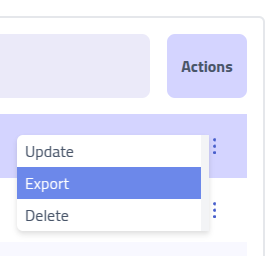
Access organization-specific data exports through the Actions menu for individual
companies.
Create company
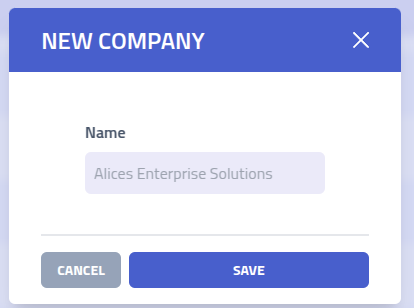
| Field | Description and Usage |
|---|---|
| Organization Name | Identifier for the client organization |
Switch company
Navigate between different companies is done by using the Change Company button in
the header.

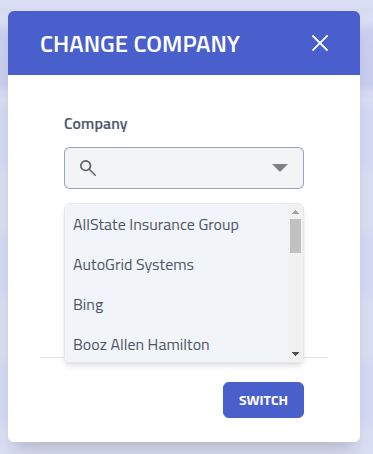
The currently active company context is displayed in the top navigation menu, showing which company data and campaigns you are currently managing:

Settings
The system settings provide control over platform-wide configuration.
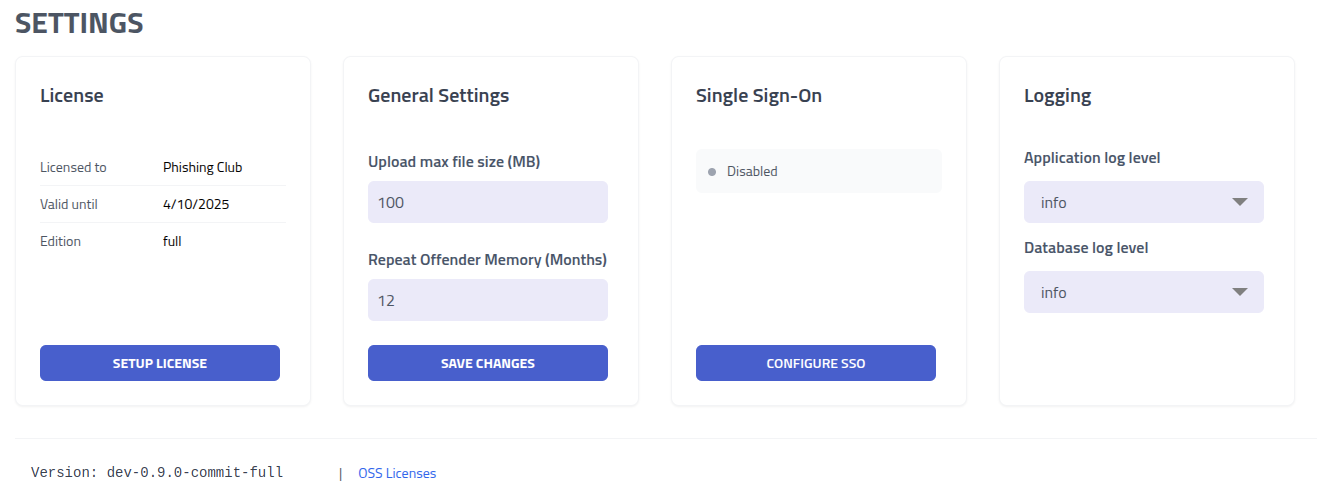
| Category | Configuration Options and Impact |
|---|---|
| Single Sign-On Integration | Configure SSO authentication with Microsoft 365 |
| General System Settings | Configure upload limits and repeat offender thresholds |
| System Logging | Adjust logging verbosity levels for troubleshooting, performance monitoring, and technical support |
| Data Import/Export | Manage data operations including imports. The import format is the export format of Templates project |
| Display Mode | Change if you want to use Phishing Club in Phishing Simulation or
Red Team Phishing
mode. Phishing Simulation mode shows fewer menus and options. |
| Backup | Create an backup or download a backup. |
| Obfuscation template | Lets you change how Obfuscated landing pages are generated. The output is already
obfuscated when the option is enabled on a campaign, however this lets you wrap and customize
it. |
| PDF Reports | Enable or disable campaign PDF report generation. Disabled by default. Requires Chromium and system dependencies. |
| Report Template | Edit the HTML template used when generating campaign PDF reports. |
| Browser Cache | Wipe the cached Chromium binary used for PDF generation and remote browser sessions. |
| Branding | Replace the header and login logos and the login side image with your own PNG images. |
PDF Reports
PDF report generation is disabled by default. It runs a headless Chromium process on the server to render the HTML report template to PDF.
Automated delivery
Reports can be emailed automatically when a campaign finishes. Set up a report delivery under Settings, Reports with a recipient group, the sending SMTP configuration, and the report email subject and body. This is the global default, and a company can override it with its own report configuration. You can also send a report on demand from a campaign.
System dependencies
The Chromium binary needs shared system libraries that a minimal server install may lack. This
set covers a headless install on Debian and Ubuntu, and apt pulls the remaining transitive
dependencies. On Ubuntu 24.04 and Debian 13 several of these packages were renamed with a
t64 suffix (the 64-bit time_t transition), so the loop installs the
plain name where it exists and falls back to the t64 name otherwise:
for p in \
  libnss3 libglib2.0-0 libatk1.0-0 libatk-bridge2.0-0 \
  libcups2 libdrm2 libgbm1 libxkbcommon0 \
  libxcomposite1 libxdamage1 libxfixes3 libxrandr2 \
  libasound2 libpango-1.0-0 libcairo2; do
  apt-get install -y "$p" 2>/dev/null || apt-get install -y "${p}t64"
done
For legible text in the rendered PDF also install a font package such as
fonts-liberation.
If report generation still fails, check the server logs. The browser launch error names the
shared library it cannot load, for example libnss3.so: cannot open shared object file. Install the package that provides it and try again. To check directly which libraries the
downloaded binary is still missing, run ldd against it; anything listed as
not found needs its package installed:
ldd /opt/phishingclub/data/browser/chromium-*/chrome | grep "not found"
AppArmor
On systems where AppArmor restricts unprivileged user namespaces, Chromium cannot create the
namespace it needs for its internal sandbox and reports No usable sandbox!. Grant
the namespace to only the bundled browser with a scoped AppArmor profile at
/etc/apparmor.d/phishingclub-chromium:
abi <abi/4.0>,
include <tunables/global>

profile phishingclub-chromium /opt/phishingclub/data/browser/chromium-*/chrome flags=(unconfined) {
  userns,
  include if exists <local/phishingclub-chromium>
}
Then load it:
sudo apparmor_parser -r /etc/apparmor.d/phishingclub-chromium
The chromium-* wildcard keeps matching across browser version updates.
Chromium binary
If no system binary is configured, one is downloaded automatically on first use. The first report generation will take longer while the download completes.
Report Template
The report template controls the appearance of campaign PDF reports. A default template is
included. Click Edit Template to open the HTML editor and customize it.
There are two report templates, chosen with the Phishing and Training selector in the editor. A phishing campaign renders the phishing report (read, click, submitted and reported funnel), while an awareness training campaign renders the training report (started, completed and completion rate). Each kind has its own default and is edited and saved independently.
The template uses Go template syntax with access to all campaign statistics and recipient data. See Campaigns: Report for the full list of available variables.
Each company can have its own report template per kind. Configure it from the company
Actions menu. When a company has no template for a kind, the global one is used as
a fallback.
Note: The report template section is only visible in the global context. Switch out of a company context to access it.
Browser Cache
Phishing Club downloads and caches a Chromium binary for PDF report generation and remote
browser sessions. Click Wipe Browser Cache to delete the cached binary. The next PDF
generation or remote browser session will download a fresh copy.
IP Data
The IP Data tab manages the data that the campaign filters use to resolve a visitor IP to a country or an autonomous system. There are two packages, sourced from the public domain ipverse project and rebuilt daily.
- Geo IP Data maps IPs to a country for country filters. A copy is built into the binary, so country filters work without downloading anything. Download to get the newest data.
- ASN Data maps IPs to the announcing network operator for ASN filters. There is no built in copy, so ASN filters only work after this is downloaded.
Each package shows its source, data date and prefix count. Use Download to
install a package, Update when a newer version is available, and
Remove to delete a downloaded package. Removing the Geo IP package falls back to the
built in copy. The download is verified before it replaces the current data, and it loads without
restarting the server.
Instances that do not use country or ASN filtering can ignore this tab. A download needs outbound access to the release server, so an air gapped install keeps using the built in Geo IP data and leaves ASN filtering unused.
Branding
The branding tab customizes the appearance of the interface for the whole installation. You can replace the logo in the top navigation, the logo on the login screen, and the image beside the login form, or hide that image to center the login box.
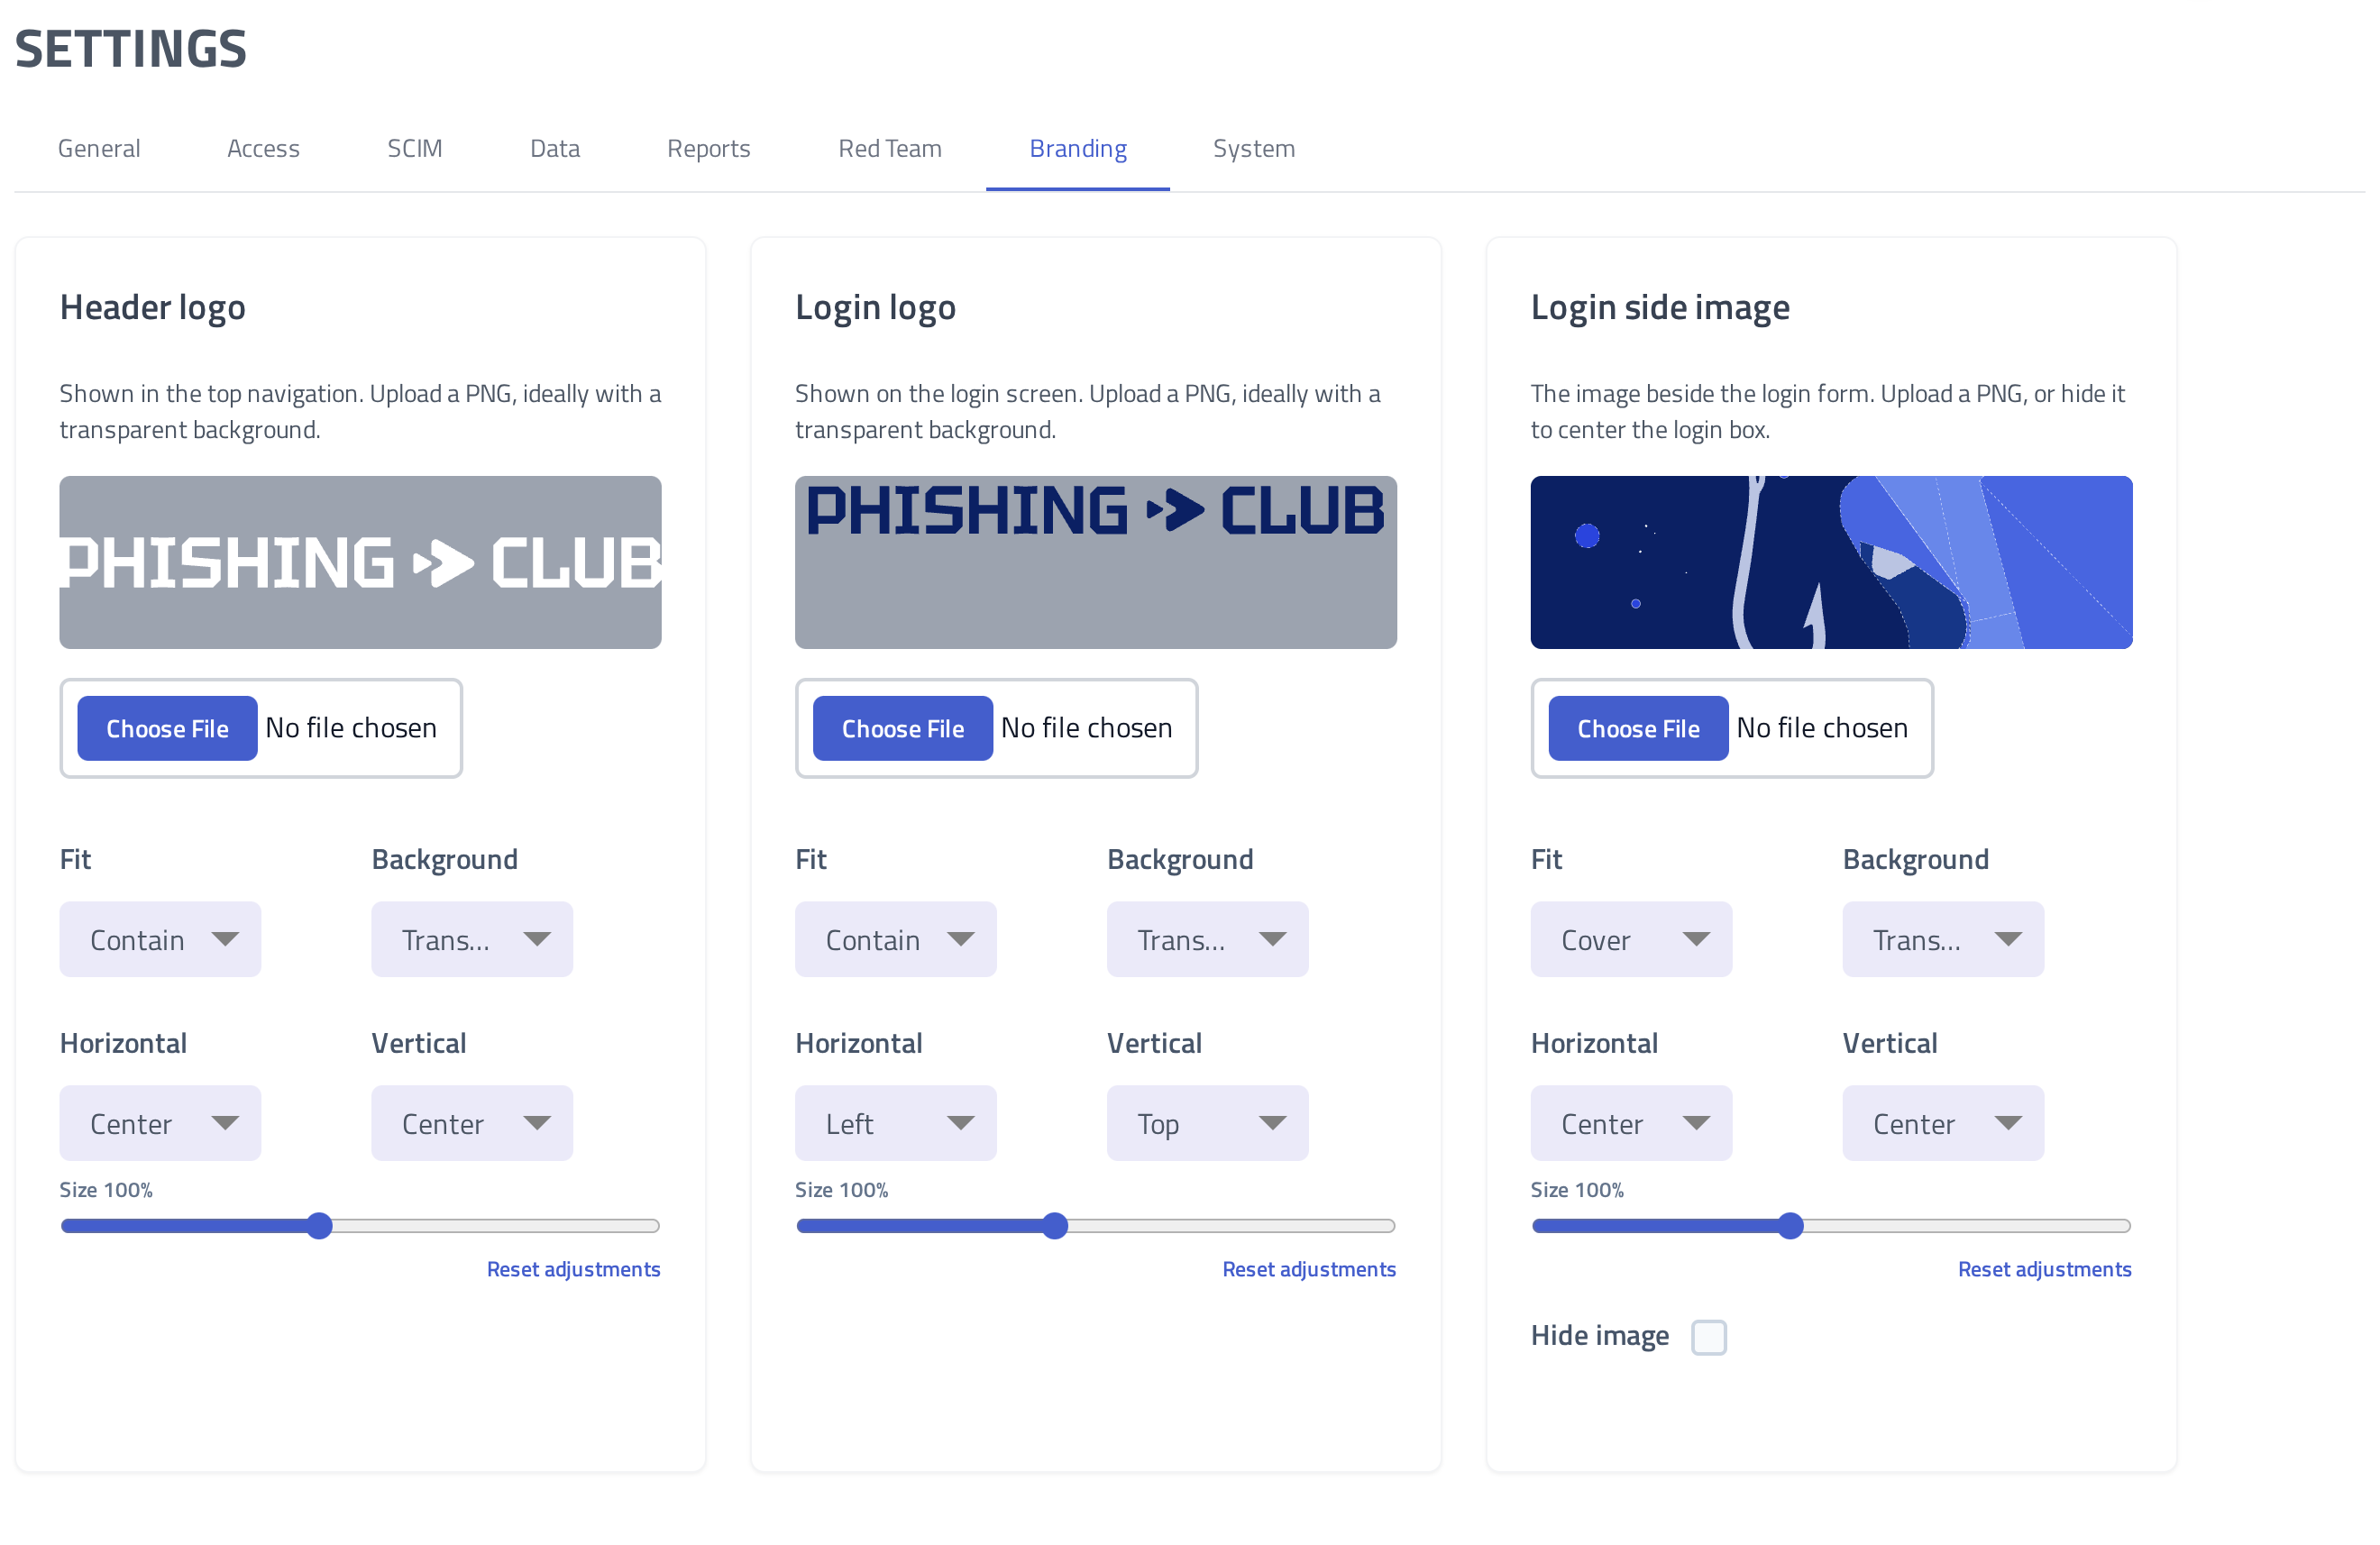
Uploads must be PNG images, and a logo with a transparent background works best. Each
image can be reset to the built in default at any time.
| Image | Description |
|---|---|
| Header logo | Shown in the top navigation across the application. |
| Login logo | Shown on the login screen. |
| Login side image | The image beside the login form. Enable Hide image to remove it and center the
login box. |
Each image has adjustment controls so an uploaded image fits its area without editing the file itself.
| Control | Description |
|---|---|
| Fit | Contain shows the whole image, Cover fills the area and may
crop the edges, and Stretch fills the area exactly. |
| Size | Scales the image within its area. |
| Background | Places a Transparent, Light, or Dark background behind
the image, useful for a logo that needs a matching backdrop. |
| Horizontal and Vertical | Position the image within its area. |
Reset adjustments returns these controls to their defaults without removing the uploaded
image.
Import
The import system enables import of assets, landing pages, email templates, and other resources.
Download a example import file to understand the required structure: Phishing Club Import Example.zip
Import Process
Data import steps:- File Upload: Select and upload your structured .zip file using the import form interface
- Context Selection: Choose whether to import data into the current organization context or apply globally across all organizations
Template Configuration File
Each template directory requires a data.yaml configuration file that defines the template
structure, content relationships, and metadata for import processing:
name: "Professional Template Name"
pages:
  - name: "Landing Page Name"
    file: "pages/landing.html"
emails:
  - name: "Email Template Name"
    file: "emails/template.html"
    envelope from: "[email protected]"
    from: "Display Name <[email protected]>"
    subject: "Compelling Email Subject Line"
Import Results Summary
Upon completion, the system provides an import summary detailing:
- Created Items: New resources successfully added to the platform
- Updated Items: Existing resources modified with new content or settings
- Skipped Items: Unchanged resources that already exist in the current state
- Error Reports: Information about any processing failures or validation issues
Single Sign-On
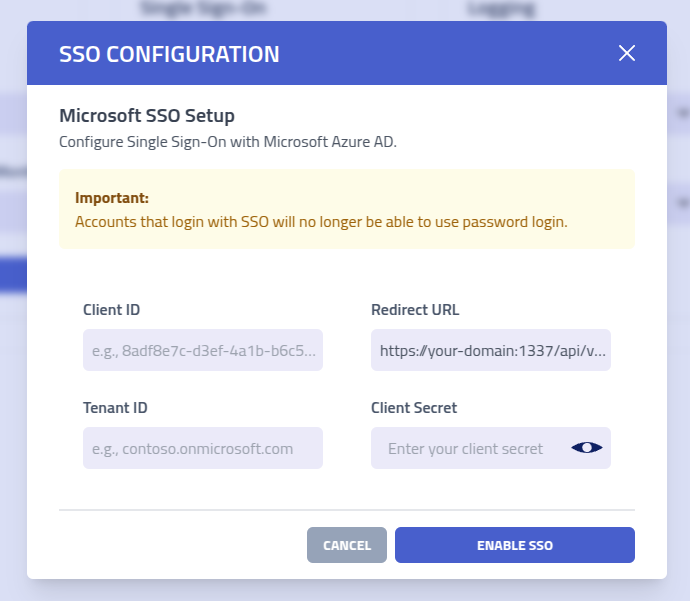
Configure Single Sign-On integration with Microsoft Azure Active Directory.
User Provisioning
Important: SSO never creates new accounts. A user can only sign in with SSO if an administrator has already created that user in Phishing Club with the same email address the identity provider reports. If the email does not match an existing user, the login is rejected. To grant someone access, create the user first, then have them sign in with SSO.
Login Methods
When a user signs in through SSO, Phishing Club matches them to an existing account by email and records the identity provider's subject id for reference.
Whether password login is available is controlled by the Exclusive SSO login setting, not by whether a user has used SSO:
- Exclusive SSO off - an account signs in with whichever method it has set up. A user with both a password and SSO can use either.
- Exclusive SSO on - password login is disabled for everyone while SSO is active, so SSO is the only way in until exclusive login is turned off again.
A user can still change their password from the profile page while SSO is linked. Changing the password and being allowed to sign in with it are independent, the latter is governed by the exclusive setting.
Accounts upgraded from older versions: earlier versions removed the password the first time an account signed in via SSO. Those accounts have no password and remain SSO only. To give such an account a password again, an administrator with server access runs the account recovery command, which sets a new password and clears the SSO link.
Security Boundary
Access is controlled inside Phishing Club: only users an administrator has already created can sign in, so an unknown account in your directory cannot authenticate or gain access. For accounts that sign in through SSO, the strength of that sign in is managed at the identity provider. As defense in depth we recommend you also restrict the application at the provider, for Entra ID:
- In Azure Enterprise App settings, set "Assignment required" to
Yesunder Properties - Add specific users or groups under the "Users and groups" tab
- Configure conditional access policies and MFA requirements in Azure AD
Azure Application Registration
Begin SSO configuration by registering a new application in your Microsoft Azure portal to establish the authentication relationship between Phishing Club and your organization's identity provider.
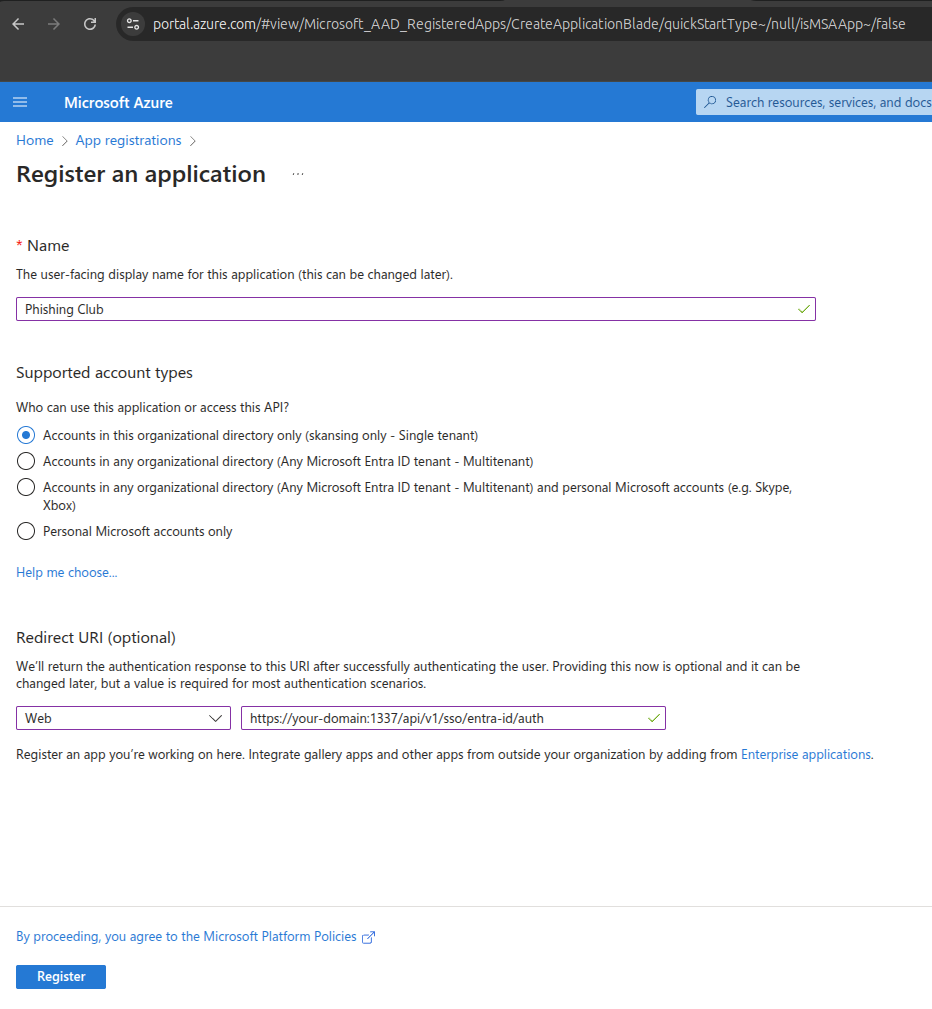
Configure the Redirect URI field with your Phishing Club instance URL:
your-domain.tld/api/v1/sso/entra-id/auth. This URL can be copied from the SSO
setup modal.
Extract the authentication identifiers from Azure and input them into Phishing Club:
- Copy the Application (client) ID and paste into the
Client IDfield - Copy the Directory (tenant) ID and paste into the
Tenant IDfield
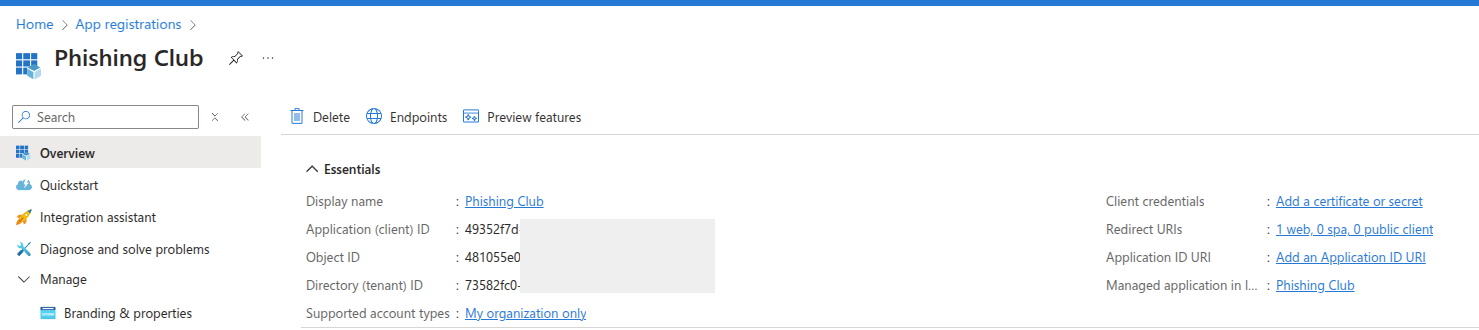
Create authentication credentials by clicking Add a certificate or secret
to generate the authentication token required for API communication between systems.
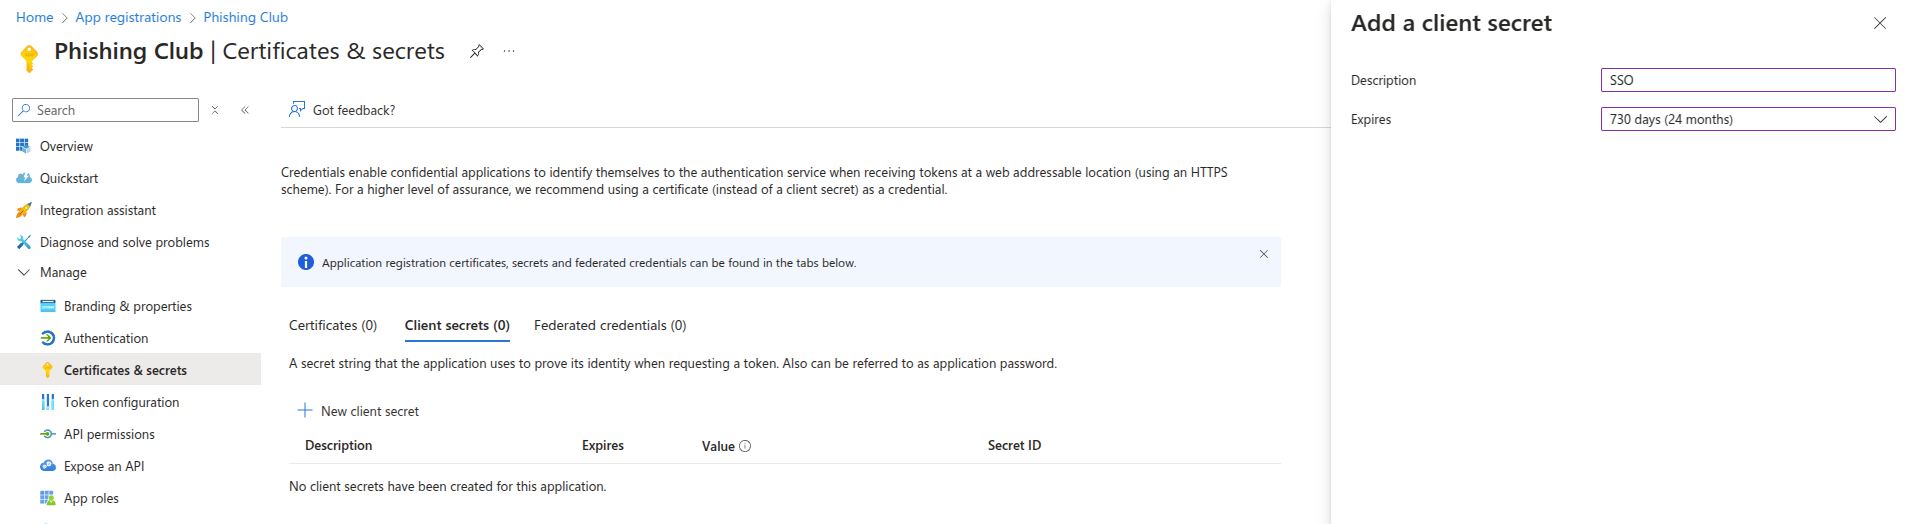
Generate a new client secret and copy the displayed Value into the
Secret field in Phishing Club. Important: This value is only displayed
once and cannot be retrieved later.

Complete the SSO configuration by clicking Enable SSO to activate authentication integration.
Users will now be able to authenticate using their organizational Microsoft 365 credentials to
access Phishing Club.
Generic OpenID Connect
Besides Microsoft Entra ID you can connect any standard OpenID Connect provider, such as Keycloak, by choosing Generic OpenID Connect as the provider in the SSO configuration. Instead of a tenant you supply the provider's Issuer URL, and Phishing Club discovers the rest of the endpoints automatically. The fields are:
- Issuer URL - the base URL of the provider, for example a Keycloak realm
- Client ID and Client Secret from the client you register at the provider. The secret is optional, a public client without a secret works because PKCE is always used
- Redirect URL - copy it from the form, it ends in
/api/v1/sso/oidc/auth - Scopes - defaults to
openid profile email - ACR Values - optional. When set, Phishing Club requests that authentication
context from the provider and rejects the login unless the returned
acrclaim matches, which is how you enforce multi factor authentication at the provider
PKCE (RFC 7636) is always used for the authorization code exchange, no configuration is needed.
The email returned by the provider must be marked verified (the email_verified
claim). An unverified email is rejected, because a provider that allows self set, unverified addresses
could otherwise be used to match another user's account. As with Entra ID, only users that already
exist in Phishing Club can sign in.
Exclusive SSO login
Enable Exclusive SSO login in the SSO configuration to turn off username and password login entirely while SSO is active. This applies to both Entra ID and OpenID Connect.
Exclusive SSO only affects interactive username and password login. API keys keep working, so automation and integrations are not interrupted when you enable it.
Break glass: if the identity provider is misconfigured and no one can sign
in, local login can be restored at the server level. Set local_login_breakglass
to
true under the authentication section of config.json
and restart the server. Because this requires filesystem access to the server it is a
deliberate recovery path, not something a normal user can change. It defaults to
false so that exclusive SSO is genuinely exclusive once enabled.